Implementing Olytics
To implement Omeda’s web tracking solution, otherwise known as Olytics, you will need to add JavaScript and CSS to the head of any web page in which you want to capture behavioral data. These scripts can be found in the Omeda menu under CDP and Olytics.
Global CSS
Global JavaScript load script
olytics.fire script
Let’s break down what each of these do in more detail.
Required Olytics Scripts
Olytics CSS
The Olytics CSS will primarily provide the styling required to use Personalization, Meters, and our Consent Management solution on your sites. NOTE: The source url for the stylesheet will be different for the Staging and Production environments.
<link rel="stylesheet" href="https://olytics.omeda.com/olytics/css/v3/p/olytics.css" />Global JavaScript Load Script
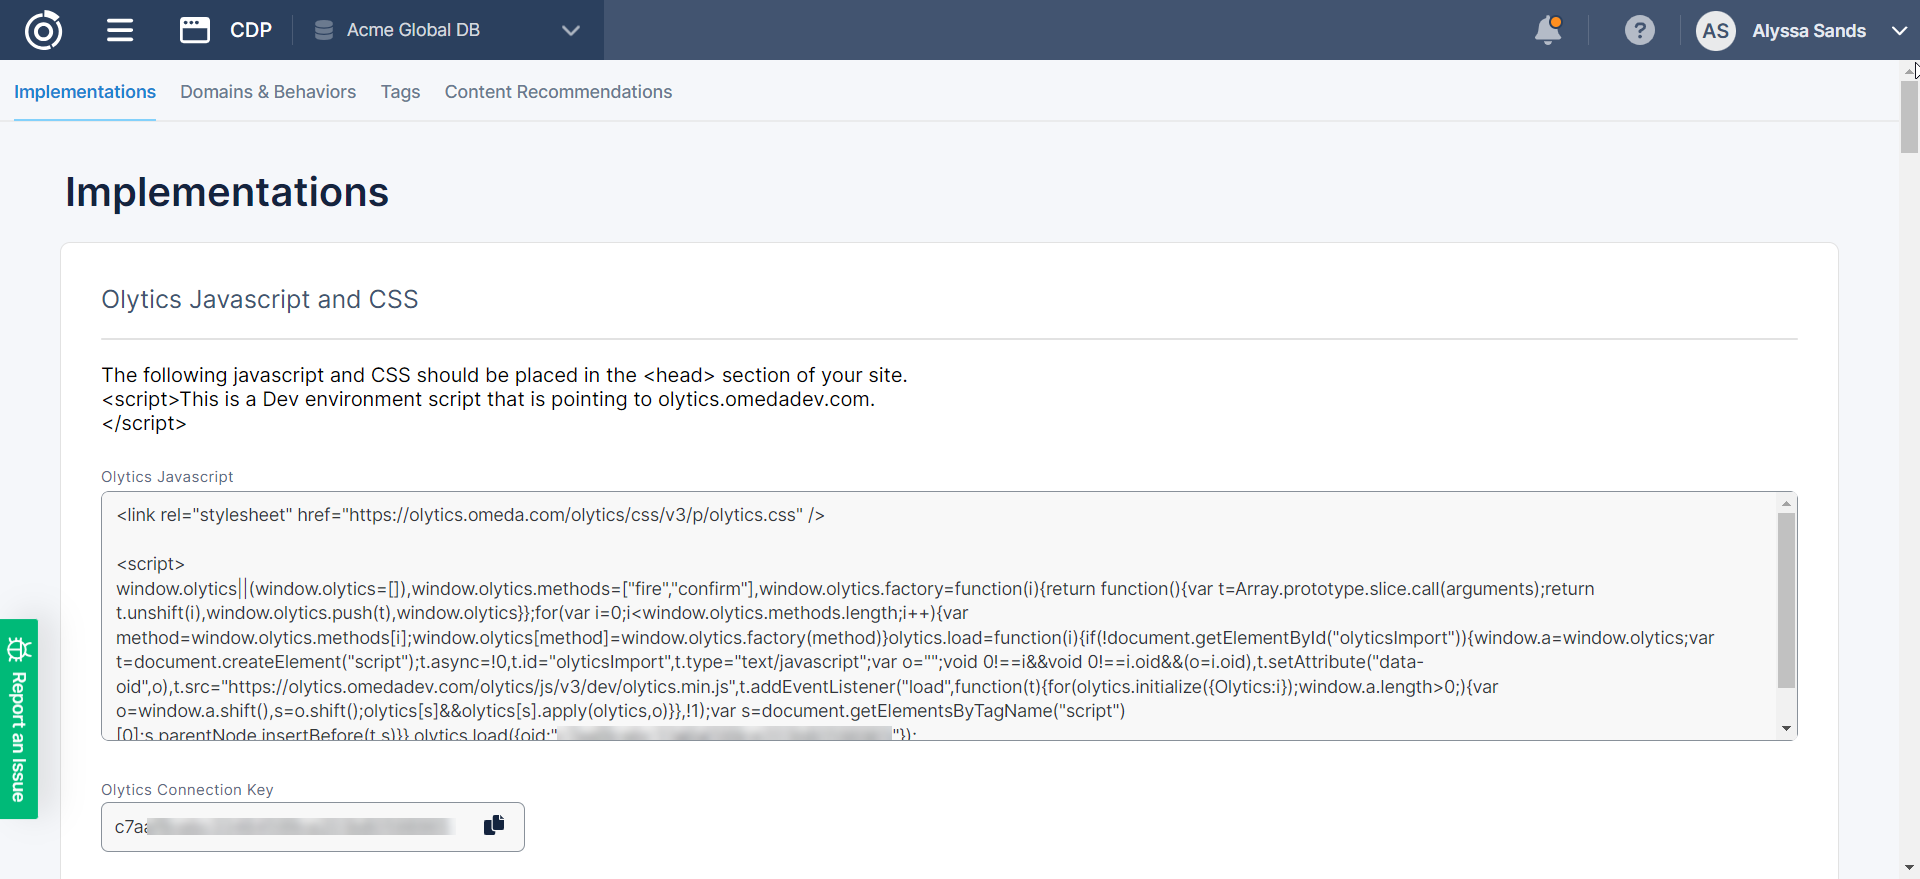
This script will be the driver for creating anonymous users in your database, converting your anonymous users to known, and triggering Personalization and Meters. This script will contain a unique oid key, or Olytics Id, which will be associated to your database. The olytics id, as well as the Global Javascript Load script, for your Production and Staging environments will be different. You can find the Production script by logging into the Production environment, my.omeda.com, and clicking Integrations in the Menu, and then selecting Olytics. You can find the Staging script by logging into the Staging environment, https://my.omedastaging.com/, and doing the same.
This script will create two cookies, the oly_anon_id cookie and the oly_enc_id cookie, and store them in the user’s browser for your site domain.
olytics.fire JavaScript

This script will associate the visitor created by the olytics.load script with an Olytics behavior stored in your database. These Olytics behaviors are typically for a single site domain, but can also be created to refer to specific user actions.
Each behavior will have a unique behavior id which should be populated in the olytics.fire script. This script is how we determine which Olytics domain your user has visited and when. The behavior can then be used to query on these properties in Audience Builder. Within this script is where you will also pass Omeda attributes about the particular url they have visited like Category or Tag. Custom Olytics attributes can also be used to pass us details about the visit.
An example of this script with each Olytics behavior id and the Olytics attributes for your database can be found under Integrations and Olytics within the Omeda portal.
Populating Attributes in your Olytics.fire Script
You can choose to populate the Olytics attributes within the olytics.fire script in a couple of ways. You may choose to populate the attributes by manually adding the Category and Tag for each page, or you can choose to populate these values from the metadata of your page. Below is an example of how to populate the attribute values using your site’s metdata.
Populating Attributes using Metadata
If the example below is used as reference be sure to do the following when implementing on your own site.
Search for
INSERT YOUR OID KEY and replace with your OID Key. Also known as Olytics Connection Key.
Search for
encrypted-behavior-id and replace with the behaviorId related to your site.
<script type="text/javascript">

// olytics 3.0

window.olytics||(window.olytics=[]),window.olytics.methods=["fire","confirm"],window.olytics.factory=function(i){return function(){var t=Array.prototype.slice.call(arguments);return t.unshift(i),window.olytics.push(t),window.olytics}};for(var i=0;i<window.olytics.methods.length;i++){var method=window.olytics.methods[i];window.olytics[method]=window.olytics.factory(method)}olytics.load=function(i){if(!document.getElementById("olyticsImport")){window.a=window.olytics;var t=document.createElement("script");t.async=!0,t.id="olyticsImport",t.type="text/javascript";var o="";void 0!==i&&void 0!==i.oid&&(o=i.oid),t.setAttribute("data-oid",o),t.src="https://olytics.omeda.com/olytics/js/v3/p/olytics.min.js",t.addEventListener("load",function(t){for(olytics.initialize({Olytics:i});window.a.length>0;){var o=window.a.shift(),s=o.shift();olytics[s]&&olytics[s].apply(olytics,o)}},!1);var s=document.getElementsByTagName("script")[0];s.parentNode.insertBefore(t,s)}},olytics.load({oid:"INSERT YOUR OID KEY"});

</script>

<!-- Olytics Global Script for Category and Tag Meta - Added by MJM 10-28-15 -->

<script>
var metas = document.getElementsByTagName('meta');
var olyticsTag = "";
var olyticsCategory = "";


// First we see if the page has any html meta tags
if(metas && metas.length > 0) {

    // loop through the meta tags
    for(var oolltt = 0; oolltt < metas.length; oolltt++) {
        var oollttMeta = metas[oolltt];
        var theNameAttribute = oollttMeta.getAttribute('name');

        // is the meta tag an 'olyticsCategory' meta tag ?
        if(theNameAttribute && theNameAttribute == 'olyticsCategory' && oollttMeta.getAttribute('content')) {
            // the meta tag is an 'olyticsCategory' meta tag - lets grab the content of the tag to use in the analytics.track call.
            olyticsCategory = oollttMeta.getAttribute('content');

        // is the meta tag an 'olyticsTag' meta tag ?
        } else if(theNameAttribute && theNameAttribute == 'olyticsTag' && oollttMeta.getAttribute('content')) {
            // the meta tag is an 'olyticsTag' meta tag - lets grab the content of the meta tag to use in the analytics.track call.
            olyticsTag = oollttMeta.getAttribute('content');
        }
    }

    if(olyticsCategory.length > 0 || olyticsTag.length > 0) {

        // so at this point we have either an olyticsCategory and / or olyticsTag to pass in the analytics.track call.

        //fire the olytics.track call
        olytics.fire(

  {

                behaviorId: 'encrypted-behavior-id',

                category: olyticsCategory,

                tag: olyticsTag

  }

)
} else {
		 olytics.fire(
			{
				behaviorId: 'encrypted-behavior-id'
			}
		);
	}
}
</script>

<link rel="stylesheet" href="https://olytics.omeda.com/olytics/css/v3/p/olytics.css" />
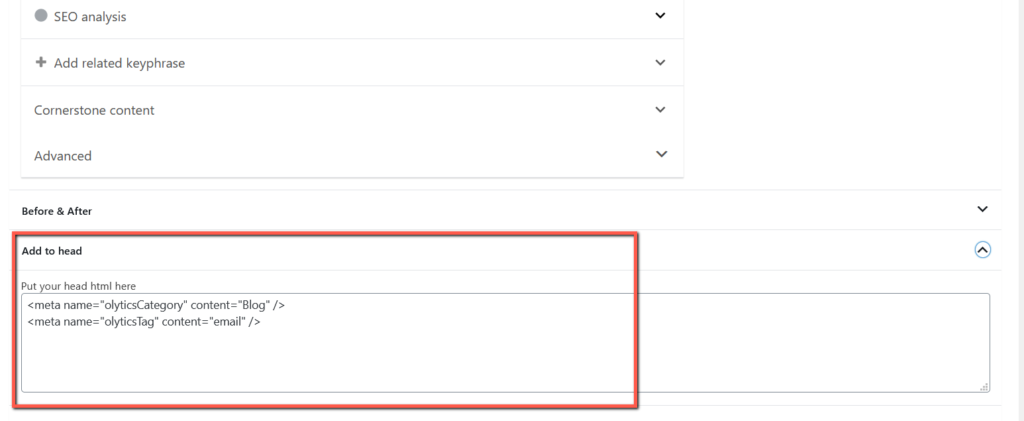
Setting Metadata values using WordPress.
Go to any of your posts or articles
At the bottom of your post, there is a section called “Add to head”.
Insert meta names olyticsCategory and olyticsTag (see below) to the head of your post or article.
Add values e.g. (blog, post, widgets, marketing etc.)
Important note – you will need to use a comma between values if there is more than one value you want to record for each meta name.<meta name=”olyticsCategory” content=”Insert a value here” />
<meta name=”olyticsTag” content=”insert in a value here” />
Adding the Scripts to Your Sites
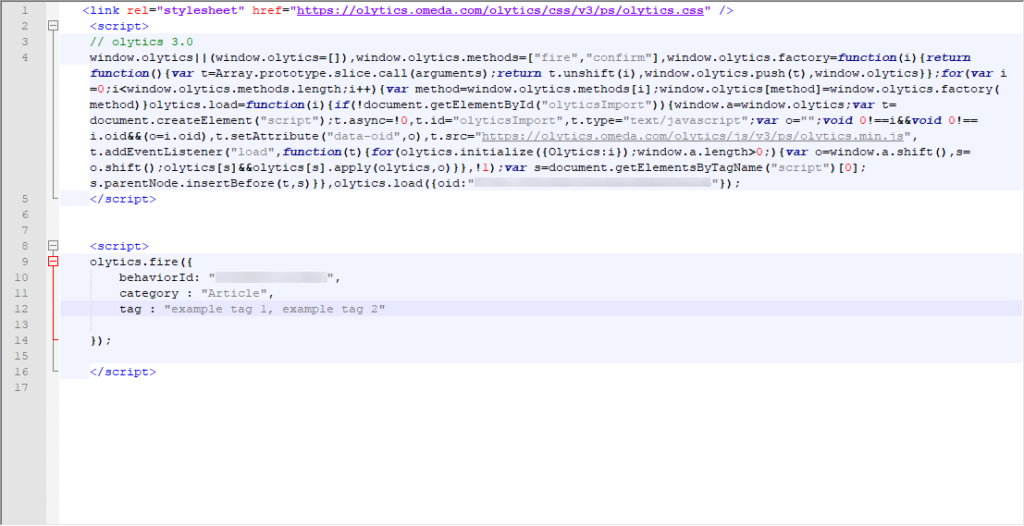
The css and two JavaScript snippets should be added to your to the head of your sites. Remember the behavior id for each domain will be different and should changed for each domain. Combined, the scripts should look like the below screenshot:
The instructions below outline how these scripts might be added using Google Tag Manager or WordPress.
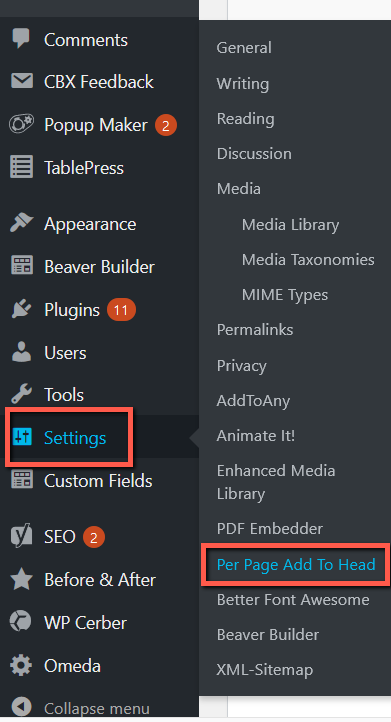
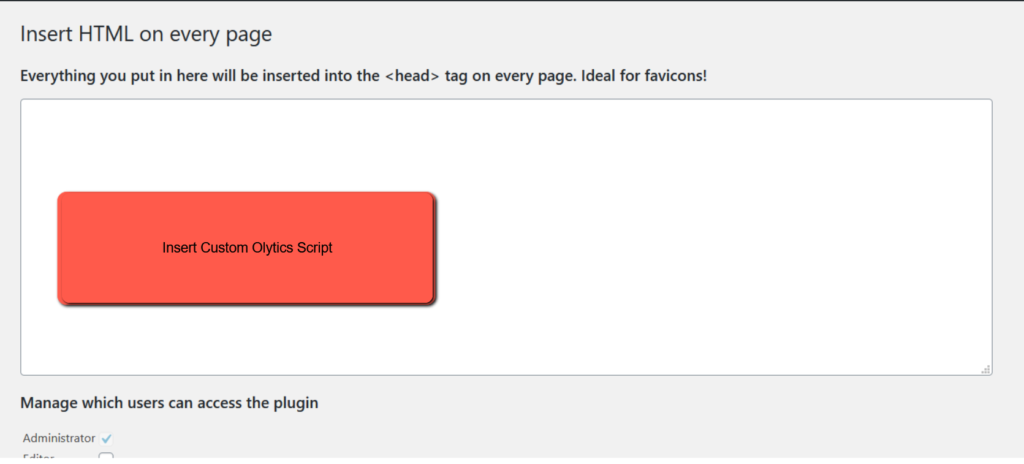
Adding Olytics to Your WordPress Sites
Go to Settings
Select Per Page Add to Head
Paste in your Olytics script
Adding Olytics to you Sites using Google Tag Manager
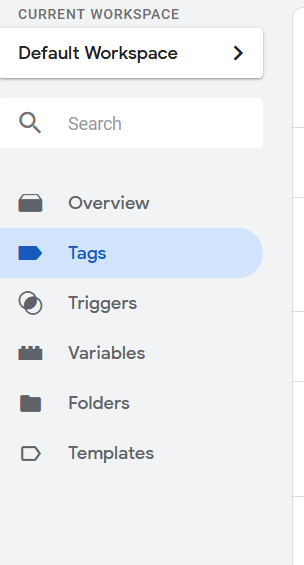
In Google Tag Manager, navigate to the container associated to the domain you want to add Olytics to. This step will be repeated for every domain.
Select the site domain container
Select Tag, then select New in the upper right corner.
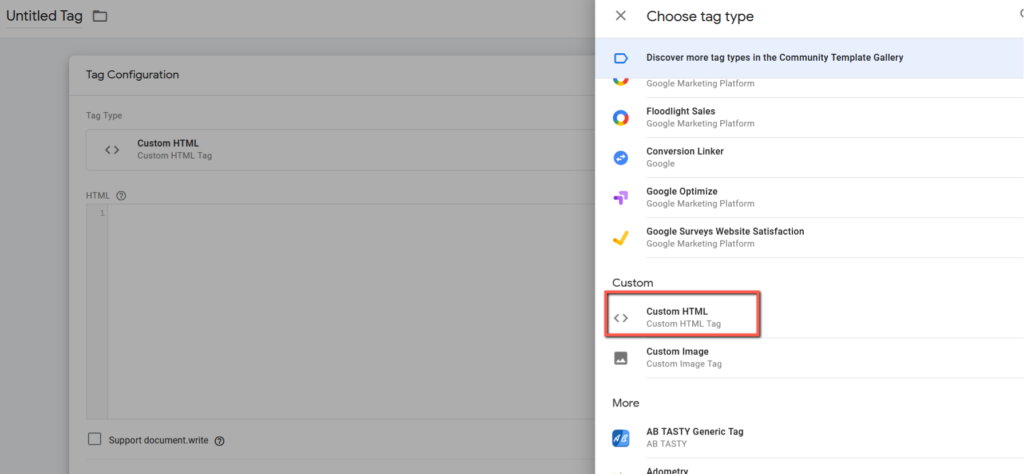
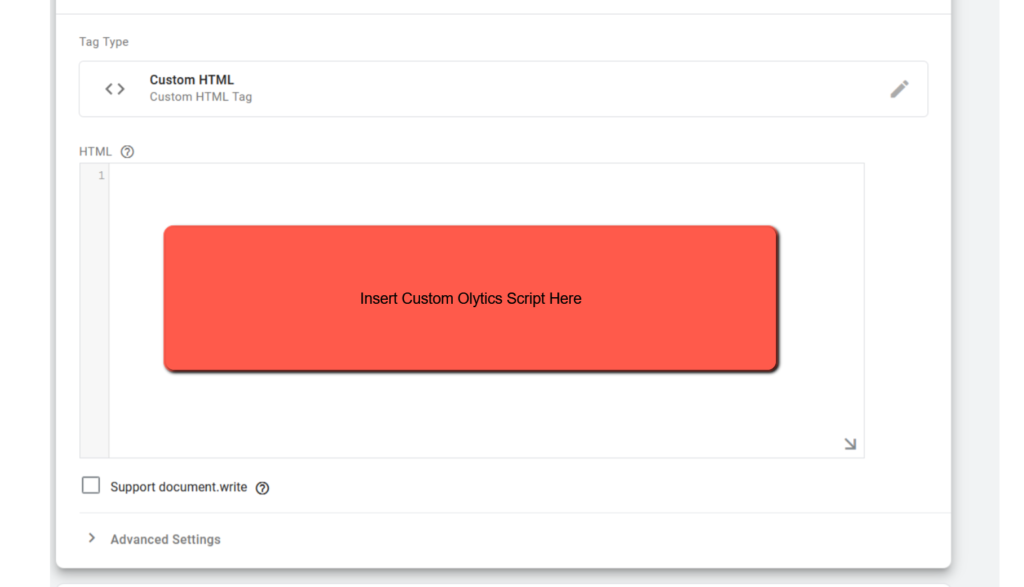
Click on Tag Configuration and select Custom HTML
Paste in your Olytics script
Click on Trigger and add trigger by choosing the + button on the upper right. You can select All Pages (default) or create a custom trigger if you only want to trigger Olytics to fire on certain pages.

Updating your Google Analytics Reports
After you’ve finished installing the Olytics scripts on your sites, you will start to see some or all of the following query parameters on the urls in your GA reports:
oly_anon_id
oly_enc_id
These parameters can be excluded from your Google Analytics reporting by navigating to Admin > View Settings > Exclude Query Parameters and listing both parameters there.
Additional Resources
Learn how to Query Olytics Data
Learn how to access Olytics Reports
Table of Contents
