Odyssey – Omeda’s Email Designer
The Email Designer in Odyssey is located within the Email element under the “HTML” section.
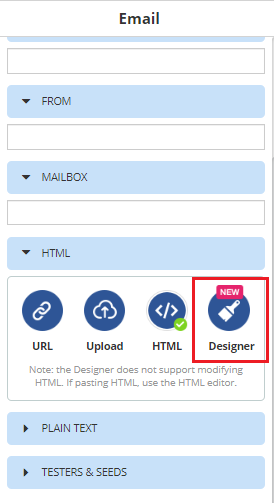
When you click into the tool, a pop-out window will appear.
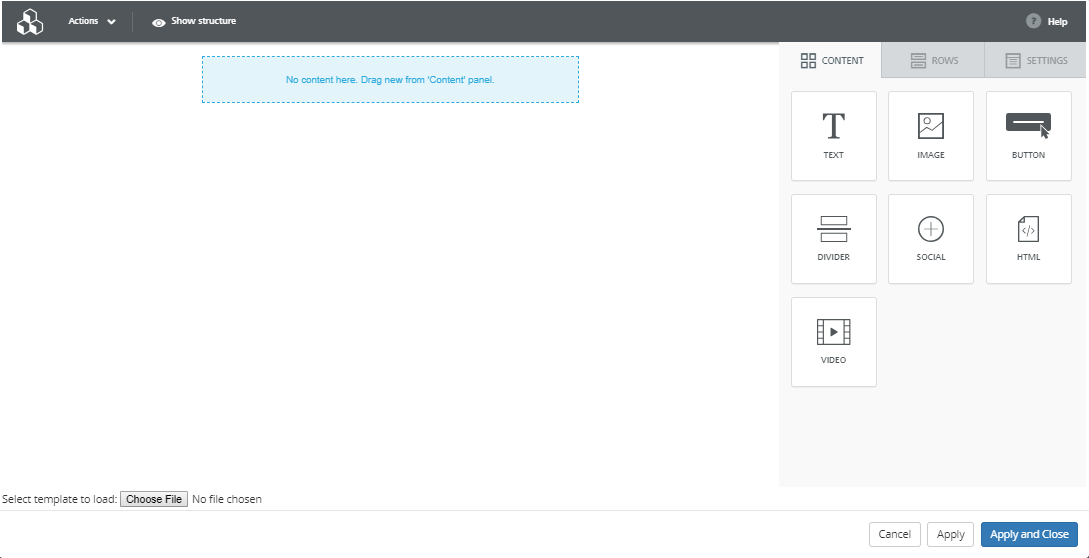
There are multiple options for formatting your email within the designer.
Using the Builder Tools
The Builder Tools tab is divided into three sections:
Content
Rows
Settings
Content
The content tab includes all of the different pieces of content that you can add to your email:
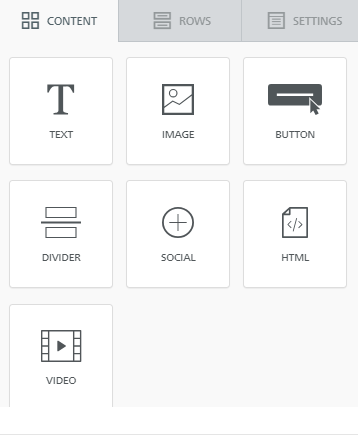
Text: A text box that you can edit and modify the size, color, links, etc.
Image: An image box to upload a picture.
Button: You can create a Call to Action in the middle of the button and attach a link to it so that users will click through to the site you want them to
Divider: For more aesthetic purposes, to divide an email into different sections
Social: The designer has preset images for the four main social channels: Facebook, Twitter, Instagram and Linkedin that you can link your accounts to
HTML: If you prefer working with HTML for your emails, you can add an HTML block in to code the email yourself.
Video: A video box to link in a Vimeo or Youtube URL.
Rows
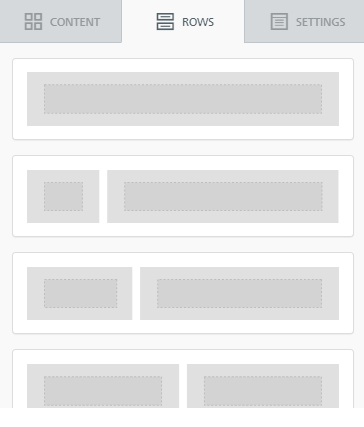
The Rows tab gives you different options for splitting your email horizontally. You can segment sections into two, three or four sections. NOTE: If your content is all part of the same row, you cannot add a split row in between the content. You have to add in a new row before or after the content that already exists.
Settings
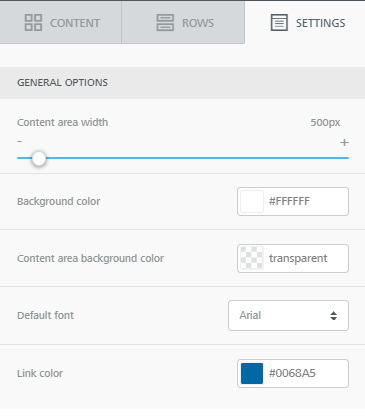
The Settings tab controls the email settings for the entire email. The selections here will be the defaults for all of your content blocks in your email. Once you add content blocks, you can change them to be different than the preset email settings.
Content Properties
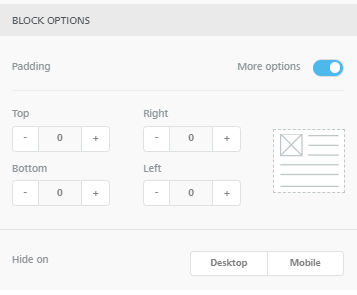
When you click on any of the content items in your builder area, a Content Properties section will appear in the Builder Tools tab on the right hand side of the pop-out. This will give you options for editing your specific piece of content. Each of the content types has different categories for the content properties. Block Options is one section that remains consistent throughout the different content types and includes:
Padding: the amount of space surrounding the content block. You can either have an equal amount of space on all sides, or select the “More options” toggle to adjust the padding on each side independently.
Hide On: You can choose to hide a section of your email on either desktop or mobile. Sometimes for formatting purposes, this can be helpful – such as a divider that doesn’t look right on mobile.
Uploading a Template
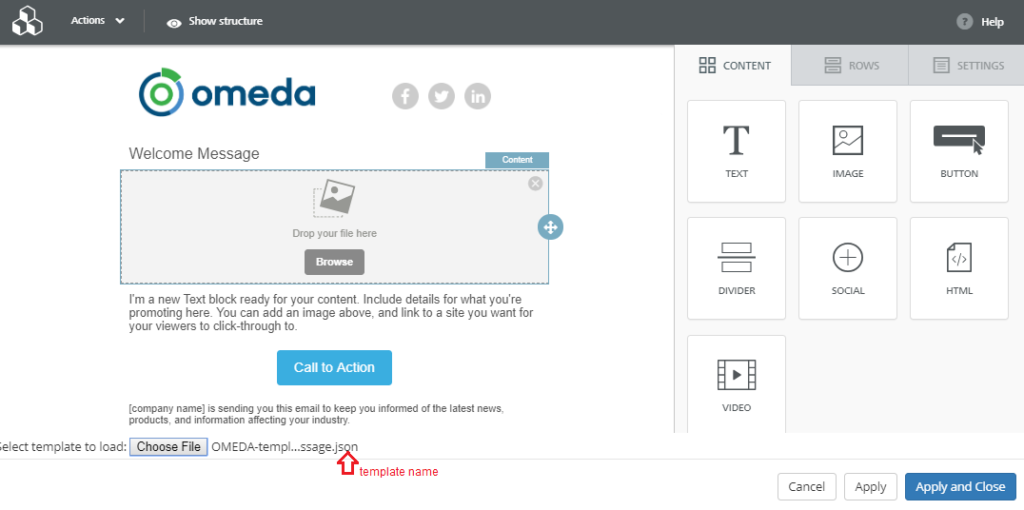
Another option is to use the template load option at the bottom left hand side of the designer.

The file that you upload must be a JSON file. Omeda has some preset templates that you can use if you’d like located here.
Once you click Choose File and select the template you want to upload – it will appear in the building area. Once the template has been uploaded, you can still use the right hand tools to make edits you would like to the template like you would if building from scratch. Also, if you’d like to upload a different template, all you have to do is again select “Choose File” and the new template will completely replace the existing design in the builder.
Omeda Custom Templates
We created some preset templates that can be used within Email Designer as a shell for starting your epromos. You can download these templates here: Email-Designer-Templates.zip . There is documentation on the Knowledge Base providing further information on these templates as well.
Actions
Save as Template
You can build a template within Designer and save it for future use. Click on Actions > Save as Template.
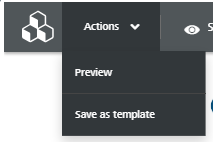
This will save a JSON file to your Downloads folder that you can then share with other employees and save for future use.
Preview
The Preview section will simply show you what your email will look like on Desktop and Mobile.

Saving Tools
Cancel: This will cancel without saving any changes you’ve made
Apply: This will apply and save the changes to your email while keeping you on the page
Apply and Close: This will apply and save the changes to your email and close the Designer pop-out
Table of Contents
