Omeda’s Add Customer Action in Zapier
Omeda’s Add Customer Action found in Zapier allows you to easily bring customer data into Omeda based on some type of event from a third party application. This action allows you to bring in standard contact information, and up to 10 demographics, 10 products, 10 deployments, and 10 behaviors.
Use cases include but are not limited to:
Keeping a 3rd party’s customer database in sync with Omeda’s database.
3rd party form submission that may not be compatible with our Data Loader webhook.
3rd party form submission where the form includes magazine or website products.
Before you get started you will need some information from Omeda to access our API. Please reach out to support and they will provide you with the Client Brand Abbreviation, Encrypted Input ID, New API key after you provide the following information:
Short description of the data you plan on bringing into Omeda from Zapier including:
Type of customer contact info
This will help us determine what customer matching type we should setup on the input (Email only, Email + Name, Full Contact)Products (if applicable)
If you plan on bringing in Magazine product data for example, we’ll need to know if you’d like specific processing rules/validation rules setup on the input. If you plan on to bring in multiple Magazine products, there may be a chance we’ll need to create multiple inputs for each product if the processing rules/validation rules required differ. This means you’ll need to setup different Omeda accounts in the Zapier Action, one for each input.
Note: If you plan on passing Demographics, Products, and/or Deployment Types to the Add Customer Action and the Omeda values are not already mapped in the Trigger app, you will need to either have our support team map those values in the provided input or use this Formatter by Zapier action.
Once you’ve successfully set up and tested your Zapier Trigger, you will need to create your Action:
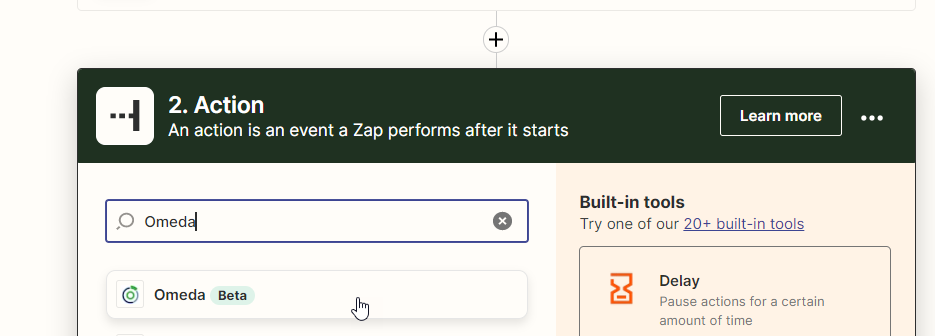
Select the Omeda app in the Action
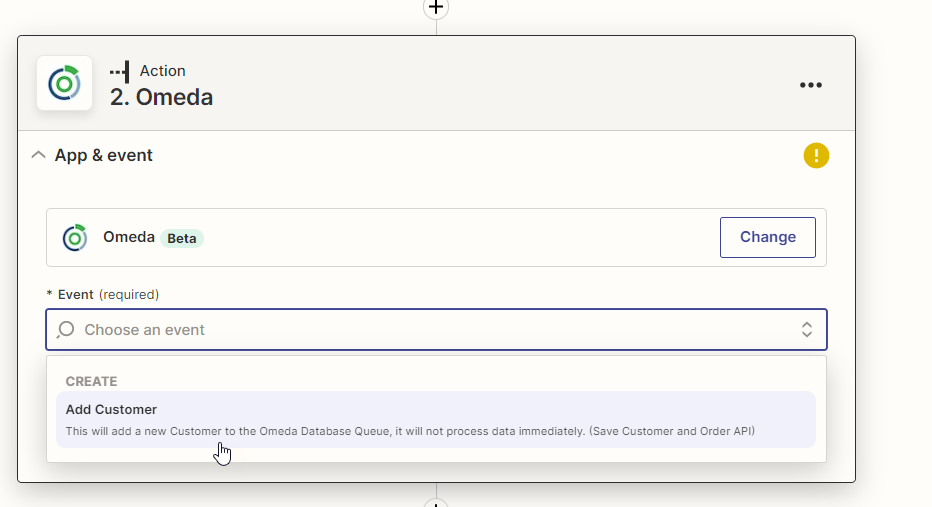
Select the Add Customer event
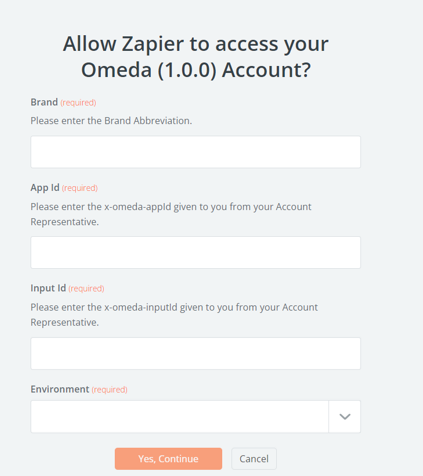
Connect to your Omeda account using the above; Brand Abbreviation, Input ID, API Key, and select the Environment to which you want to connect to (Staging or Production).Note: If you’ve already connected to your Omeda account prior, you will not have to repeat this step again. You will be given the option to choose from the drop-down menu the account that’s already been connected to.
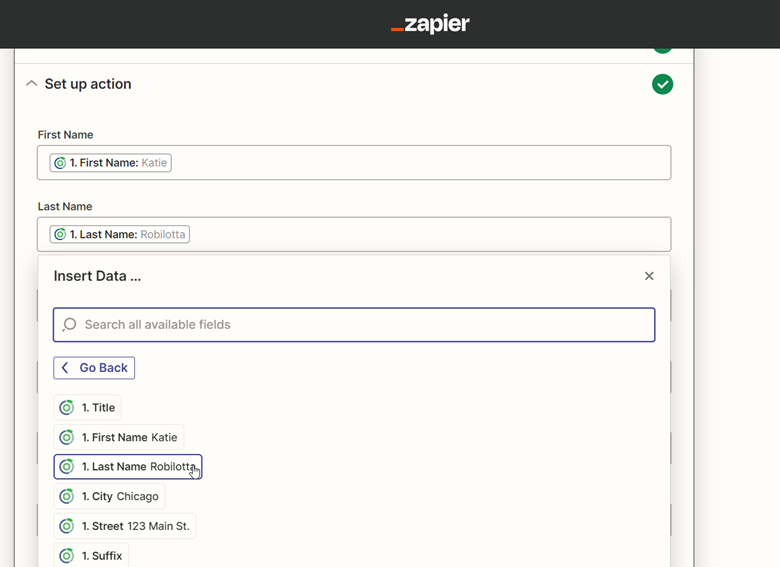
Once connected, you will be given a list of Omeda fields to map the data from the Triggered event. After you have tested the trigger, the data from that test should appear when mapping these fields.The list of Omeda fields that you can map to include the standard contact and address information for a customer as well as the following: Demographics, Products, Deployment Types, and Behaviors. You are able to map up to 10 each.
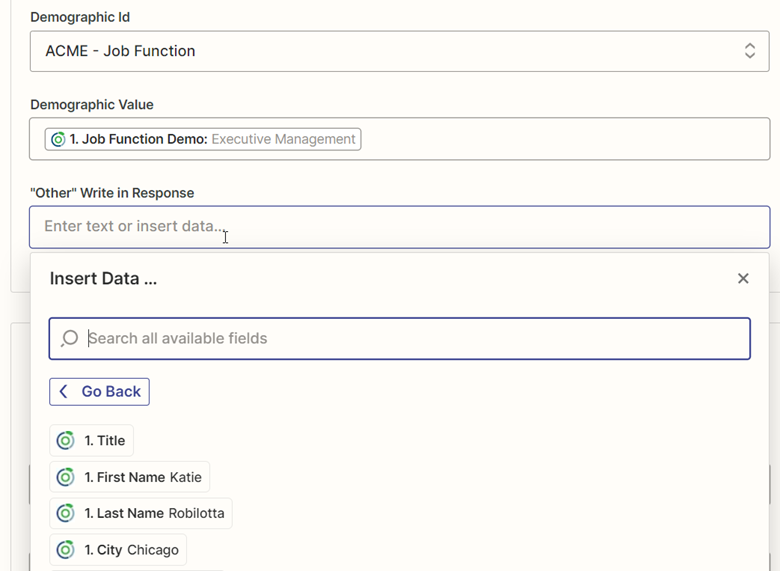
To map a Demographic, you will need the following:
– Demographic ID: Once you click on this field, all active demos will appear. You will have the option to search for the demographic and select the one to map to.
– Demographic Value: The field from the triggered event you’d like to map to or add constant.
– “Other” Write in Response: The other write-in field for that demographic (if applicable)
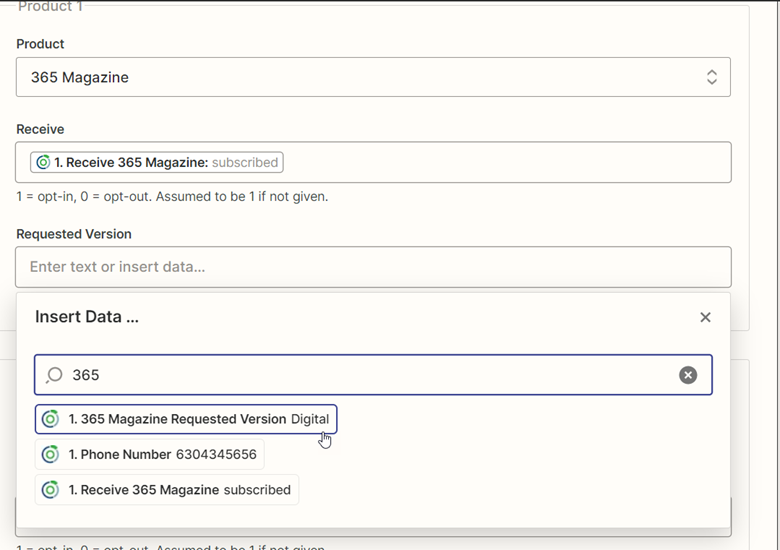
To map a Product, you will need the following:
– Product: Once you click on this field, all active products will appear. You will have the option to search for the product and select the one to map to.
– Receive: The field from the triggered event you’d like to map to or add a constant.
– Requested Version: The field from the triggered event you’d like to map to or add a constant (if applicable).
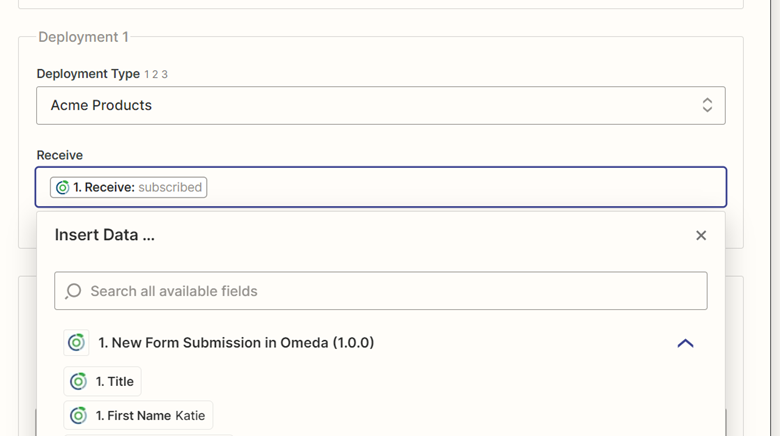
To map a Deployment Type, you will need the following:
– Deployment Type: Once you click on this field, all active Deployment Types will appear. You will have the option to search for the Deployment Type and select the one to map to.
– Receive: The field from the triggered event you’d like to map to or add a constant.
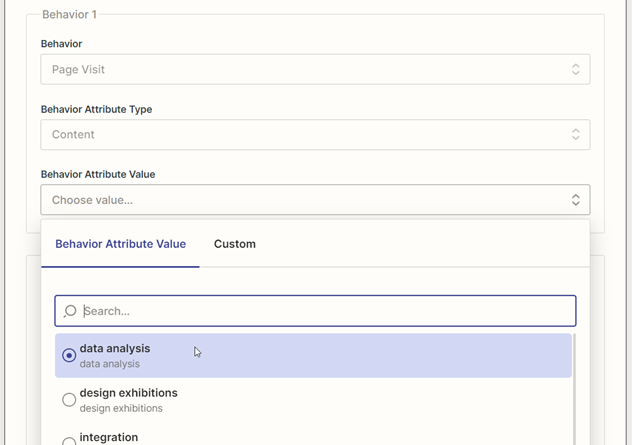
To map a Behavior, you will need the following:
– Behavior: Once you click on this field, all active Behaviors will appear. You will have the option to search for the Behavior and select the one to map to.
– Behavior Attribute Type: Once you click on this field, all active Behavior Attribute Types will appear. You will have the option to search for the Behavior Attribute Type and select the one to map to.
– Behavior Attribute Value: Once you click on this field, all active Behavior Attribute Values of the selected Type will appear. You will have the option to search for the Behavior Attribute Value and select the one to map to.
Once all fields are mapped, you will be able to test the action by selecting the Test Action button under the Test Action section. This section will give you an overview of what data you have mapped and left unmapped. If test is successful, you are ready to publish your zap!
Table of Contents
