Sending an SMS Message
SMS Dashboard
The SMS Dashboard will provide users with an at-a-glance view of several metrics that they may find helpful as well as a list of the SMS Messages that are scheduled or are currently sending.
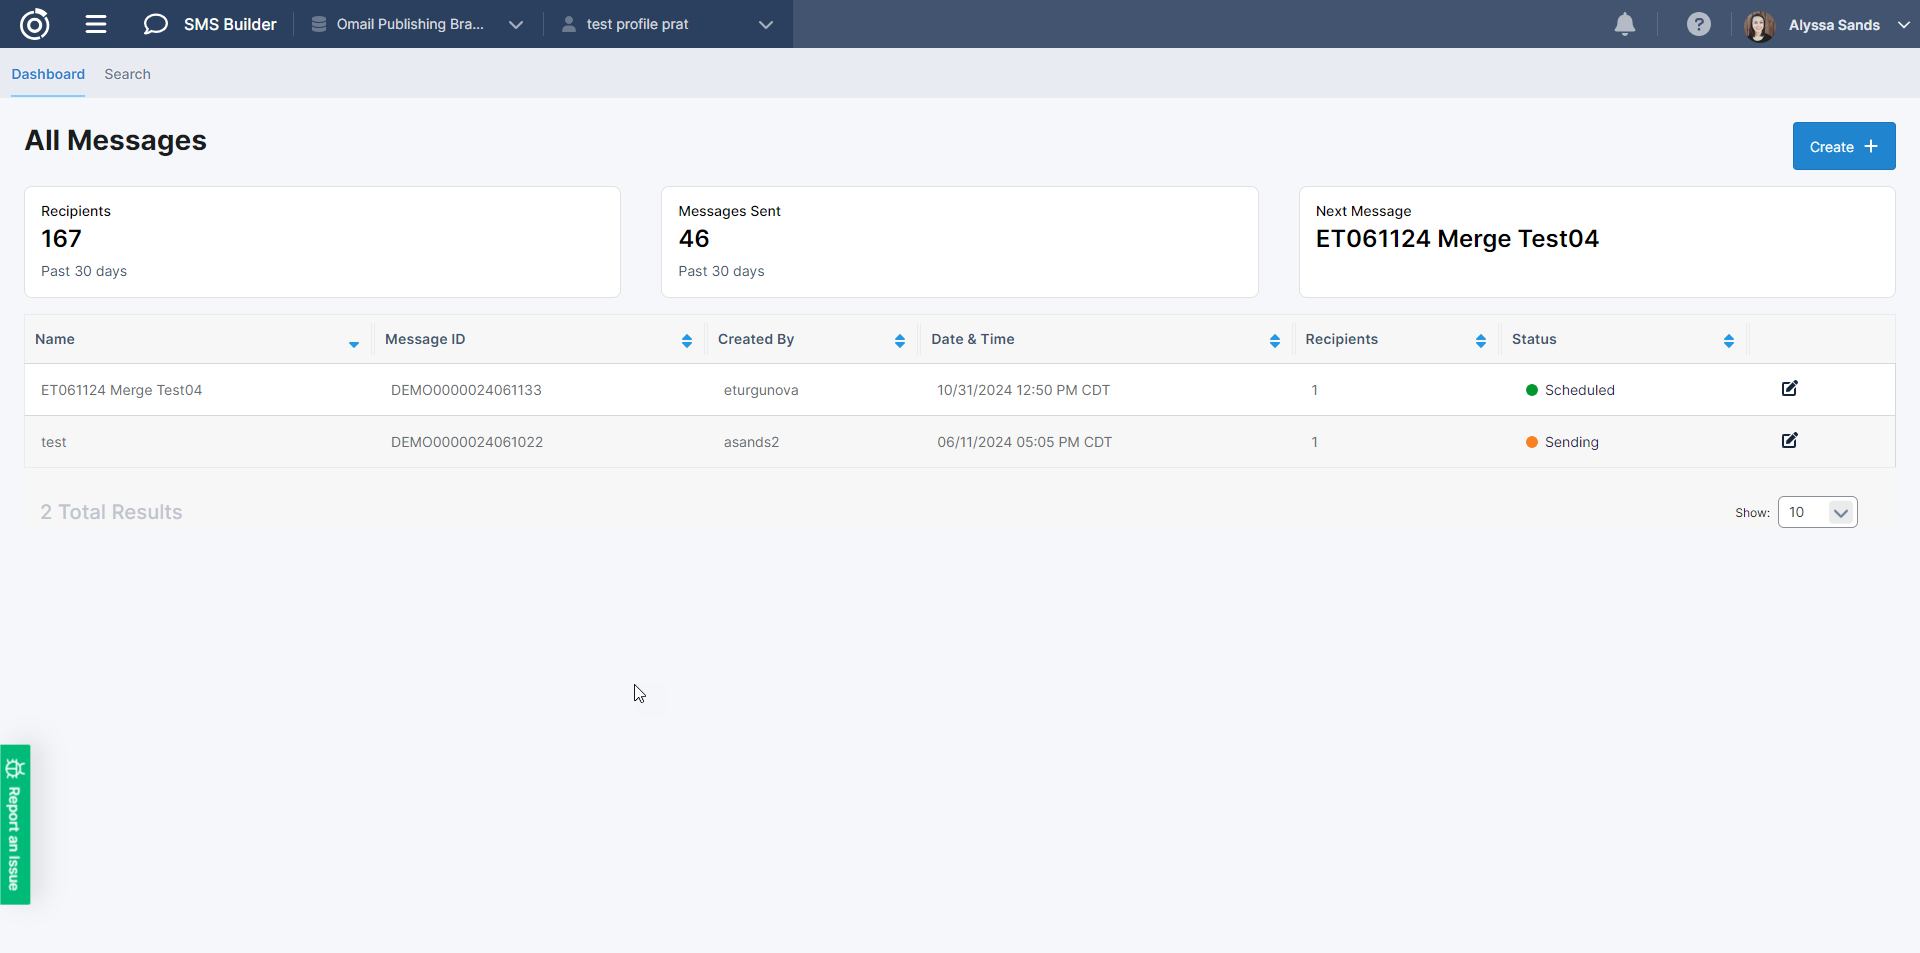
In the boxes along the top of the screen users can see the following:
Number of Recipients that have received an SMS Message in the last 30 days
Number of messages that have been sent in in the last 30 days.
SMS message that are scheduled to be sent next
In the table, the following columns will appear:
Name of each Message in Scheduled or Sending Status
Track ID
User the message was Created By
Date & Time the message was scheduled
Number of recipients for the message
Status for message
On this screen users can also:
View the settings for each SMS Message
Create a new SMS Message
Use the navigation to search for an existing SMS Message
Searching for an SMS Message
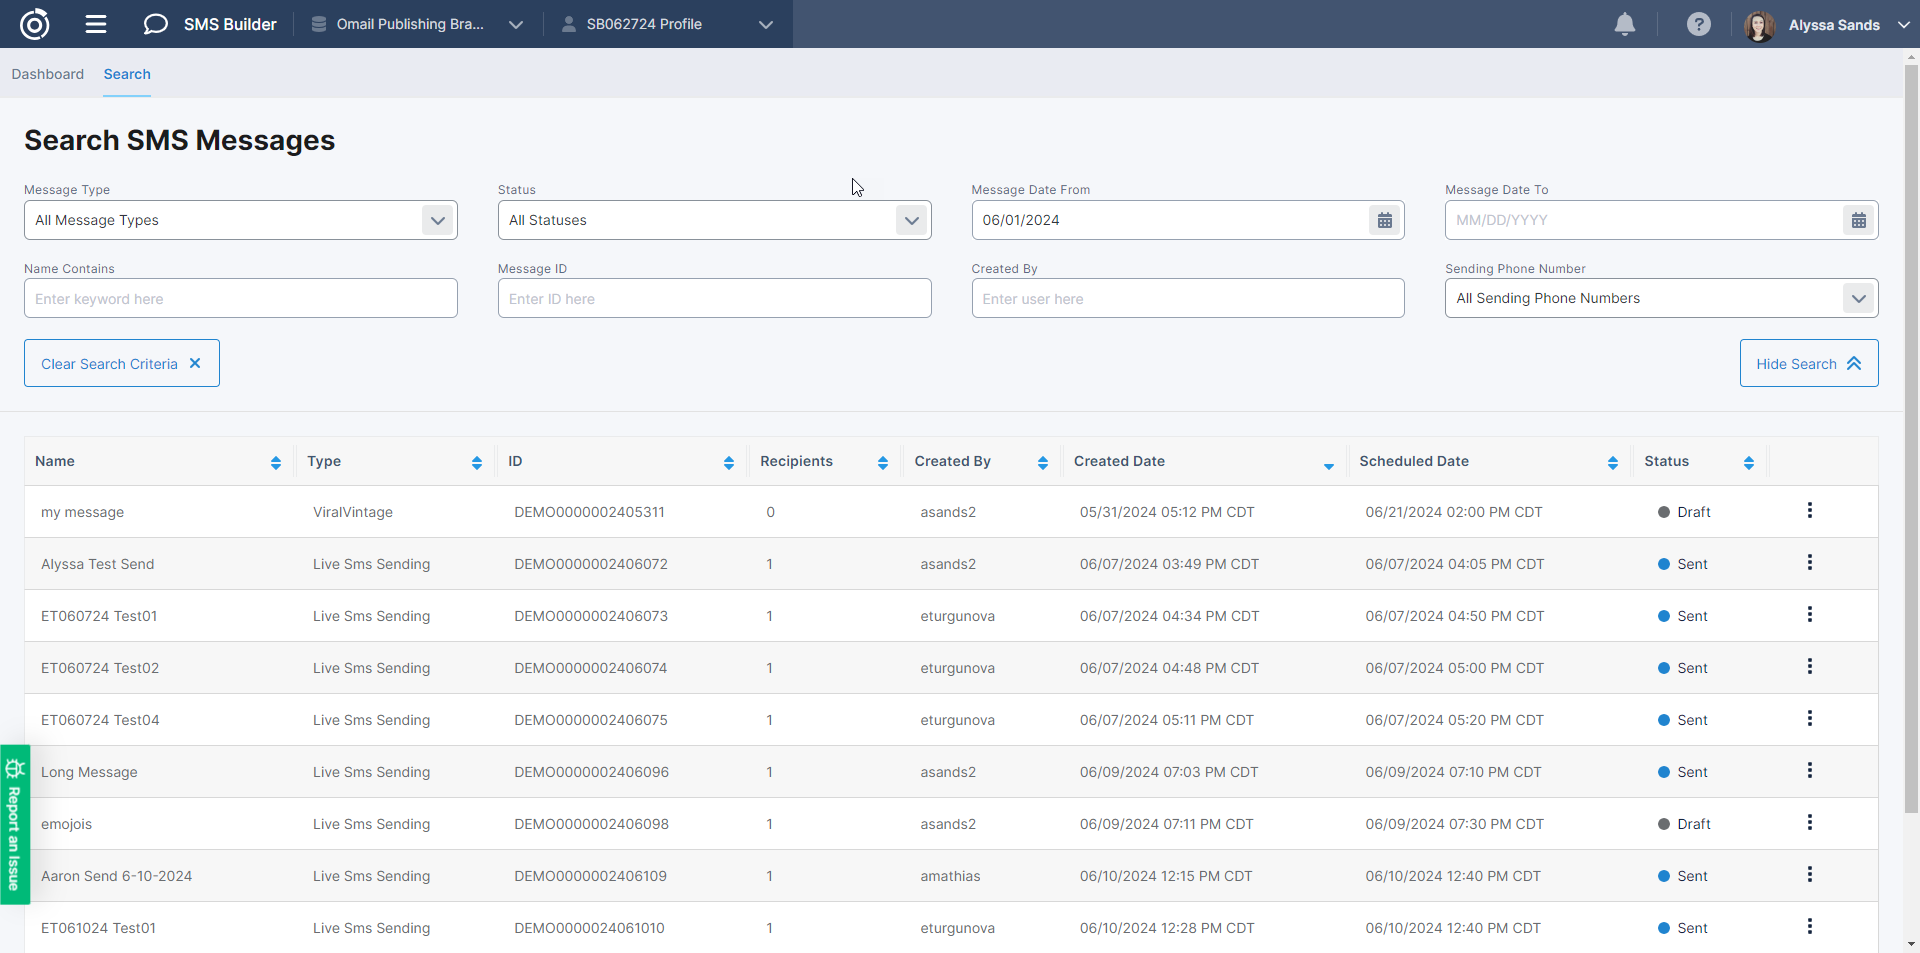
The SMS Search page will help users find SMS messages. Users can filter by the following fields:
Message Type (Active & Unverified)
Status (Sent, Draft, Sending, Scheduled, Error, Cancelled)
Message Date From
Message Date To
Name Contains
Track ID
Created By
Sending Phone Number (Active & Unverified)
In the table, the following columns will appear:
Name
Type
Track ID
Recipients
Created By
Created Date
Scheduled Date
Status
The following actions are available for messages depending on the message status and the user’s permissions:
View – the message and it’s settings can be viewed. This action will show when message has already been sent, scheduled, or cancelled or if a user does not have editing permissions.
Edit – the message and it’s settings can be edited. Users with permissions can edit a message in Draft status.
Clone – the message and it’s settings can be cloned. Users with Create permission can clone any message.
Schedule – the message can be scheduled using the selected audience and date and time. Users with permissions can schedule messages in Draft status.
Cancel – the message can be cancelled. Users with permissions can Cancel any message in Draft status. This cannot be undone.
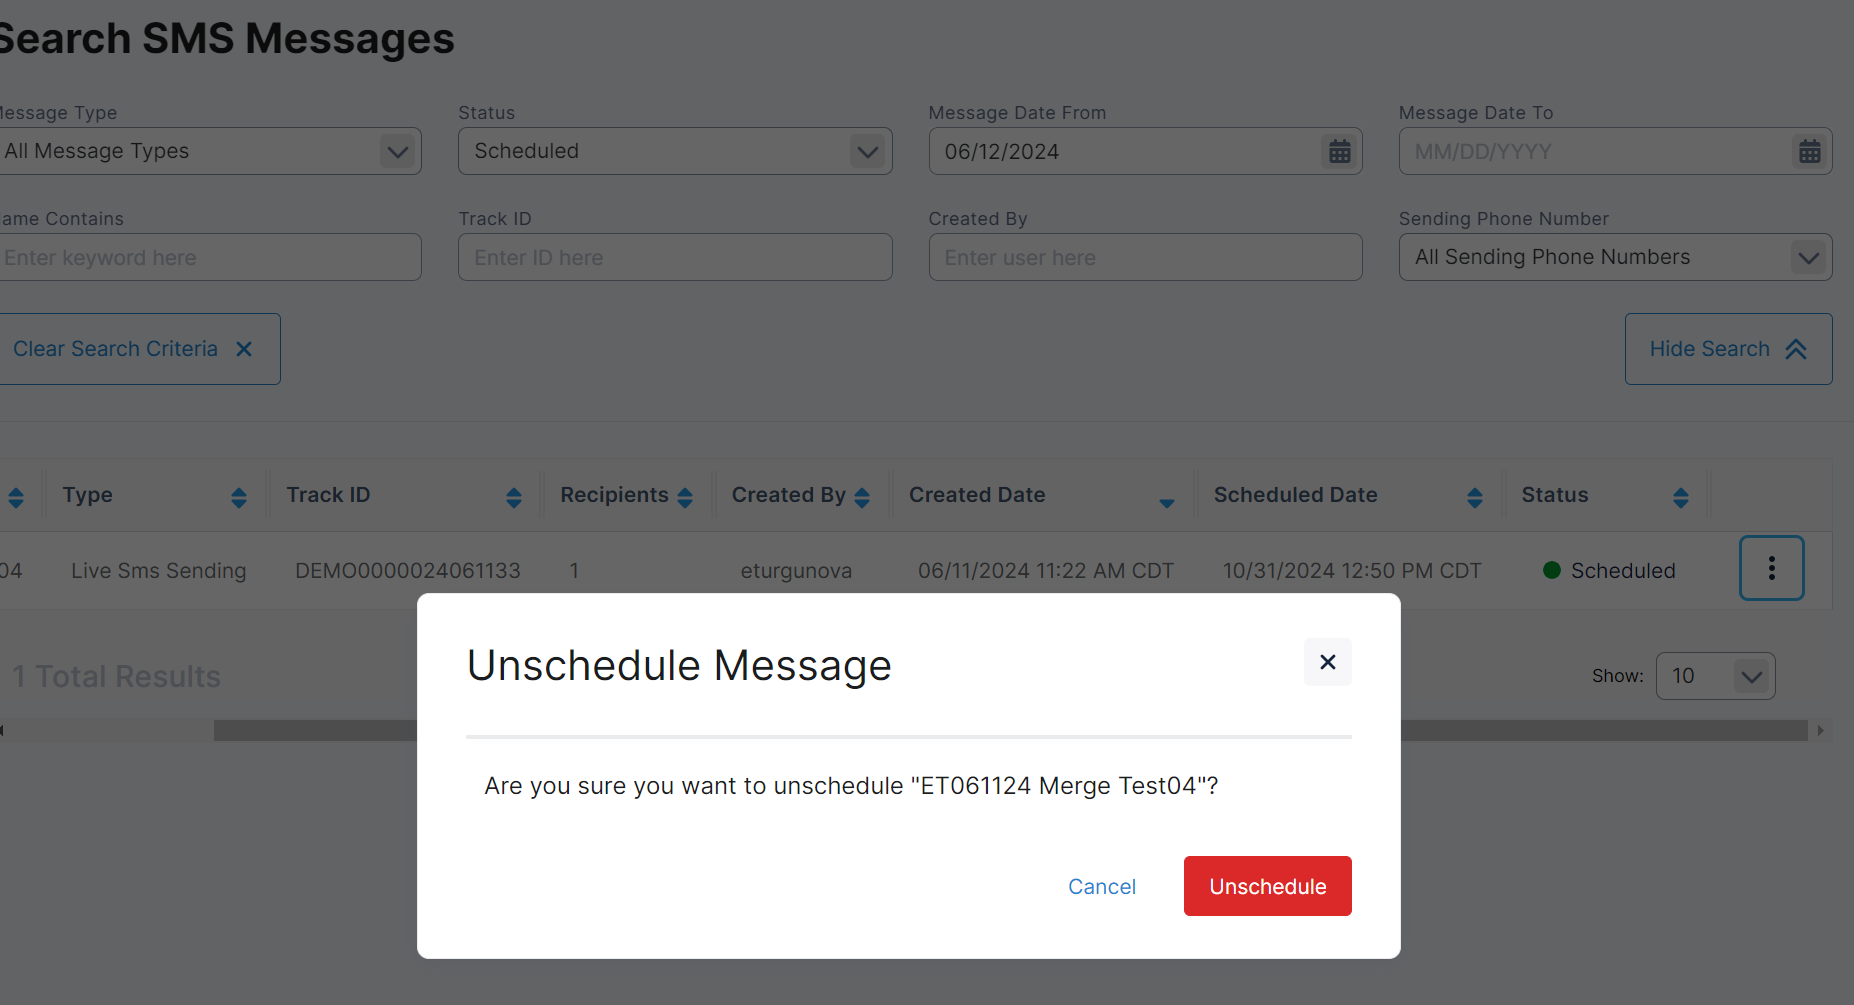
Unschedule – the message can be unscheduled. Users can unschedule messages in Scheduled status.
View Report – the report for Sent or Sending messages can be opened.
Create a Message
Message Summary pleat
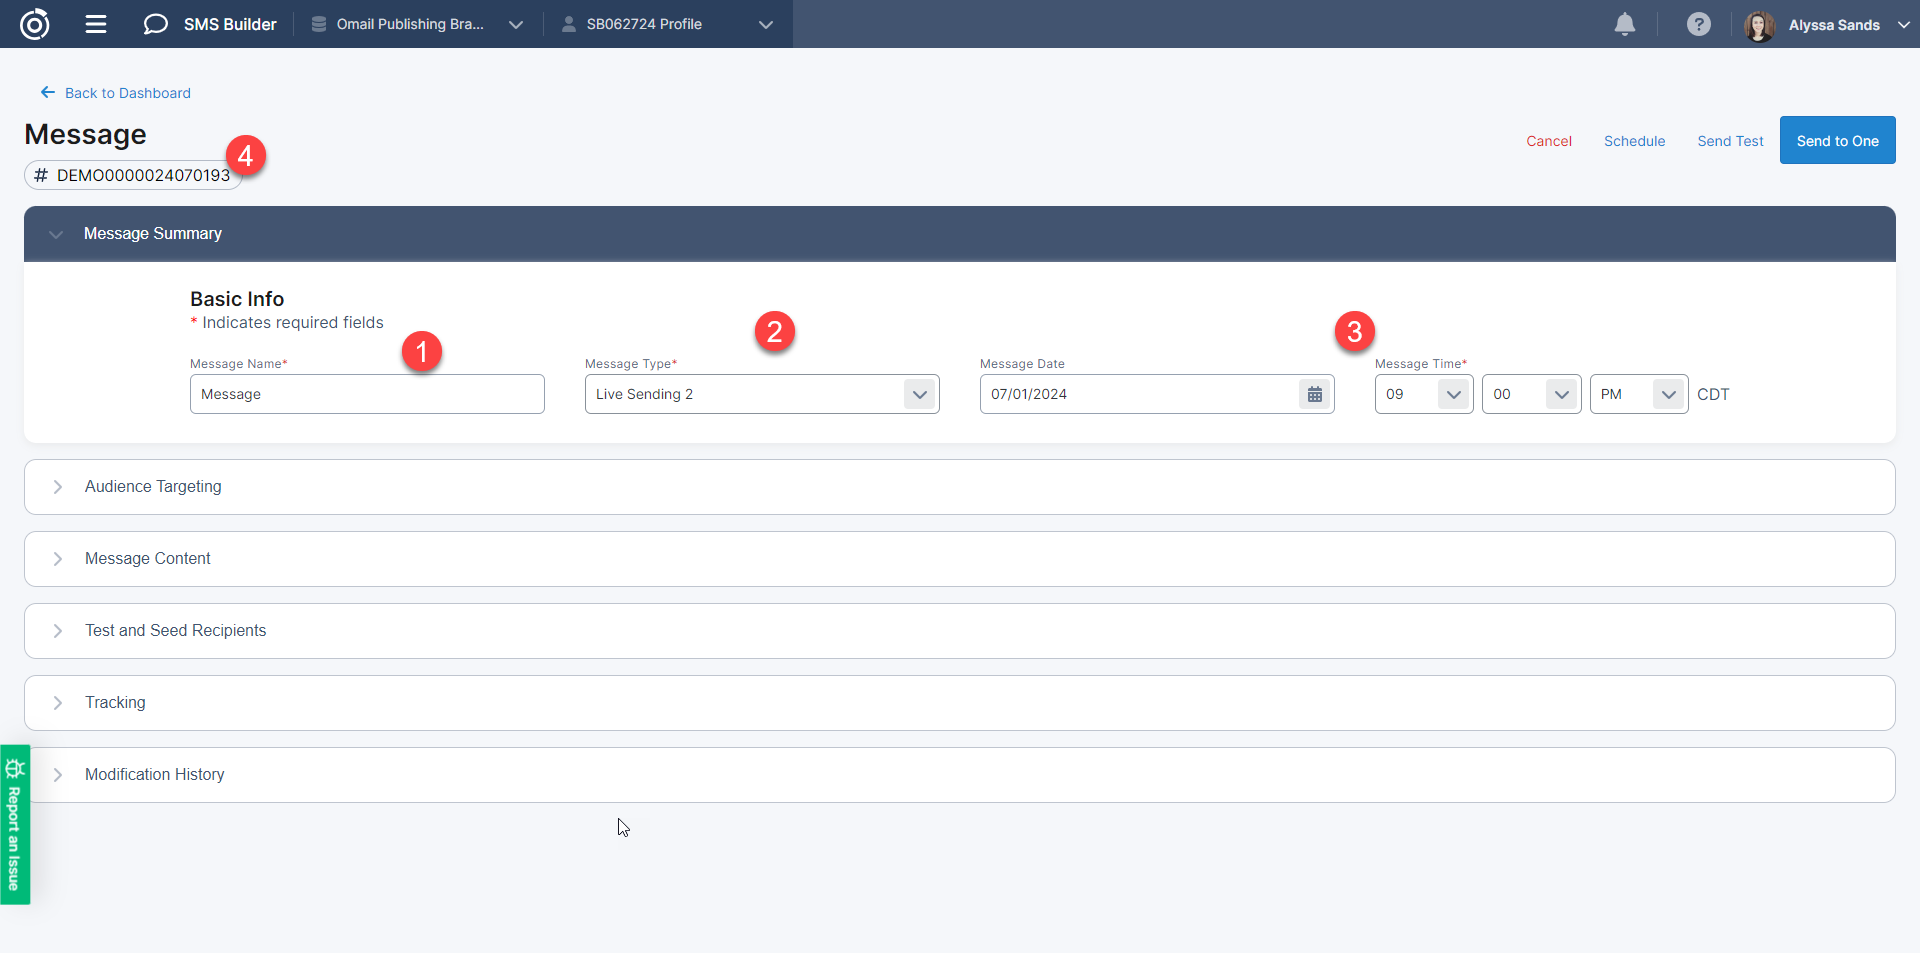
Message Name
Message Type – only active Verified Message Types
Message Date / Time – scheduled date/time for the message.
Track ID – makes it easy to search for and reference in tickets
Audience Targeting pleat
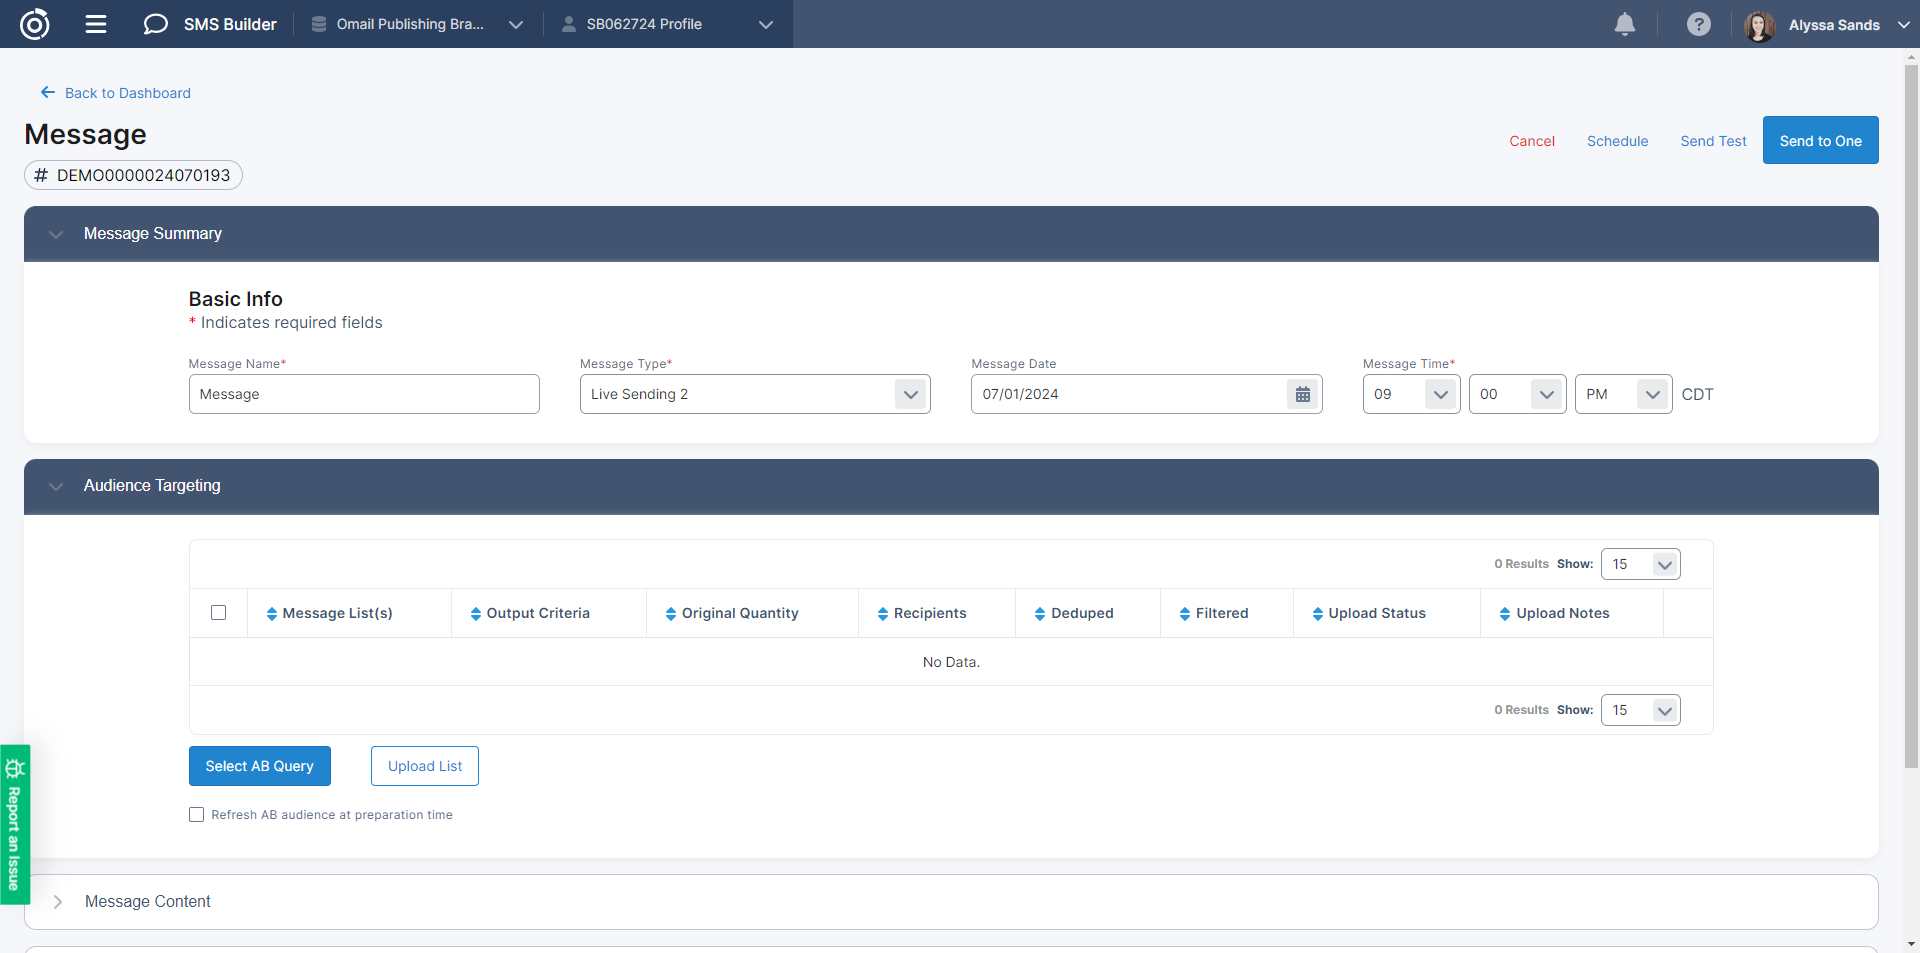
Users can select recipients for their SMS message via the following:
Select an AB Query – options to remove internal duplicate, and remove duplicates from prior lists like with Email Builder. Filter means only people who have opted IN will be able to receive. Persons not opted in will be removed. Users can use different Output Criteria. Users can select to refresh the audience builder query at the time of preparation (at the time when the message is scheduled), otherwise it will use the query at the time of selection.
Upload list – Persons identified as opt out will be removed. Upon upload, users will need to confirm the uploaded list has opted in to messages. We will look for the following columns to identify the mobile phone number. *Only csv and txt formats supported.
“Phone”
“Cell”
“Mobile”
“phone number”
Message Lists – these are the list names as uploaded or selected.
Output Criteria – this is the criteria or layout for the list. Only relevant if an AB query is uploaded.
Original Quantity – this is the Original List upload quantity.
Recipients – this is the final count of recipients after the list is filtered for opt ins/outs and the lists are deduped.
Deduped – depending on the selection when a query is selected, duplicates that are removed within a file or across files will display here.
Filtered – if AB query is selected, the removed amount will be those who did not opt in. If external it will be those who have not opted out.
Upload Status – status of the list upload.
Upload Notes – any relevant log information on the uploaded file.
Users can delete individual lists.
Message Content

When creating message content, users can insert emojis or merge variables. If merge variables are inserted, you can set a default value recipients who don’t have a value. Messages with emojis have a smaller count limit (66) for each segment because due to message encoding. Generally, a standard message segment will equal about 152 characters.
A single toll-free SMS message technically supports up to 152 characters, or up to 66 if the message contains Unicode characters like emoji. Modern phones, however support message concatenation which compiles individual SMS segments into what appears as a single readable text message for the end user. Each SMS segment will equal a single credit.
Omeda has a standard “Opt-out Instructions” variable which will insert default language “Reply Stop to stop, Help for help. Msg&Data rates may apply.” directly into the message. Users can modify the language, although “Stop” & “Help” responses will operate the same.
Test and Seed recipients
Users can add new tester or seed recipients or select from previously used testers or seeds.
Unlike Email Builder, testers will receive a test message only if Send Test is clicked. This will send a test send to all testers. There is not an approval mechanism built into the application.
Seeds will receive the message along with the rest of the recipients.
Please note that sending test messages will consume credits.
Tracking
Users can add a web tracking string similar to Email Builder, to include elements such as UTM parameters.
Users can turn on olytics for all olytics links within a message.
If link tracking is on, each link will be shortened to about 35-40 characters
Users can give links names.

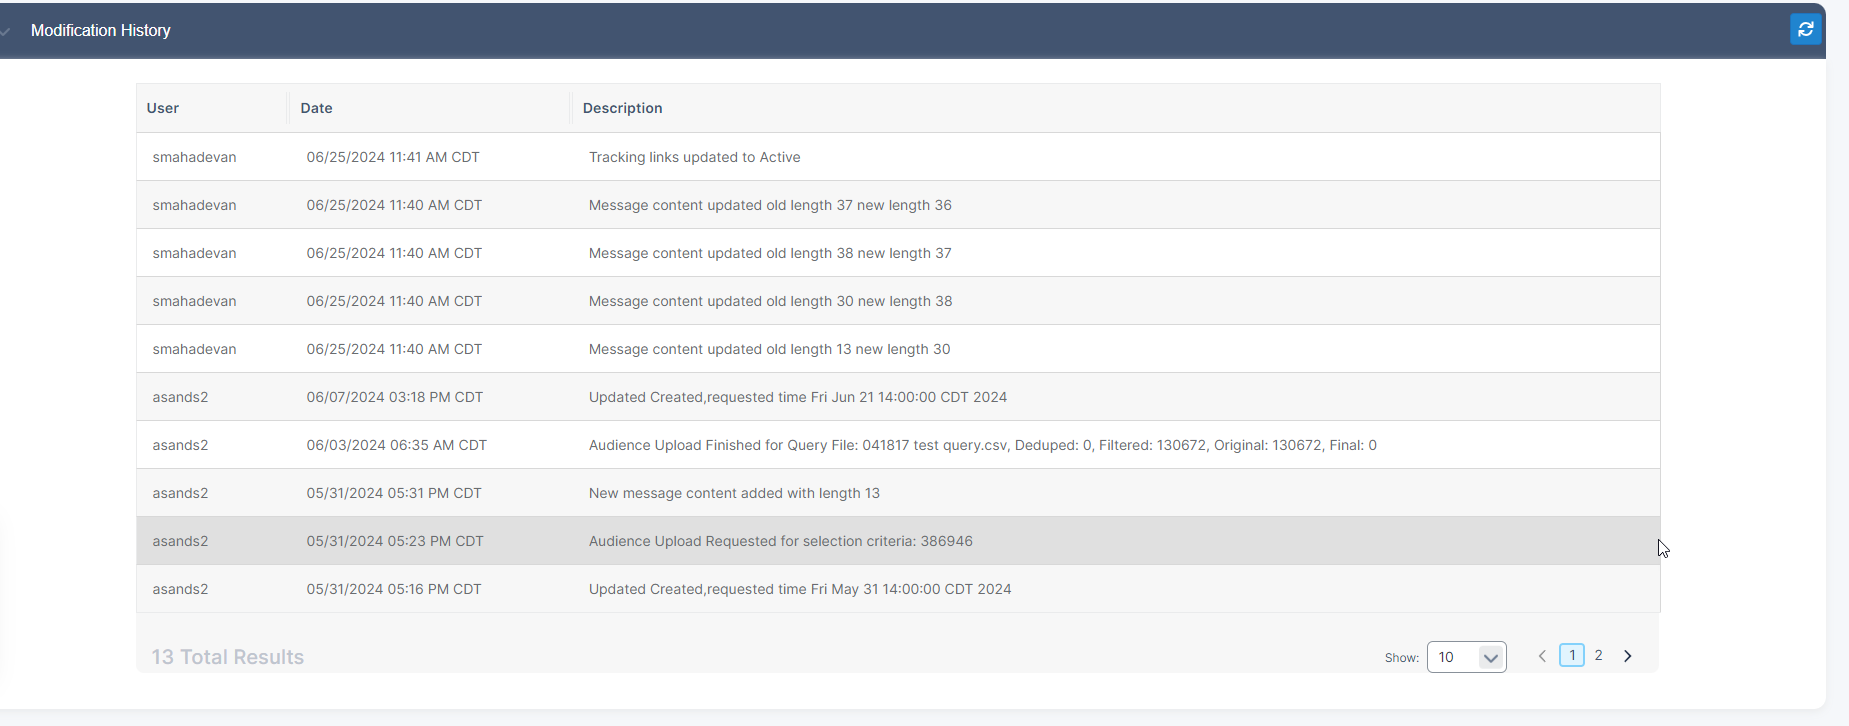
Modification History
Similar to Email Builder & Odyssey, user modification logs will be recorded in the Modification History pleat.
Sending a Test Message
Send to One – send an individual message to yourself.
Send Test – send messages to Testers.
Schedule – can Schedule the message according to the date/time in the Message Summary pleat.
Scheduling a Message
Once your message is ready, you can click on the “Schedule” button at the top of the page. This will place the message into the “Scheduled” status for send on the selected Message Date & Message Time. At this time, you will no longer be able to make any modifications to your message. To make additional changes, you will have to Unschedule the message. You can do so from the Message Summary page, or from the search page by clicking on the vertical ellipses for the respective message and click on “Unschedule”.
After a message begins sending, you can see information about the send from the View Report link on the search page.
Table of Contents
