Connecting your Shopify store to Omeda is fast, simple, and secure—designed to get you up and running with minimal effort. Our step-by-step integration flow guides you through the process in just a few clicks—no technical expertise required. Once connected, your store's order, product, and customer data begins flowing into Omeda automatically, giving you instant access to valuable ecommerce insights. It’s a hassle-free setup that lets you focus on activating your data, not managing it.

Step 1: Access & Product Setup
-
Reach out to your CSM or open a support ticket to get access to the Shopify Integration and to set up a Shopify Sales product in Omeda.
-
The user configuring the integration in Omeda must have the "Manage and install apps and channels" permission within Shopify.
Step 2: Connect to Shopify Store
-
Navigate to Integration tab → Shopify
-
Select the Create + button
-
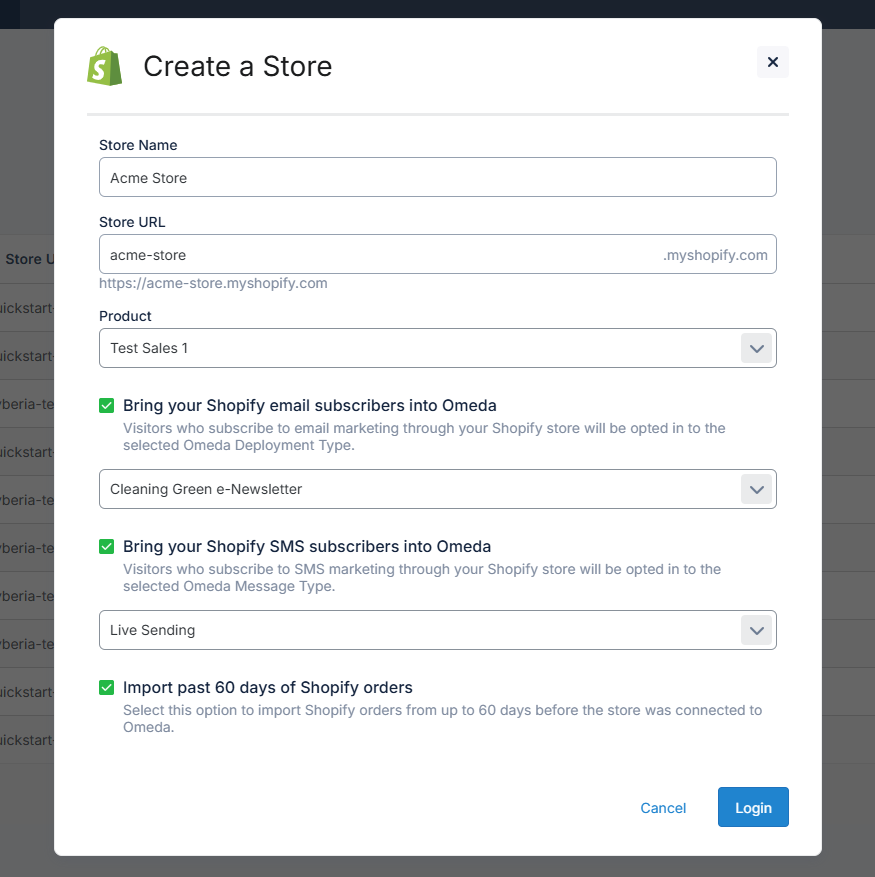
Enter the requested information:
-
Store Name - This can be whatever you want but ideally, the name of the Shopify Store you’re connecting to.
-
Store URL - The subdomain of the store. So if my store’s URL is http://quickstart-8ce9739b.myshopify.com, all I need to enter in this field is quickstart-8ce9739b because the .myshopify.com is already there by default.
-
All Shopify stores are assigned a
.myshopify.comdomain by default, which serves as the unique identifier for your store. When connecting your store to a third-party application like Omeda, Shopify requires you to use this original.myshopify.comdomain—not a custom storefront domain. If your store uses a custom domain, you can locate your.myshopify.comdomain by navigating to the Domains section in the Shopify Admin.
-
-
Product - Select the Sales product that was created for the Shopify store.
-
Bring your Shopify email subscribers into Omeda - Shopify provides the ability to collect customer consent for email marketing during checkout. If you want to connect the customer consent with an Omeda Deployment Type, select the Deployment Type here. Learn more here: https://help.shopify.com/en/manual/promoting-marketing/create-marketing/customer-contact-information#collect-customer-emails-from-the-checkout
-
Bring your Shopify SMS subscribers into Omeda - Shopify also provides the ability to collect customer consent for SMS marketing during checkout. If you want to connect the customer consent with an Omeda SMS Message Type, select the SMS Message Type here. Learn more here: https://help.shopify.com/en/manual/promoting-marketing/create-marketing/customer-contact-information#collect-customer-phone-numbers-from-the-checkout
-
Import 60 days of Shopify orders - When connecting a Shopify store to Omeda, users have the option to import up to 60 days of historical order data from the original date of connection. This enables immediate segmentation and targeting based on past purchasing behavior. If the store is already connected, this feature can be turned on retroactively by editing the store setup. Omeda will then import historical orders going back 60 days from the initial connection date.
-
-
Select the Login button to connect to the entered Shopify Store.
-
Users will be redirected to Shopify and asked to install the Omeda app. Continue.
-
Users will be redirected back to Omeda to review the integration before officially accepting the connection.
You have now integrated Omeda with Shopify!
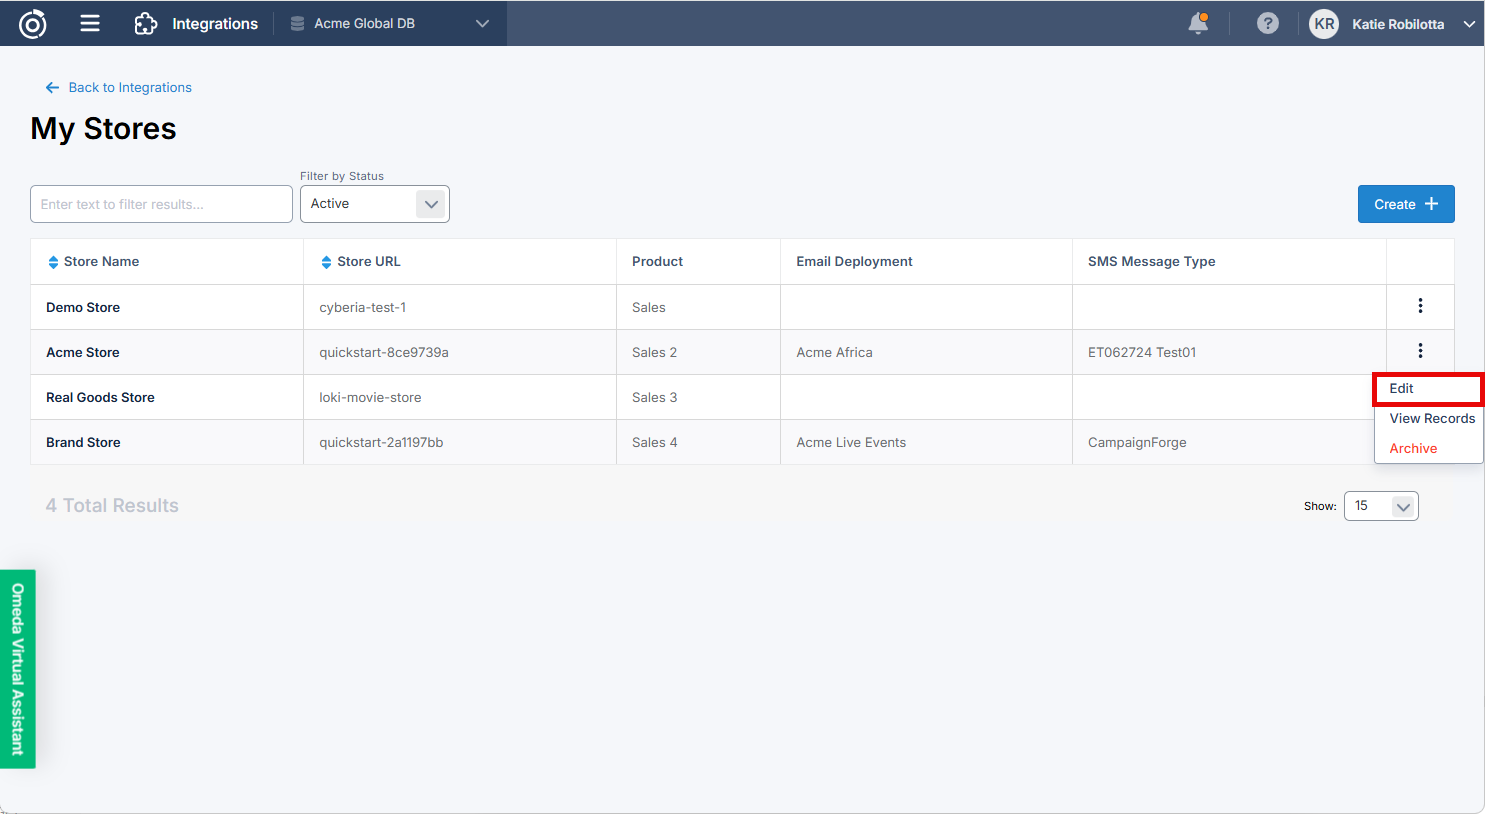
If you need to make edits to the integration, select the ‘Edit’ button in the action menu of the store.
Step 3: Monitor Incoming Transactions
-
From the Store dashboard, select ‘View Records’ from the action menu. This will display the incoming Shopify transactions after the connection was made.
-
Users can get a quick view of incoming transactions which include the Order ID, Customer Name, Amount spent, and Date/Time.
-
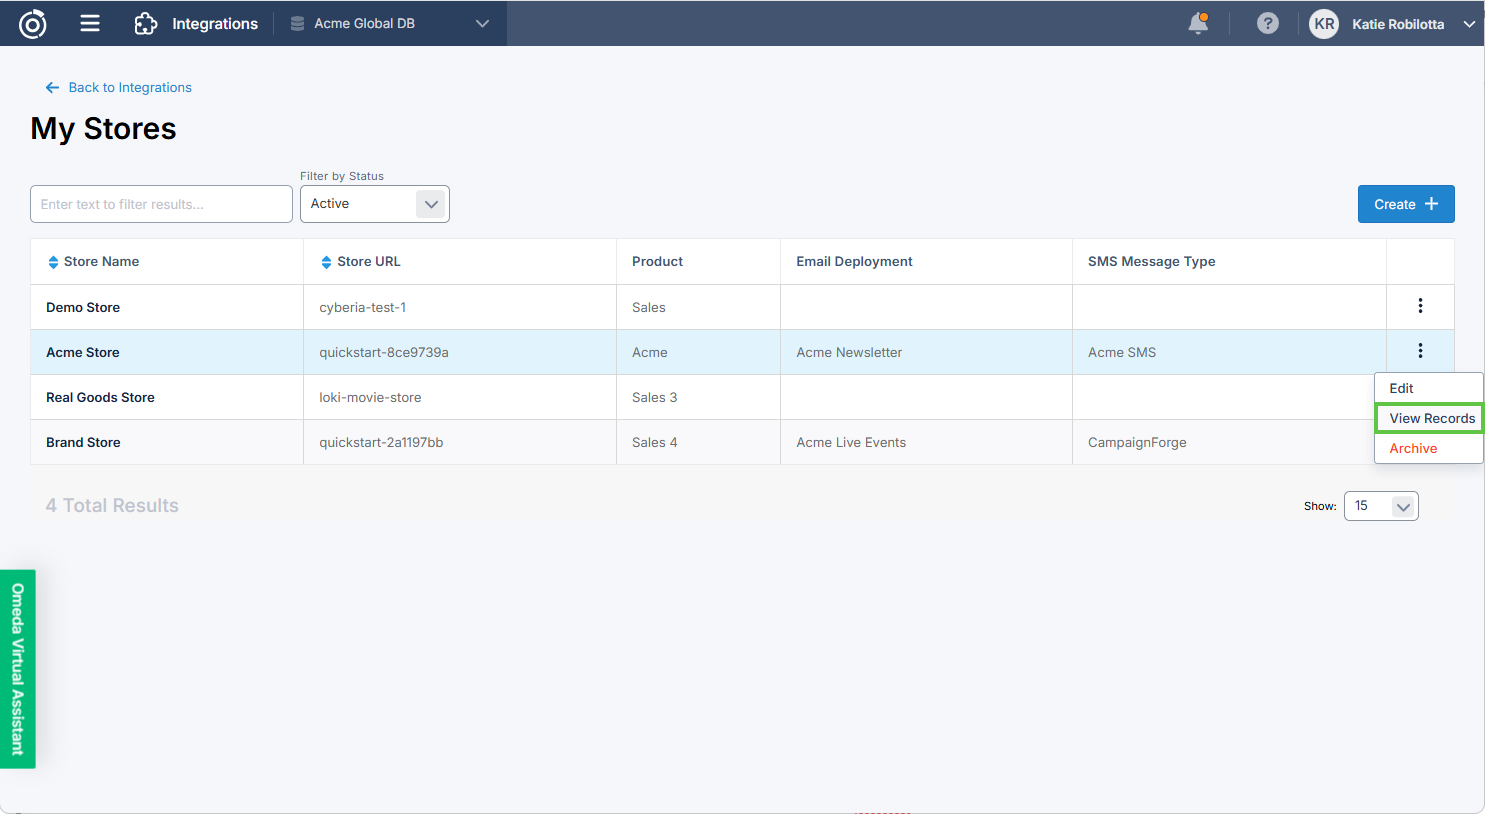
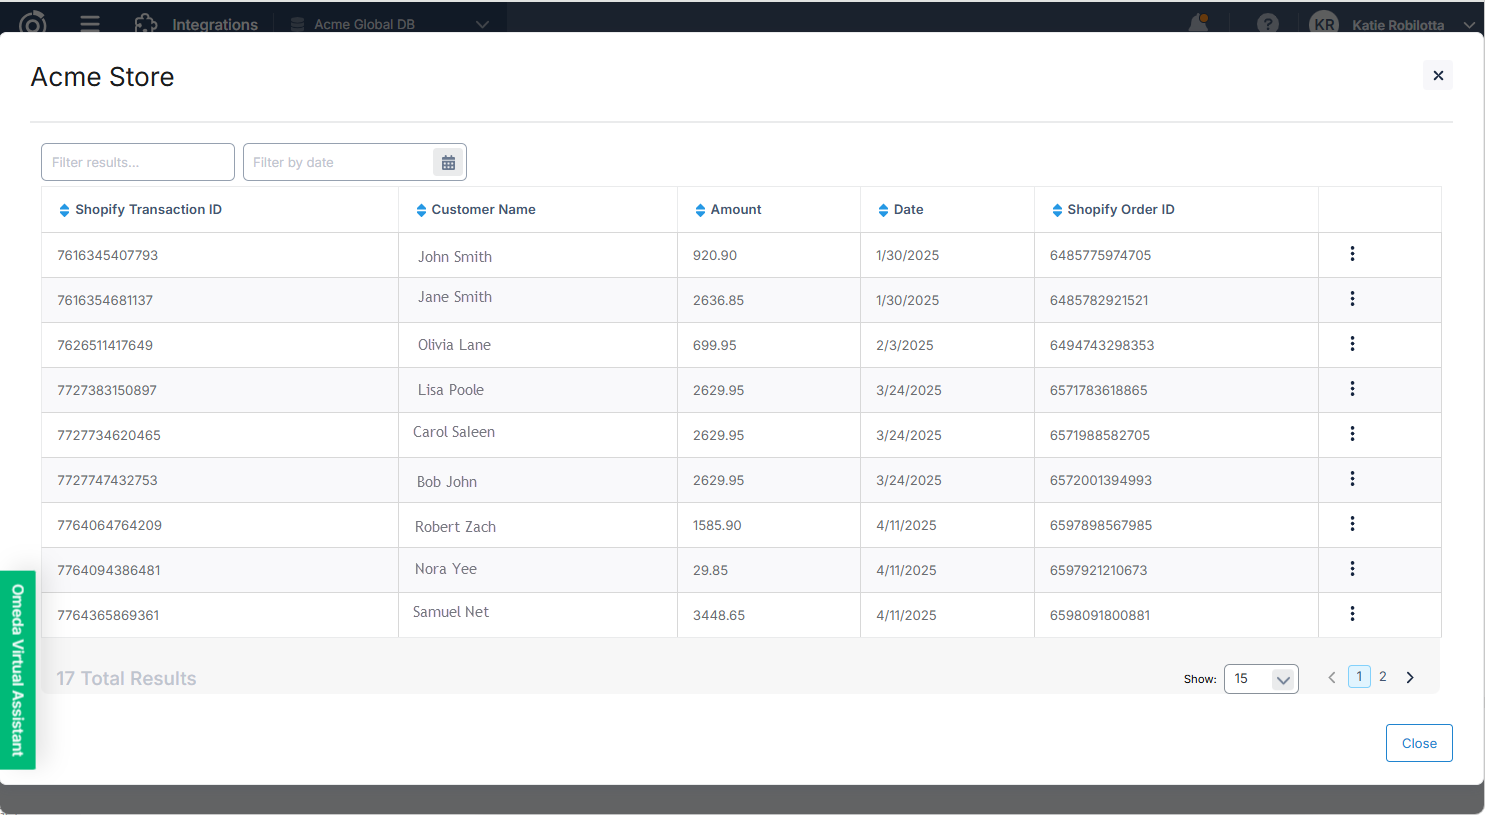
Table of Contents