
What’s new in the Cloud?
Your client Portal has moved to the Cloud to make your experience faster, easier and more secure. Learn about a few changes to the previous Support Portal experience that you might notice as you submit and manage your Omeda Support Requests.
Logging into your new Cloud Portal
Most of you already use your email address to login, but if you have had a legacy login using a username and not your email, please note that all logins are now using the email associated to your Omeda Jira account.
Go to Your Cloud Support Portal
Cloud Portal Access FAQ’s
If you tried the above suggestions, and still need assistance logging in, please contact your client success manager or email jiracloudsupport@omeda.com.
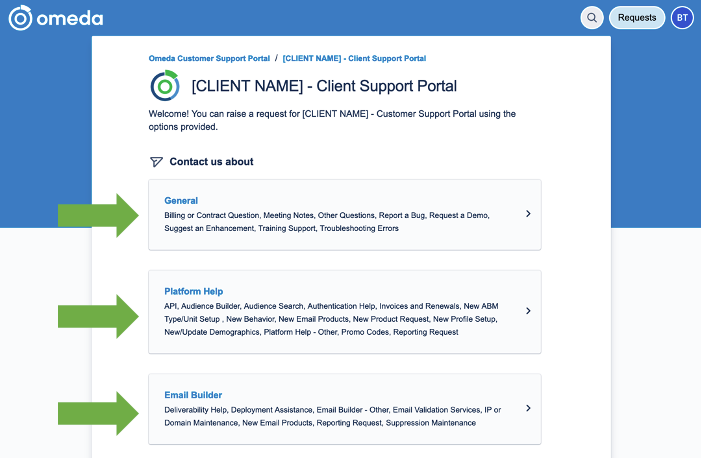
Support Portal Landing Page
The Landing Page has a slightly different look and feel. You will see a preview of all available ticket types under each category, eliminating the need to click on the category to see the different options:
Requests >> Use Advanced Filters
You now have the ability to turn “Advanced Filters” on or off – depending on your preference – by going to the requests page:

Legacy Portal Issue Links
Ticket URLs are now using a new domain structure. Therefore, please use the “Requests” button to see your current request.
Omeda will put link forwards into place, but if you are unable to access a ticket, please locate the ticket in your “Requests” list, or paste the issue KEY-### of the legacy ticket to replace any ticket URL KEY-## in the Cloud portal.
Quick Start Guide – CLOUD
Welcome to the Omeda Client Support Portal User Manual. Read on to learn how to use the new Portal interface, your one-stop access to all of our support options. Request service, report bugs, add products, ask a question and more!
Let’s get started!
Go to Your Cloud Support Portal
Hit the ground running with our Quick Start Guide PDF and download a copy for future reference.
Download the Quick Start Guide

Support Portal Ticket Type Guide
Review our Ticket Type Guide to find the ticket that best meets your support needs.
Download the Support Portal Ticket Type
Critical Support Requests
Support is available during Omeda Business Hours from 7:30am to 5:30pm CST, Monday through Friday.
Emergency assistance for urgent requests, e.g. platform outages, non-temporary service interruption, critical Email issues that require immediate action, is available after hours by emailing criticalsupport@omeda.com, or by submitting a Service Desk request with the priority “Critical Path”. The critical support team will respond back to you as quickly as possible.
Please include the following information in all requests for support when you are reporting a problem or abnormality to ensure the quickest possible resolution/response, including :
-
URLs, ID’s or other issue-specific information to clarify where the problem occurred
-
Screenshots of Issue or error messages
-
Problem/question
-
If you encountered a problem, what were you trying to do?
-
What happened immediately before ‘the problem’?
-
Include screenshots, if applicable.
-
NOTE: Priority “Critical Path” or “Escalate” is reserved for system outages/service interruptions, and emergency Email Support. For requests requiring prioritization, please assign a due date where applicable and select Priority “High”.
Features
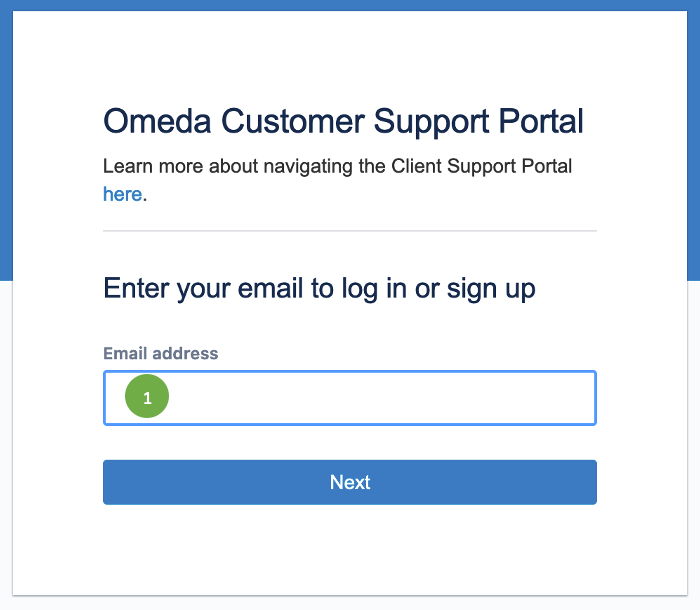
Portal Log-In Screen
1. Log in with your existing JIRA account:
Use your existing JIRA account credentials to log into your organization’s service portal. Your log-in will automatically take you to the Support Portal Home screen below.
If you don’t remember your login, please use the “Forgot Your Password” Link.
If you do not have an account, please contact your Client Success Manager for support.
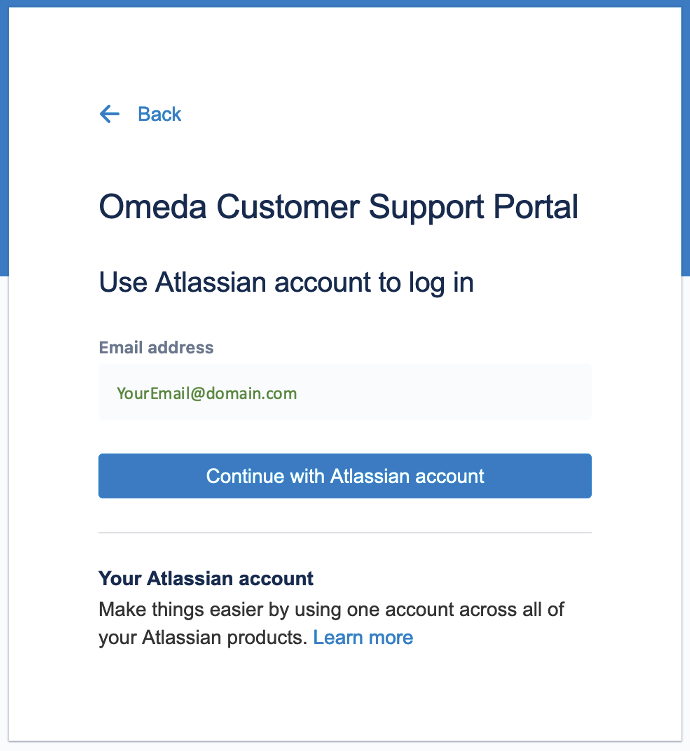
Select “Continue with Atlassian Account” to confirm your login email
Portal Home Screen
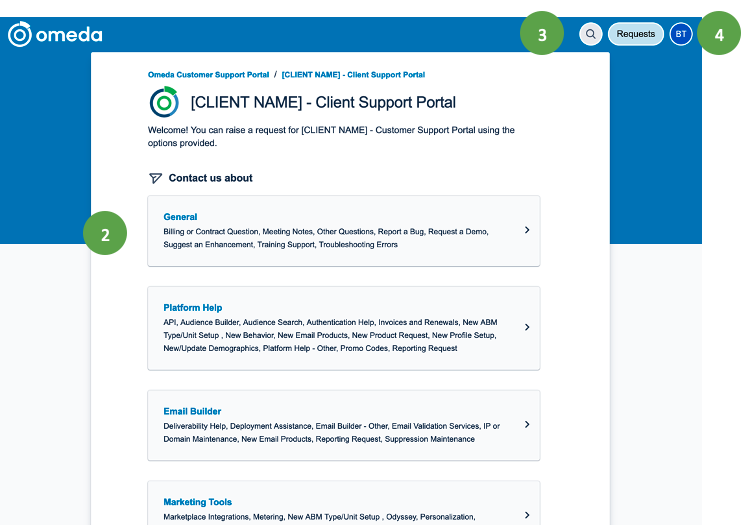
2. Search for a Request Type
Use the Search Bar to find the correct request type, or use the categories in the left bar to navigate to the desired category and request type.
3. View your existing Requests
Click on the “Requests” button to see your active requests, or search for closed tickets.
The number in the blue bubble indicates the number of active (open) requests you are participating in.
4. View or Edit your Profile Preferences
Click on the Avatar in the top right corner to view or edit your profile preferences, including changing your email address or name.
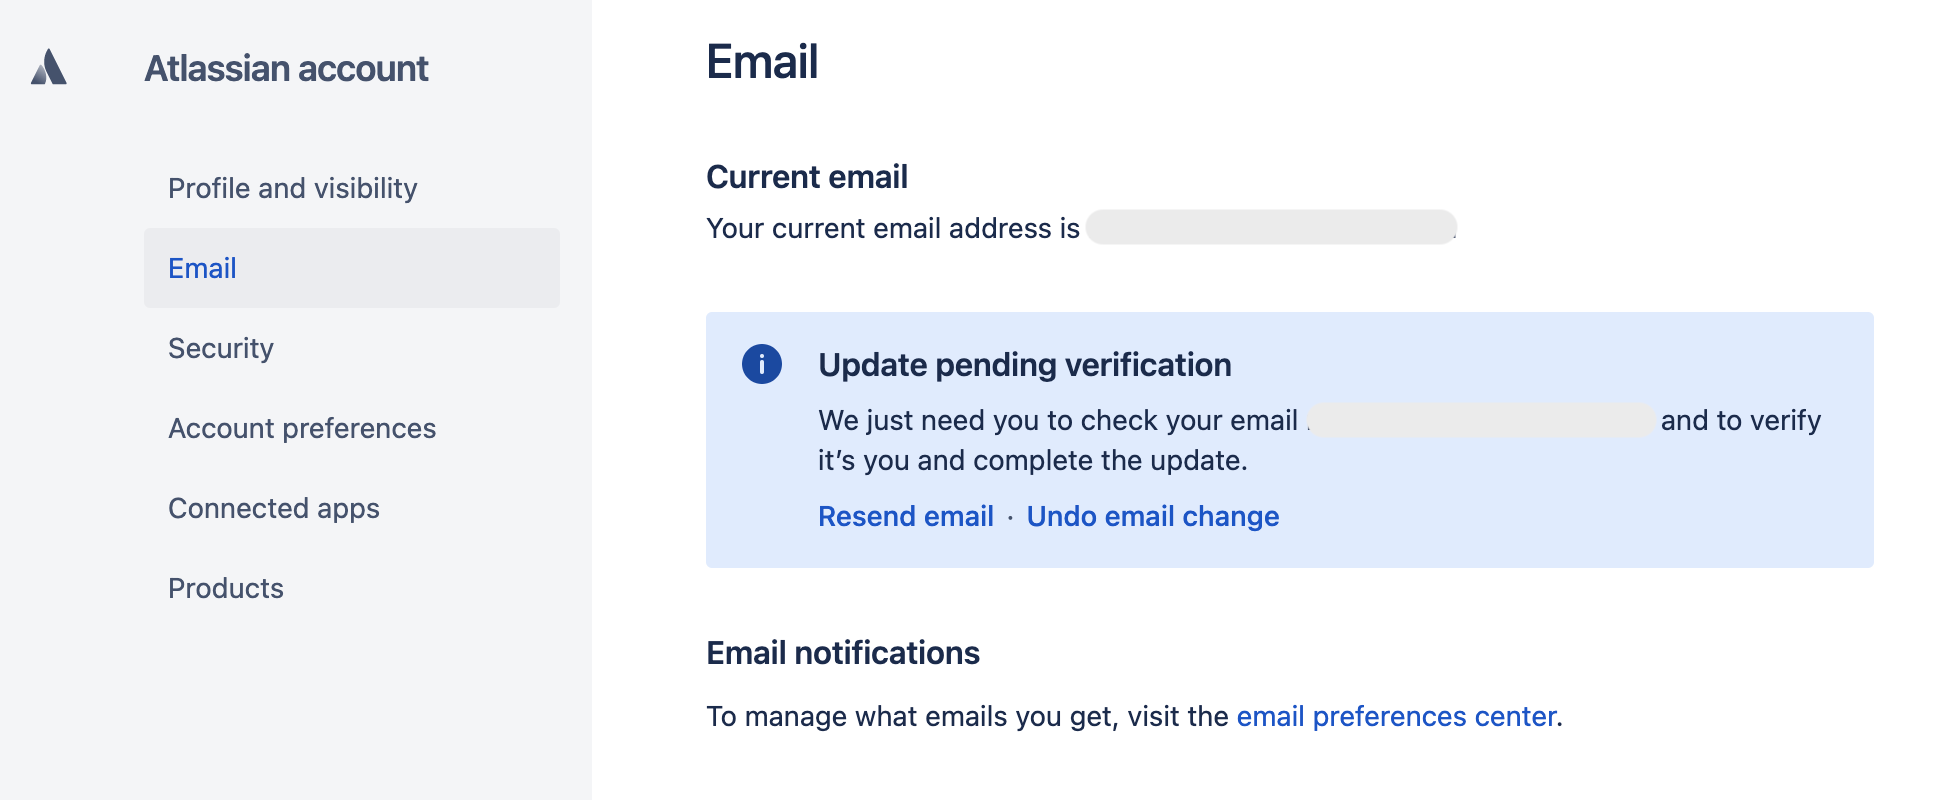
Changing your Account Email Address
The email address associated to the account can be changed by the user at any time:
-
Enter the new email address.
-
Save changes.
-
Check the inbox of the new email address to find the verification message.
-
Click Verify your email and follow the instructions to conclude the update.
If the email address you enter is already used in Atlassian you will get a notification:
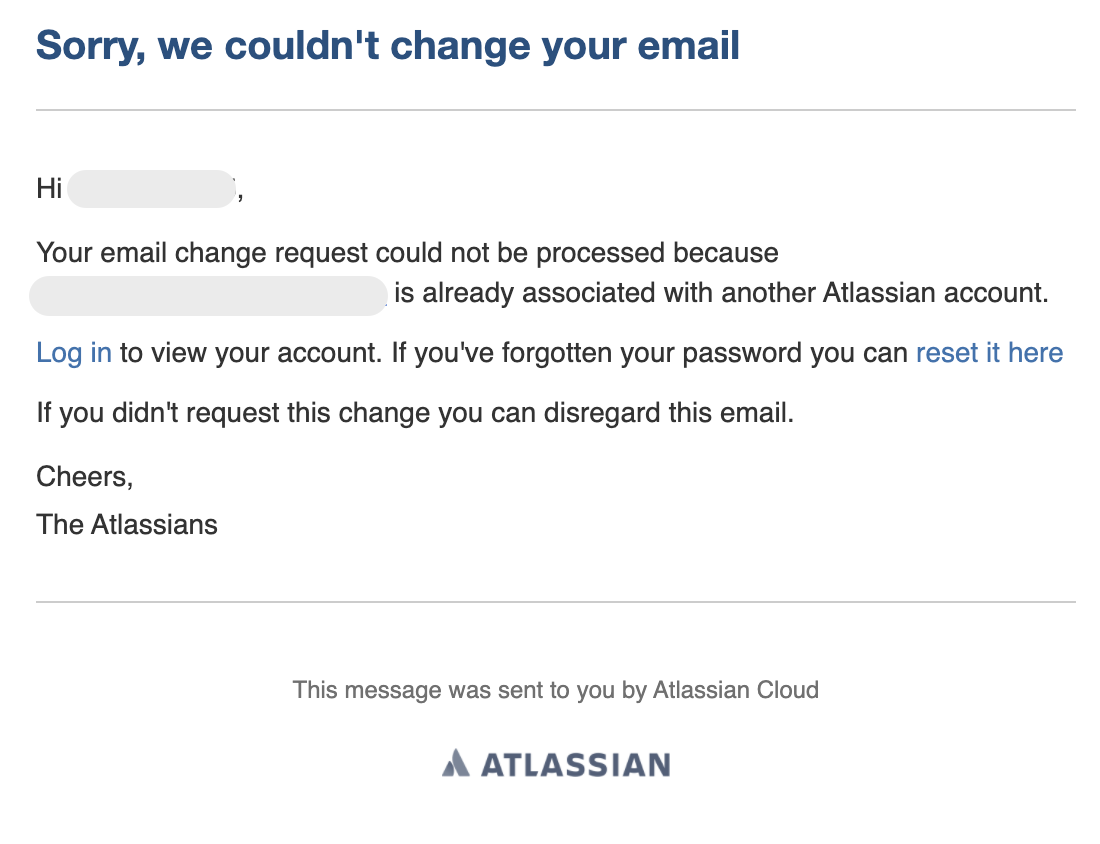
Login to the account associated to the desired email address and change its email address to another one (a third email address)The desired email address must be released from the existing Atlassian account so that it is available to be used on the original account:
-
This other email address must be something accessible: either a personal account or an email alias
-
Conclude the email verification and update on this other address – only this will fully release the desired email address
Issue List View
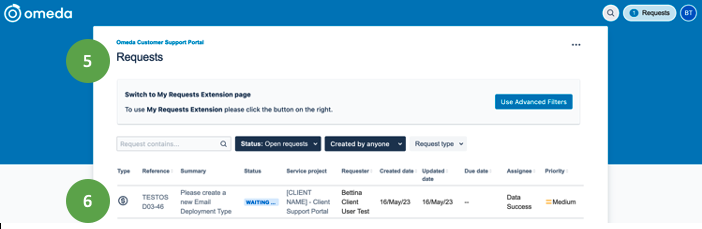
5. Requests
Once you select the “Request” button on the top right next to your profile icon, you will see a list of all requests you are involved with. The list defaults to “Open requests”, but you can filter by the other options listed below.
6. Issue Detail View & Features
Select the issue to view details, add comments, share with others in your organization, and change issue status.
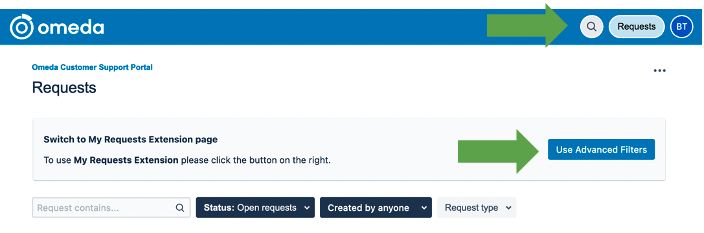
Issue List View – Request Filters
Create, Save & Share Request Filters
You can create your own filters to access frequently requested queries. To create your own queries simply go to:
“Requests >> Use Advanced Filters”
Build your Filter as desired from the options provided and then select “Save filter as“:
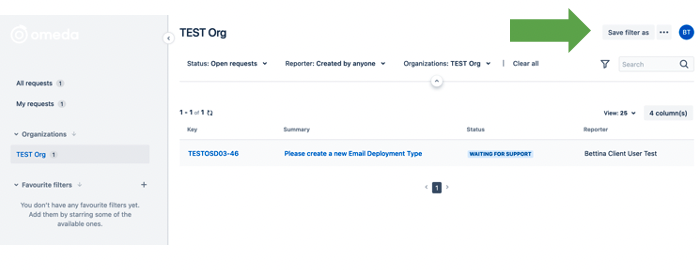
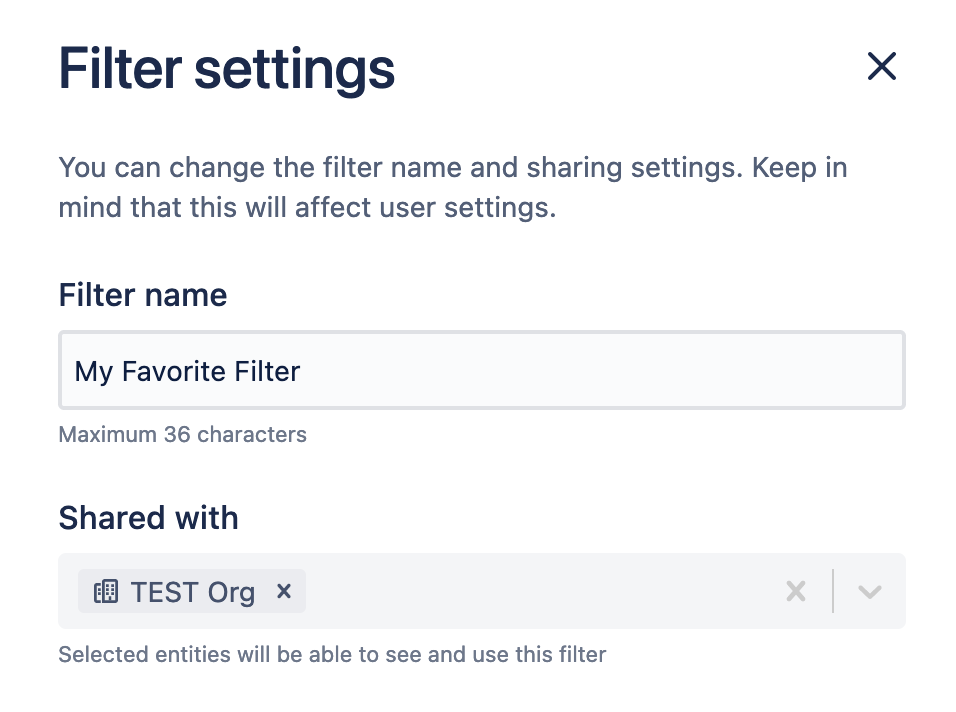
Saving your filter will bring up the Save menu where you can select to share your filter with other users or your entire organization. You can also add it to the “Requests Dropdown” for easy access by saving the filter, and then adding it to the Favorite Filter using the “+” sign in the left nav.
You can export your issues from a filter using the Export icon in the top right.
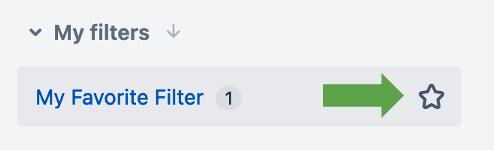
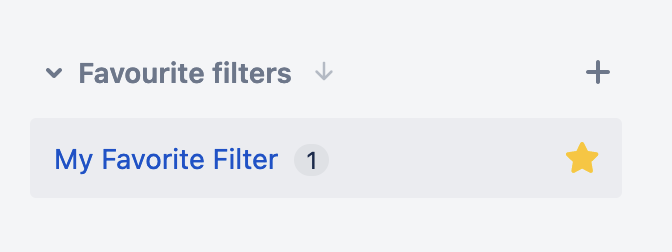
Add your saved filter to “Favorite filters” by clicking the “Star” icon:
This will add the filter to the Favorite Filter section:
Issue Detail View & Edit an Issue
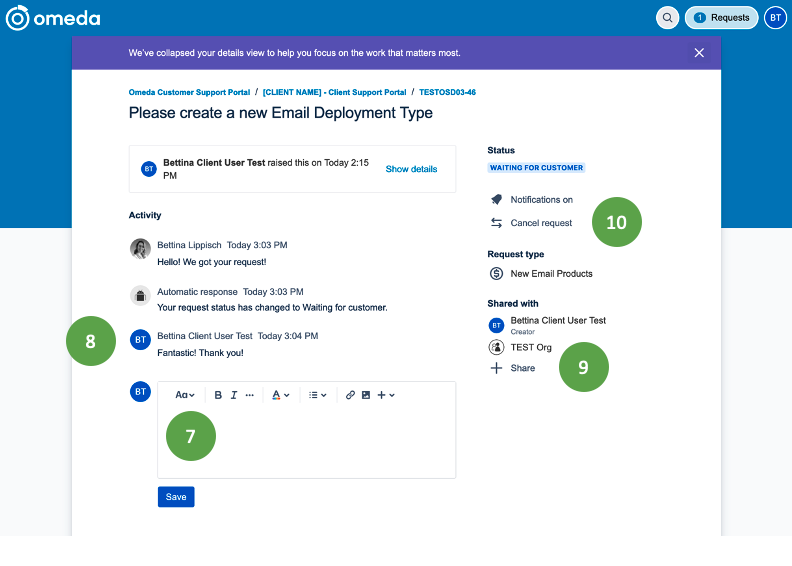
7. Comments
You can leave a comment on any issue by clicking into the comment bar. This will also bring up the option to attach files to the comment.
8. Ticket Activity
You can view the comment and ticket transition history in this section. The latest comment is marked for your convenience.
9. Share
Share a comment with other Service Portal users in your organization.
10. Change Status / Transition an Issue
You can change the Ticket Status in this section: Here are the ticket- and transition status types available:
10.1 Ticket Status Types
10.2 Ticket Actions
11. View Participants
View who is participating on the issue.
Create a Request Screen
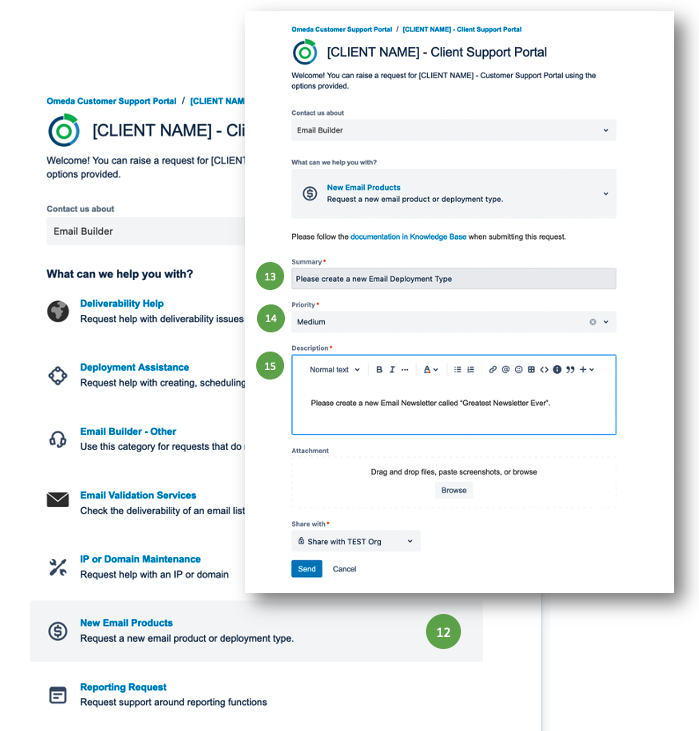
12. Select the desired Request Type
Select the Request Type to bring up the Request Form
13. Summary
Please give your request a descriptive name so you can easily find and identify the request.
Good practice is to include the brand abbreviation and a descriptive summary, or another indicator that lets you easily search for or distinguish one request from another.
14. Priority
Please select the priority for your request. Please indicate due dates as applicable and where appropriate, using date fields where available, or add a date into the ticket description field, instead of using priorities to indicate urgency.
The Omeda support team will be able to support you more effectively having a due date rather than priority, so please keep tickets in normal priority unless it is an emergency or urgent request with a faster than normal turn-around time.
NOTE: Priority “Critical Path” or “Escalate” is reserved for system outages/service interruptions, and emergency Email Support. For requests requiring prioritization, please assign a due date were applicable, select Priority “High”.
15. Description and other Ticket-Type based Fields
Each request type will have a “Description” field to explain your request in more detail. Please provide as many details as possible so we can assist you quickly with the right information at hand.
Some ticket types also have additional fields, e.g. Deployment ID, Due Dates, Links to Queries, etc., depending on the request types.
Some fields are optional, others are required, depending on the type of request you are submitting.
16. Attachments
You may attach screenshots, files or other documents that are required to solve your request.
Attachment Size Limits:
The maximum attachment size is 20MB. Please break down larger files into individual files if necessary.
17. Submit Your Ticket
Select “Create” to submit your ticket.
Manage Your Profile
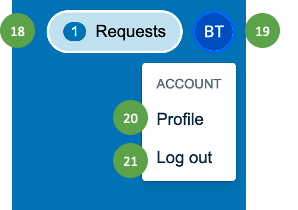
18. My Requests
Select the Request Type to bring up the Request Form.
19. Profile Menu
Click the Avatar to show the Profile menu.
20. My Profile
Select to view/edit your profile.
21. Log Out
Log out of the Customer Portal.
Your Profile Page
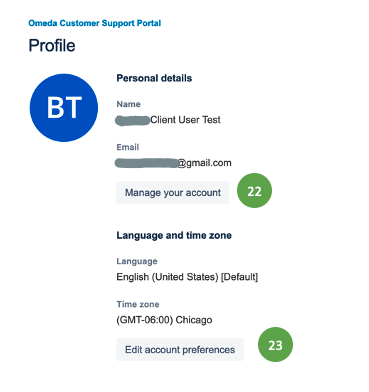
22. Manage Your Account
Click this link to edit your profile settings, including name, profile photo, notification email, etc. by selecting the desired header:
-
Profile and Visibility – About You settings and who can see them
-
Email – Update your email
-
Security – Update/Reset your password
-
Account Preferences – See below under 23. Account Preferences.

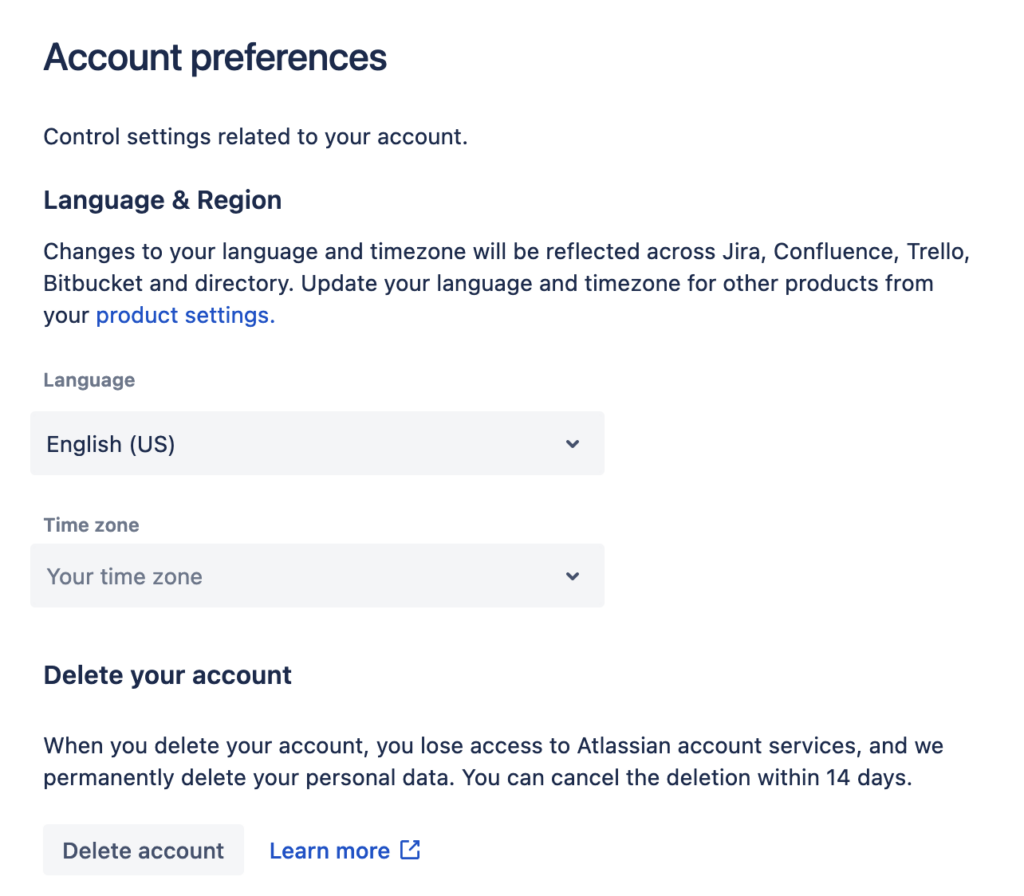
23. Edit Account Preferences
Change Language & Region, Time Zone, or Delete your Account (CAUTION: will remove all access).
Do you have additional Questions?
Additional Question about the Omeda Customer Support Portal? Contact your Client Success Manager, or email clientsuccess@omeda.com.
Table of Contents