Integration Log
The Integration Log gives you full visibility into your third-party integrations and provides a detailed record of every backend and webhook post, including the date and time, request, response, customer information, and more.
With this feature, you can:
-
Easily monitor activity: Track each request sent from your forms in real time.
-
Validate responses: See the exact response returned from third-party systems to confirm successful posts.
-
Quickly troubleshoot issues: Identify errors at a glance and understand why a request may have failed.
By making integration data transparent and accessible, the Integration Log helps you resolve issues faster, confirm successful submissions, and build confidence in your connected systems.
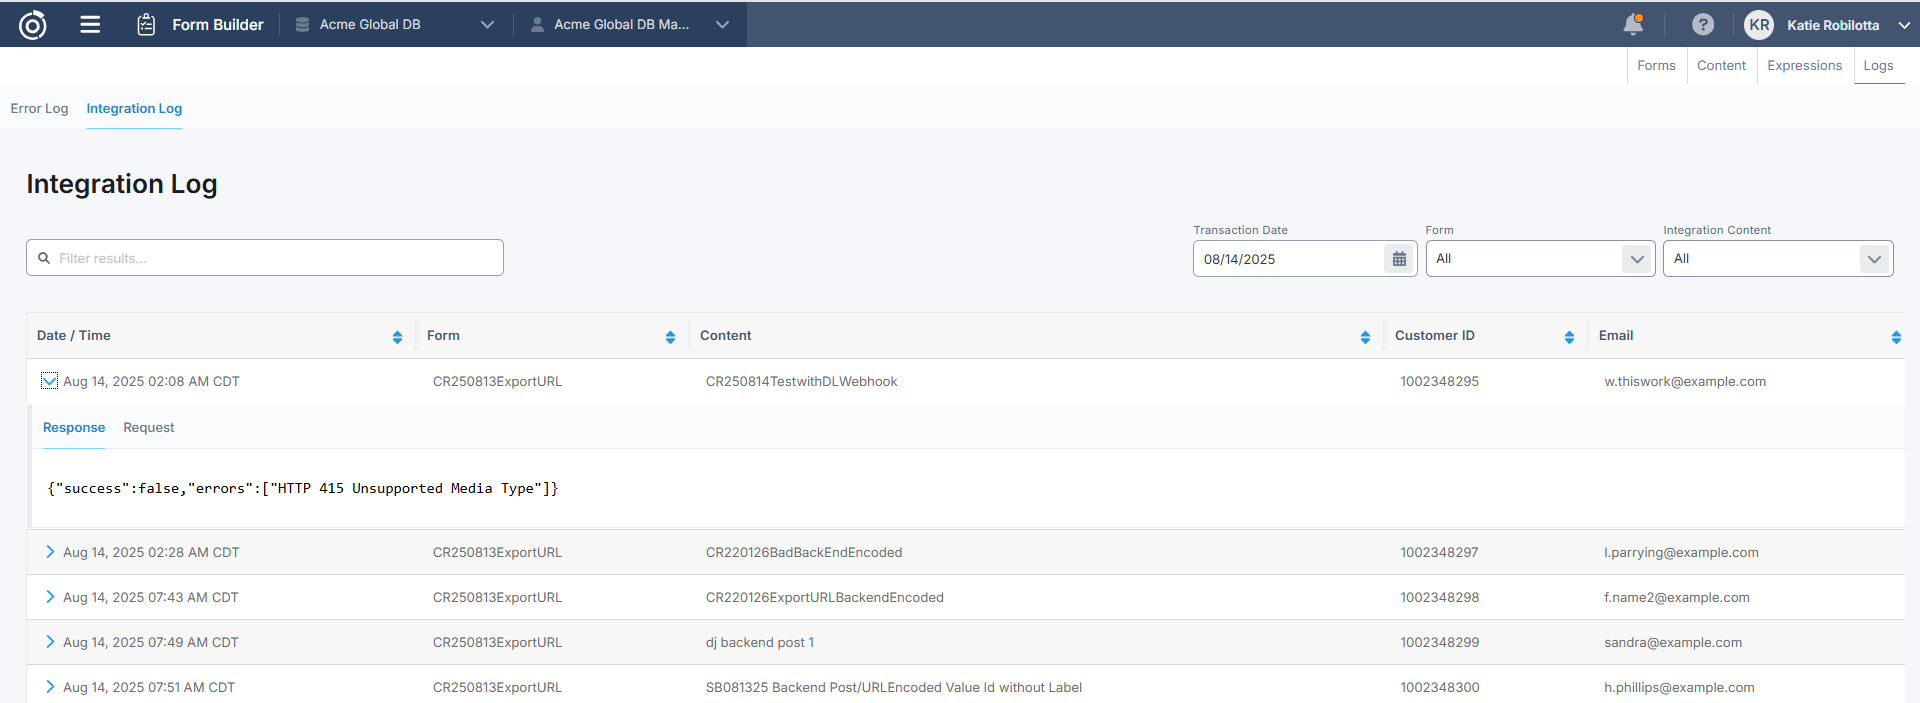
To use the Integration Log, first navigate to Form Builder → Logs → Integration Log tab.
You will need to select the date of when the form submission took place that you are investigating. The best way to find the submission you’re looking for is having the exact date/time and form to narrow your search.
You can also use the Text search to search for specific information about the post, like email or customer ID. Or use the Form drop down or Integration Content drop down to search for only logs coming from a specific form or Integration content.
After you choose the Transaction Date (and any other filters), a list of logs will appear. To view the log, click on one of the rows. There will be 2 tabs; Response and Request
-
Response: This will display the response provided by the third-party you are posting to. It will let you know if the post was successful or not and in most cases, give reasoning as to why it failed.
-
Request: This is the post to the third-party from Omeda so you can see exactly what was sent to the third-party.
NOTE: The Integration Log only supports backend posts and webhooks.
Error Log
The Error Log helps Form Builder users troubleshoot failed form submissions when testing newly created/edited forms, or after receiving a customer inquiry. Users are able to view the full API response in the Error Log after receiving an error upon form submission. This is great for troubleshooting issues that need a bit more investigating.
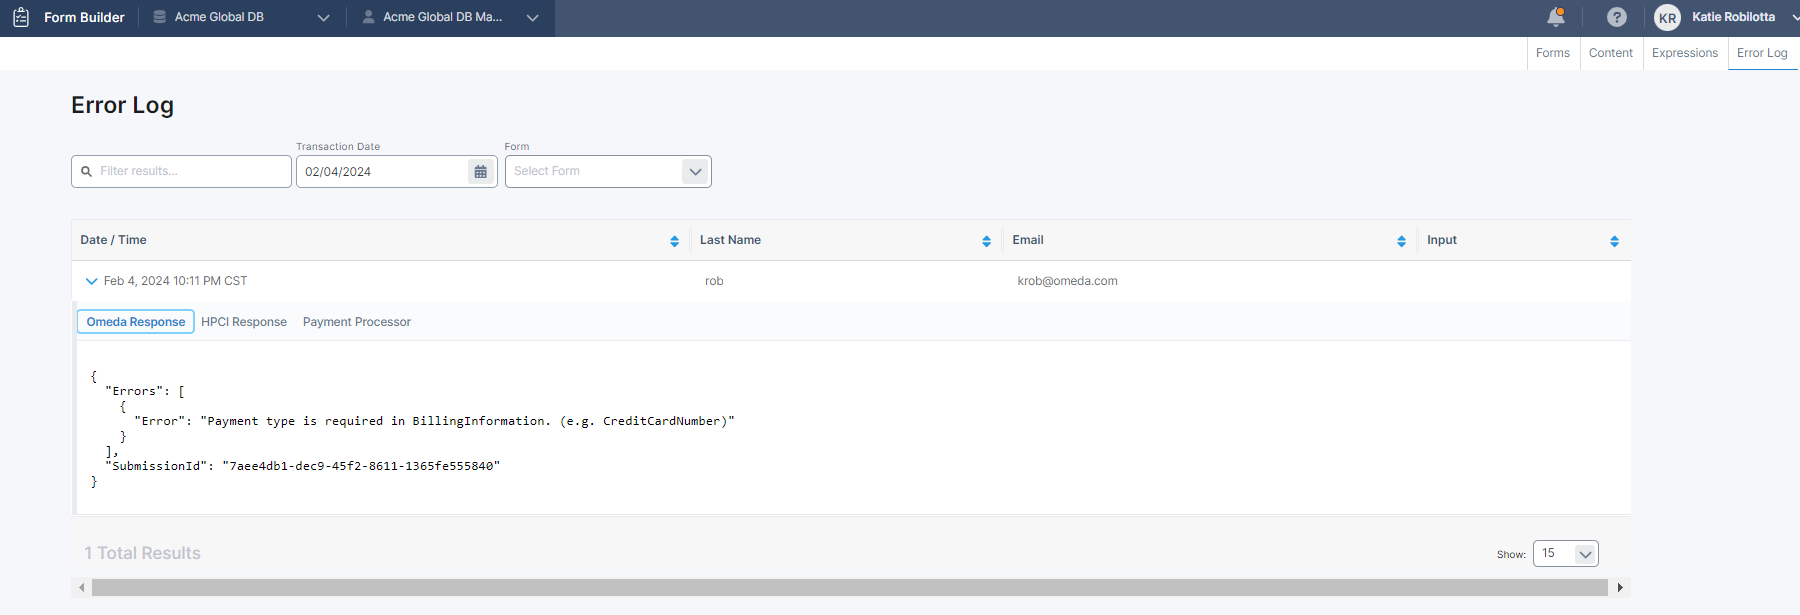
To use the Error Log, first navigate to Form Builder → Logs → Error Log tab.
You will need to select the date of when the form submission took place that you are investigating. The best way to find the submission you’re looking for is having the exact date and time to narrow your search.
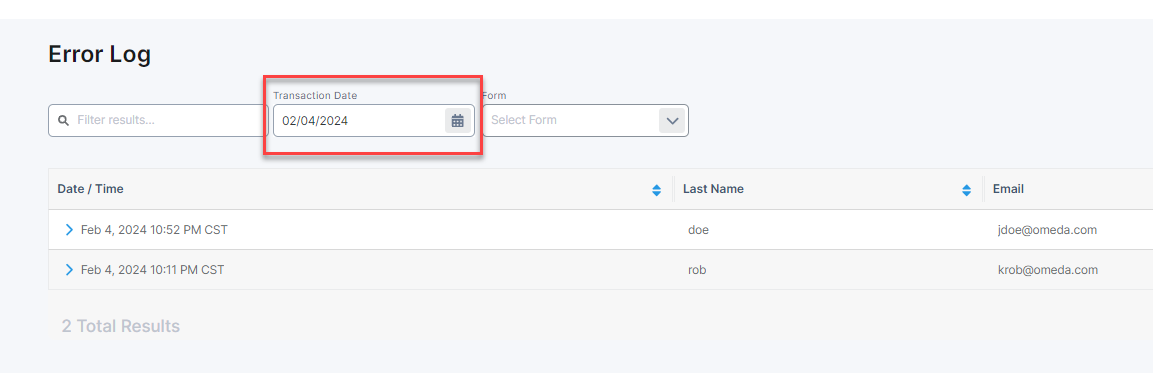
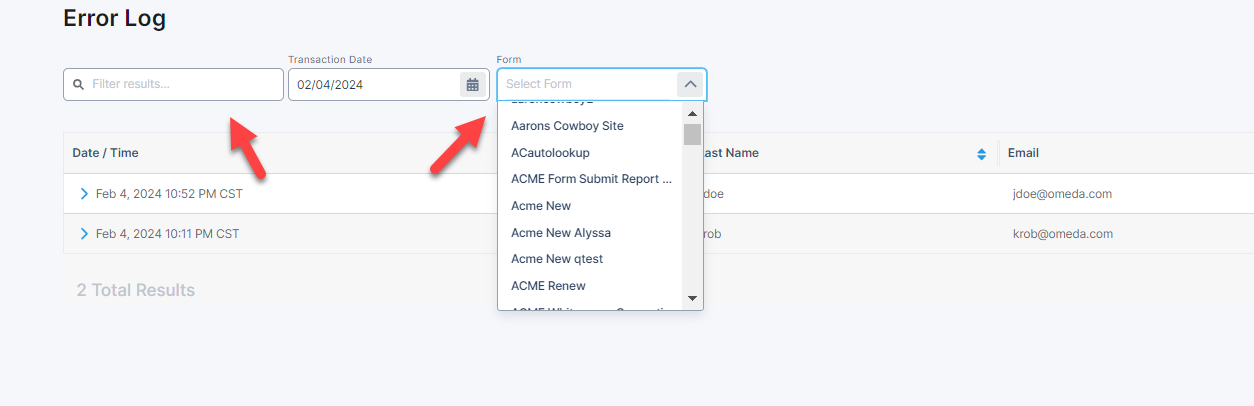
You can also use the Text search to search for specific information about the submission, like email or customer ID. Or use the Form drop down to search for only errors coming from a specific form. NOTE: not all API responses will include customer info or the form so these search tools (text search and form drop down) may not always display all error submissions. Again, the best way to narrow down your search is by having the exact date and time of the form submission.
After you choose the Transaction Date (and any other filters), a list of errors will appear. To view the error, click on one of the rows. There will be 3 tabs; Omeda Response, HPCI Response, Payment Processor.
-
Omeda Response: This will be the error response from the Omeda API.
-
HPCI Response: If there was payment on the transaction that errored, you may be able to find out more info on why the payment failed using this tab which is the API response from HPCI.
-
Payment Processor: This is the API response from the actual Payment Processor so this can also provide helpful information if a payment transaction failed.
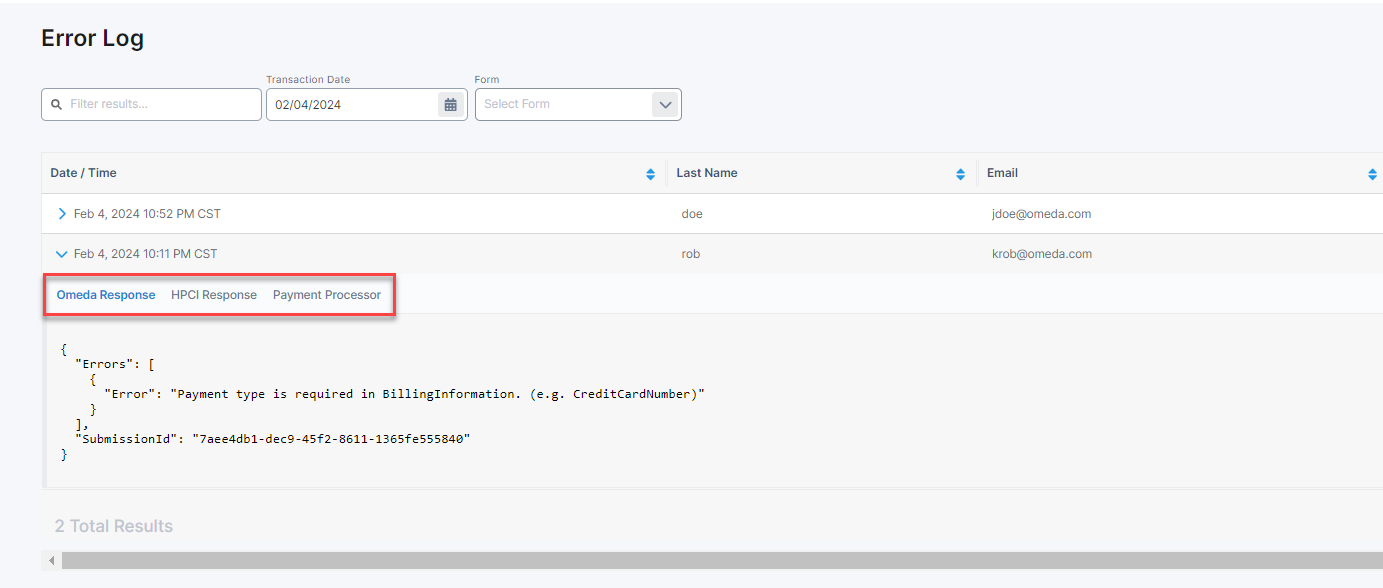
Table of Contents