Form Builder – Expressions
The Expressions tab will bring you to our expression builder which will allow you to create simple or complex logic. Expressions can be used for displaying or requiring content on your form, sending emails, or directing users to different pages or different URLS based on defined criteria the visitor meets. For example, if you want the Zip Code field to only be required for subscribers from the United States or Canada, you would create an expression for this. You can create an expression from the Expression tab or you can create them directly from builder.
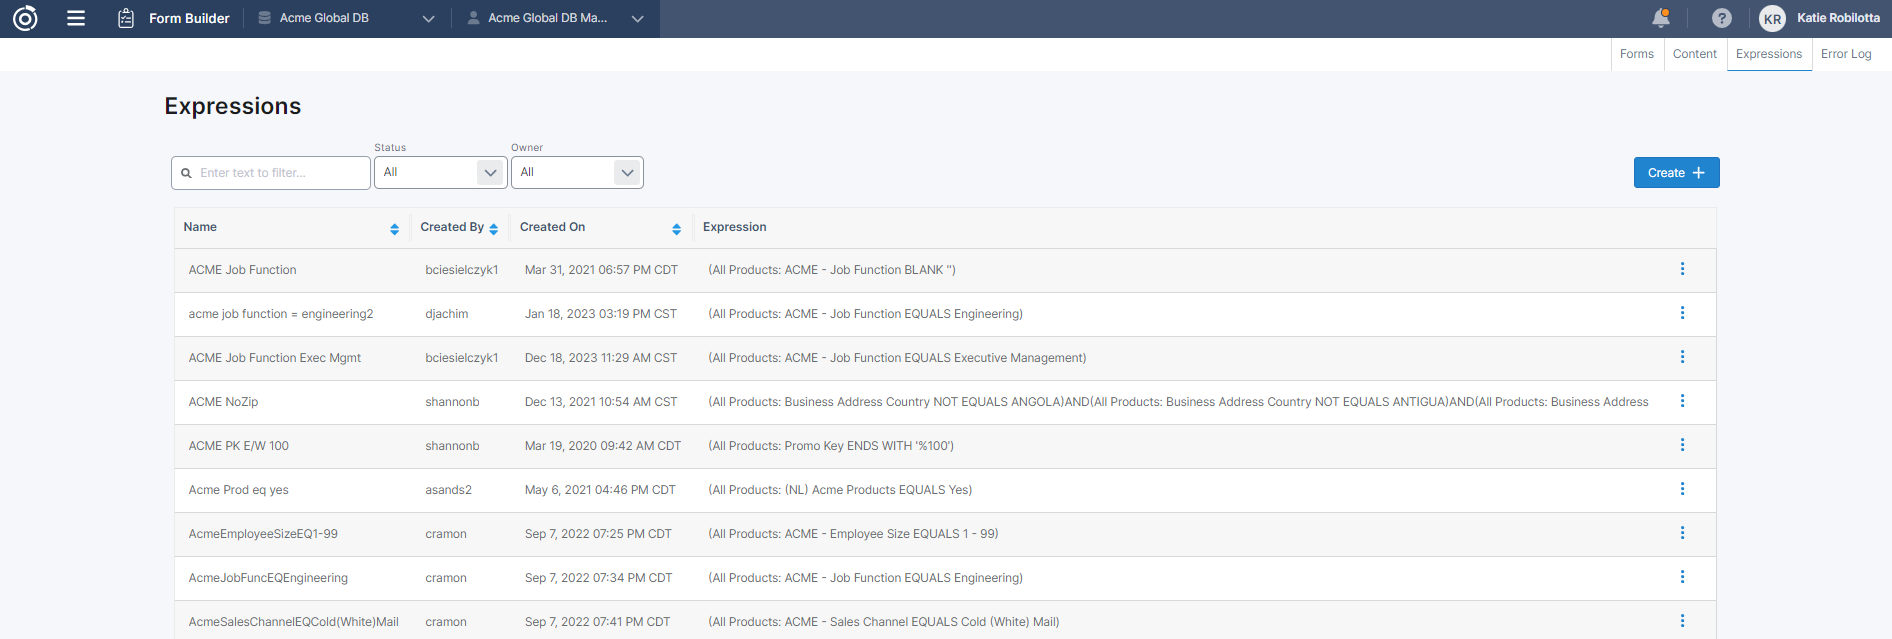
Expression Dashboard
The Expression Dashboard lets you filter down, sort, and search for the already existing expressions. You can also Create, Edit, Copy, or Archive individual expressions here as well.
Expression Builder
Let’s go through all the pieces of Expression Builder to get a better understanding how to edit/create an expression.
Left panel: Lets you search for an existing expression and add it to the current one you’re working on.
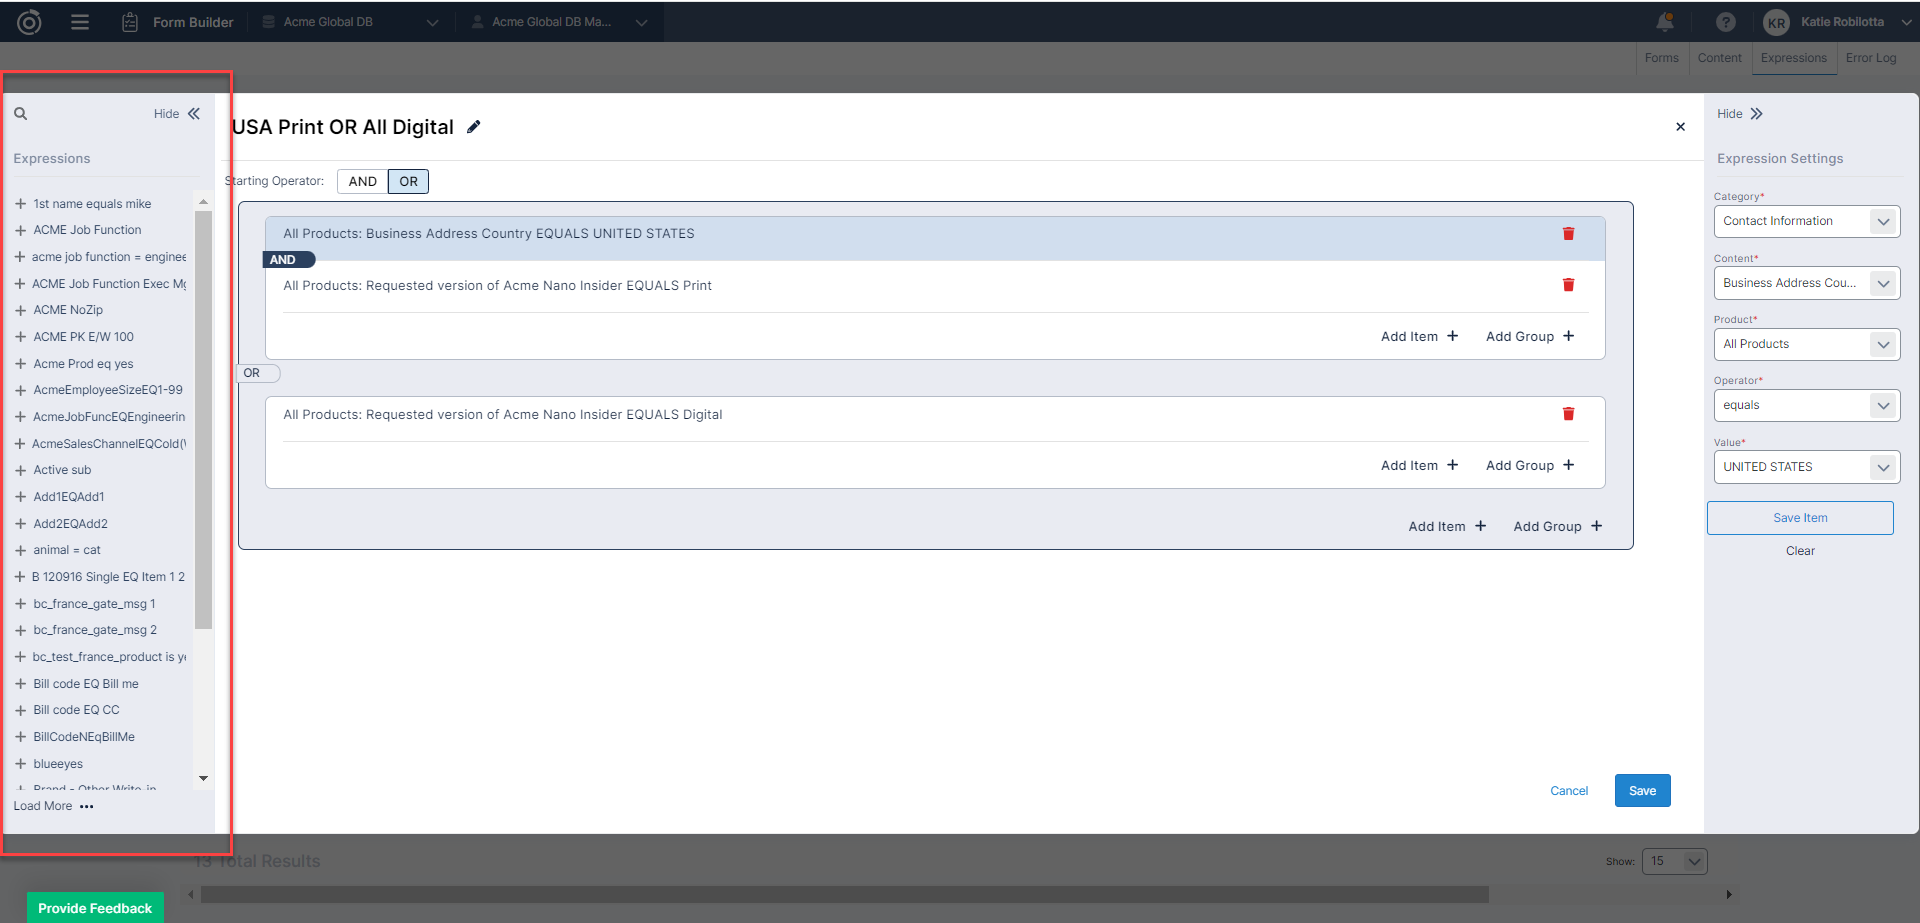
Title: Name your expression something clear and descriptive so you know what the expression’s purpose is.

Canvas: This is where you’ll build your expression. Select the Starting Operator (AND / OR). You’ll be able to add individual Items or Groups, or Individual Items and Groups within other Groups. You’ll also be able to delete Items/Groups. See expression Sample section.

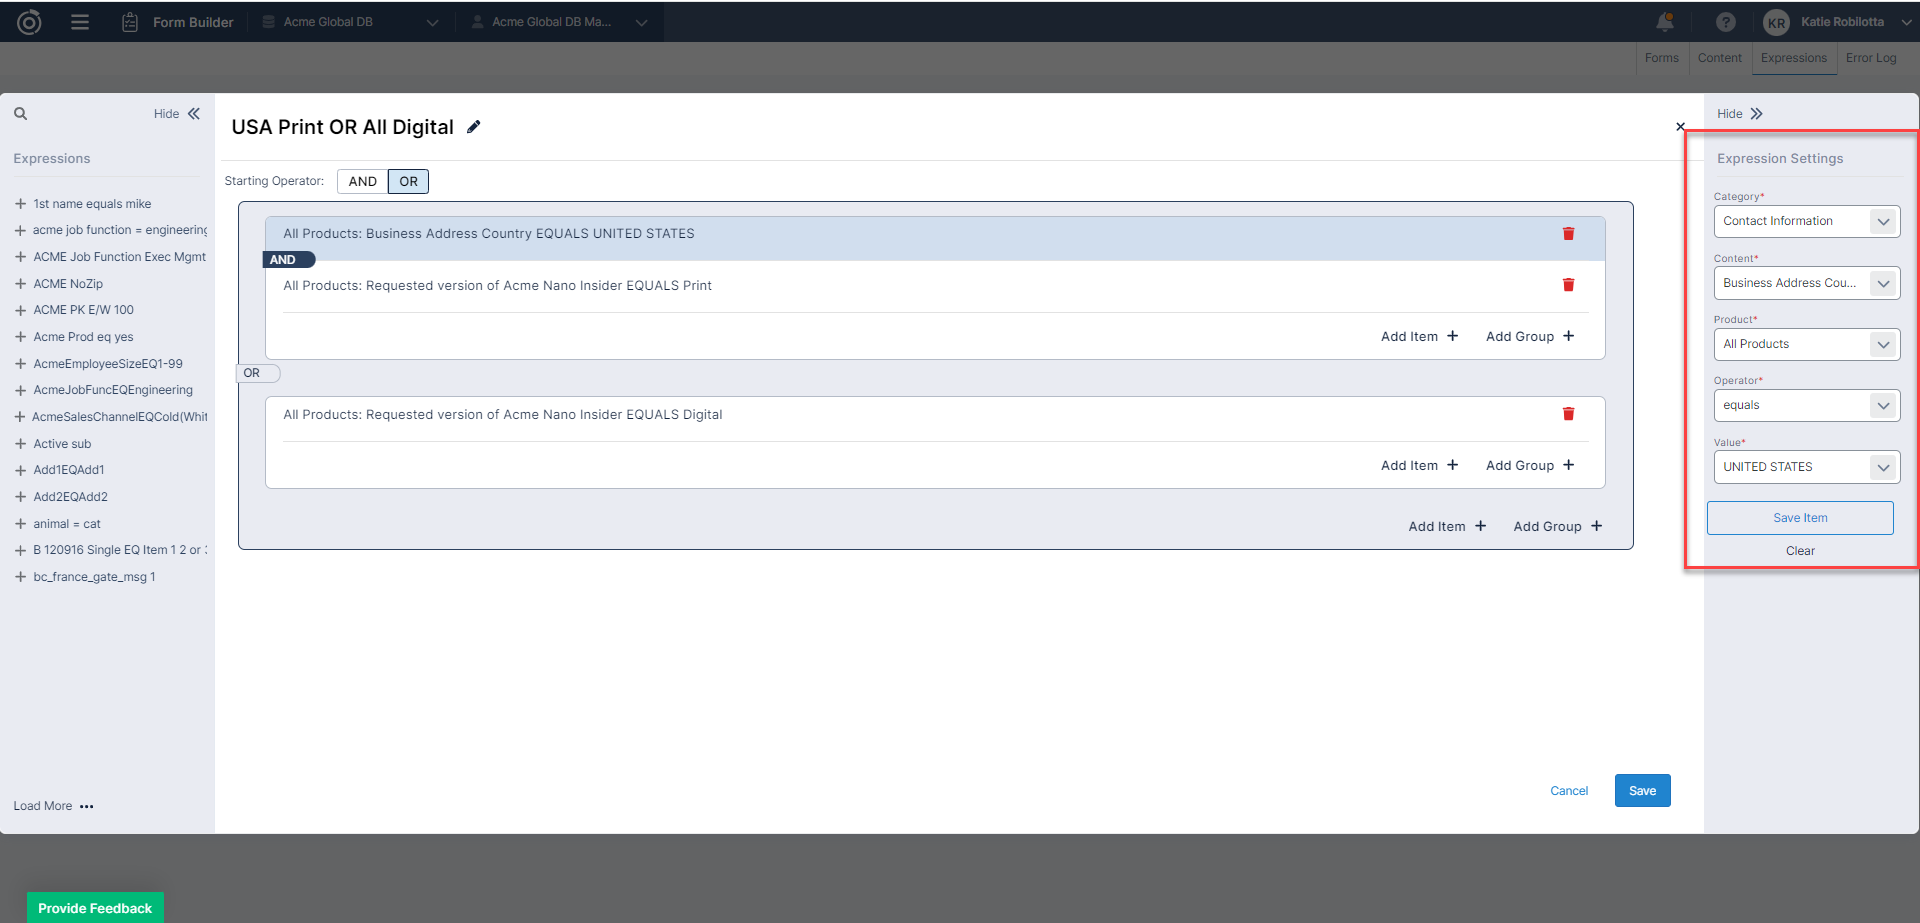
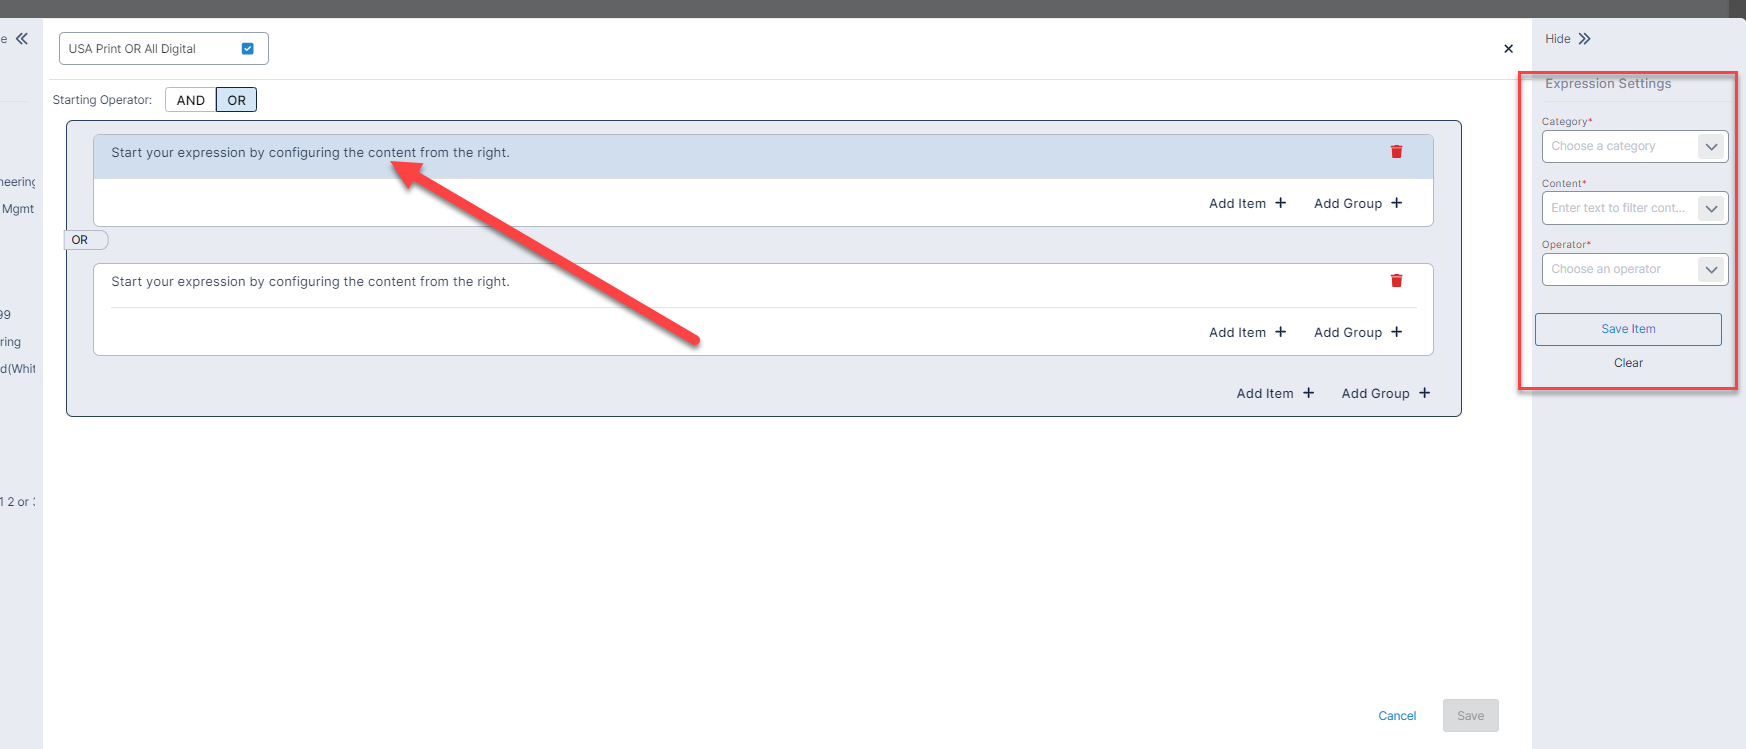
Expression Settings: This is where you will select the logic. Choosing which fields and values you want to target. Depending on what Category you select will dynamically display what’s available to use in the remaining fields.
Edit
To edit an existing expression, click the ‘Edit’ button on any expression in the action menu.

This will open your expression above in the builder. If you need to delete an item, hover over the box and click the ‘Delete’ button:

To add an item within a group, select the Add Item+ button within an existing group.

To add another group within a group, select the Add Group+ button inside an existing group.

To add an individual item, select the Add Item+ button.

To create a new group, select the Add Group+ button.

Copy
This will copy the expression. You can rename and add or delete any items.

Archive
If you want an expression removed from the Active list, select this option:

If you try to archive an expression that is being used on a form, you will receive an error letting you know which form(s) the expression lives on. To archived the expression, you will need to remove it off the listed forms first, then archive the expression.
Add
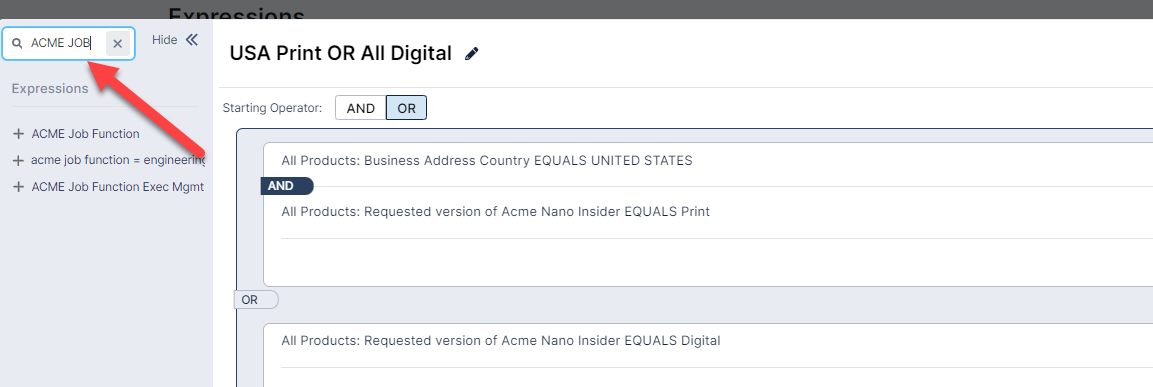
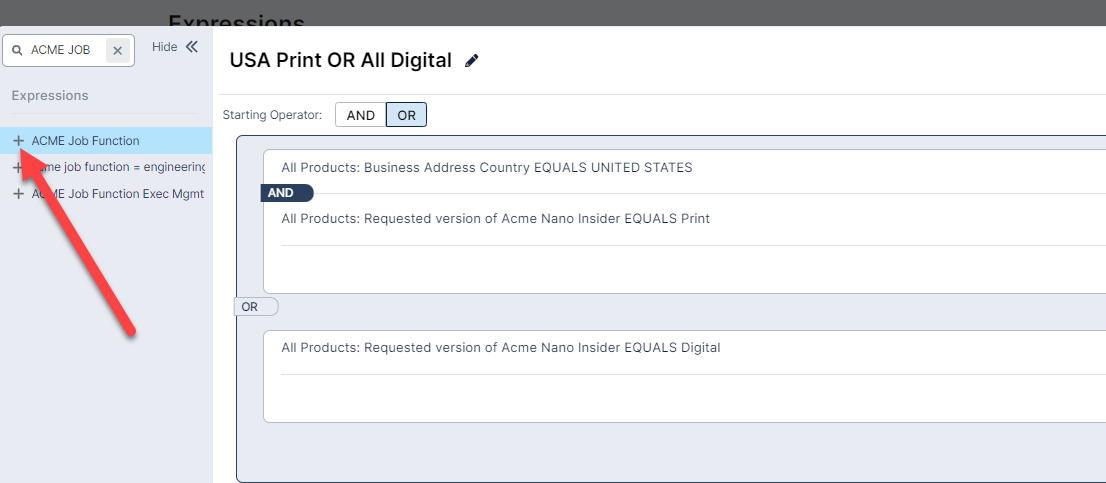
If you want to add an existing query to another query, select ‘Edit’ on the query you are working on, use the search bar in the left panel to search for the query, then select the ‘+’ button on the query you want added to the query you are editing.
Sample
Follow the steps listed below to create a new expression. The goal of the expression in the example is to direct domestic subscribers who requested a print version of a magazine or any subscriber who selected digital, past the payment page so these subscribers are not required to pay.
Navigate to the Expressions tab in the Navigation bar
Select the Create + button
Create a title for your expression in the title text box.

Since we’re creating two conditions (USA Print OR All countries Digital), we’re going to start of by creating two groups. To do this, click the Add Group + button twice.
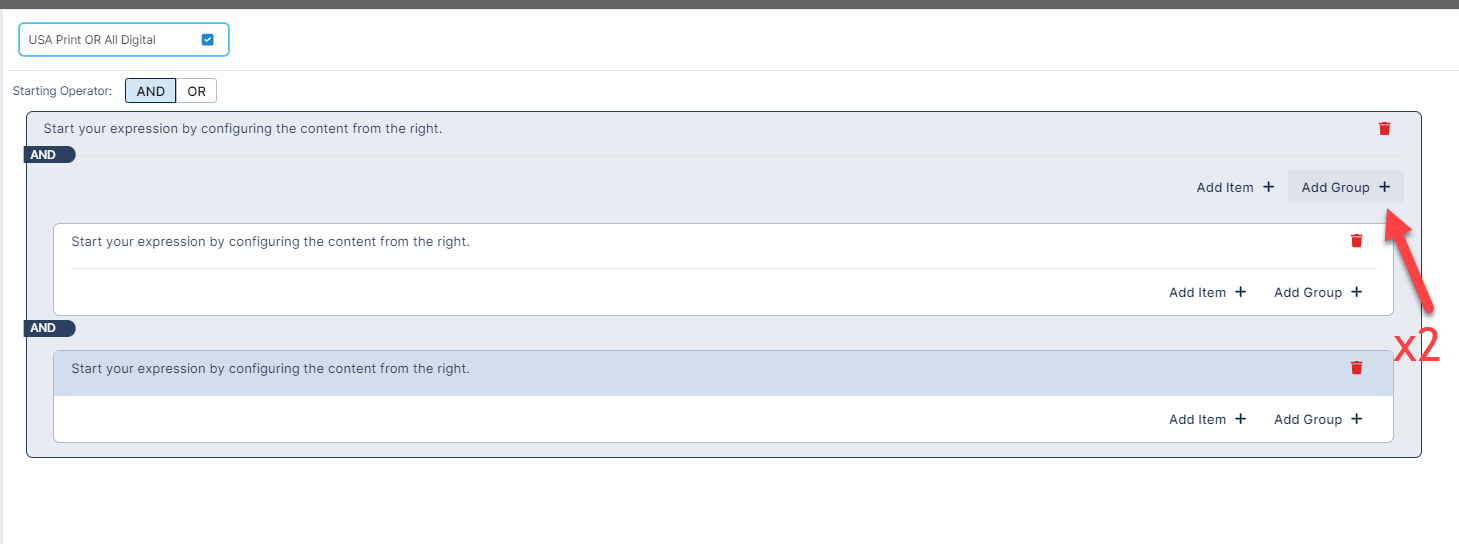
Delete the first condition as we wont need it for this expression. If you need to create an expression that starts without a group, you would start your expression there.
Switch the operator between the groups to OR since we’re doing the first group as country = USA and version = print OR the second group as version = digital.

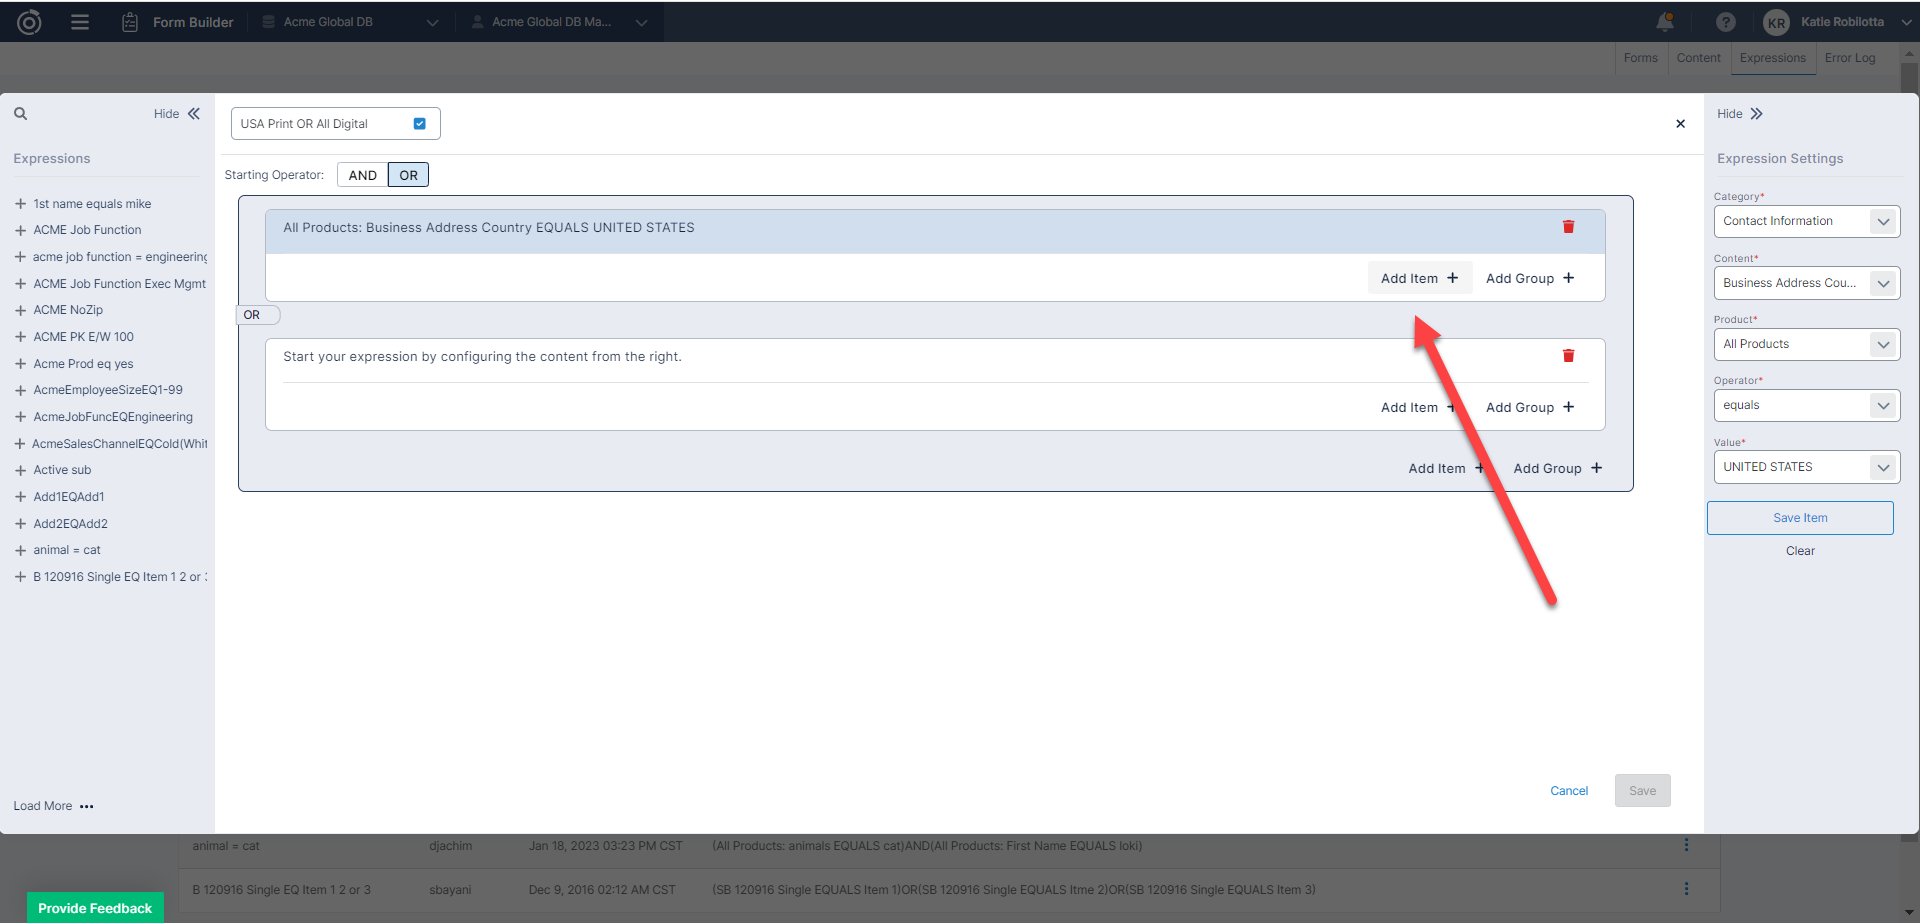
Let’s add content into our first group. First, we’ll add Country equals USA. Click on the text in the first group box. The expression settings will appear in the right panel which is where you will define the criteria.
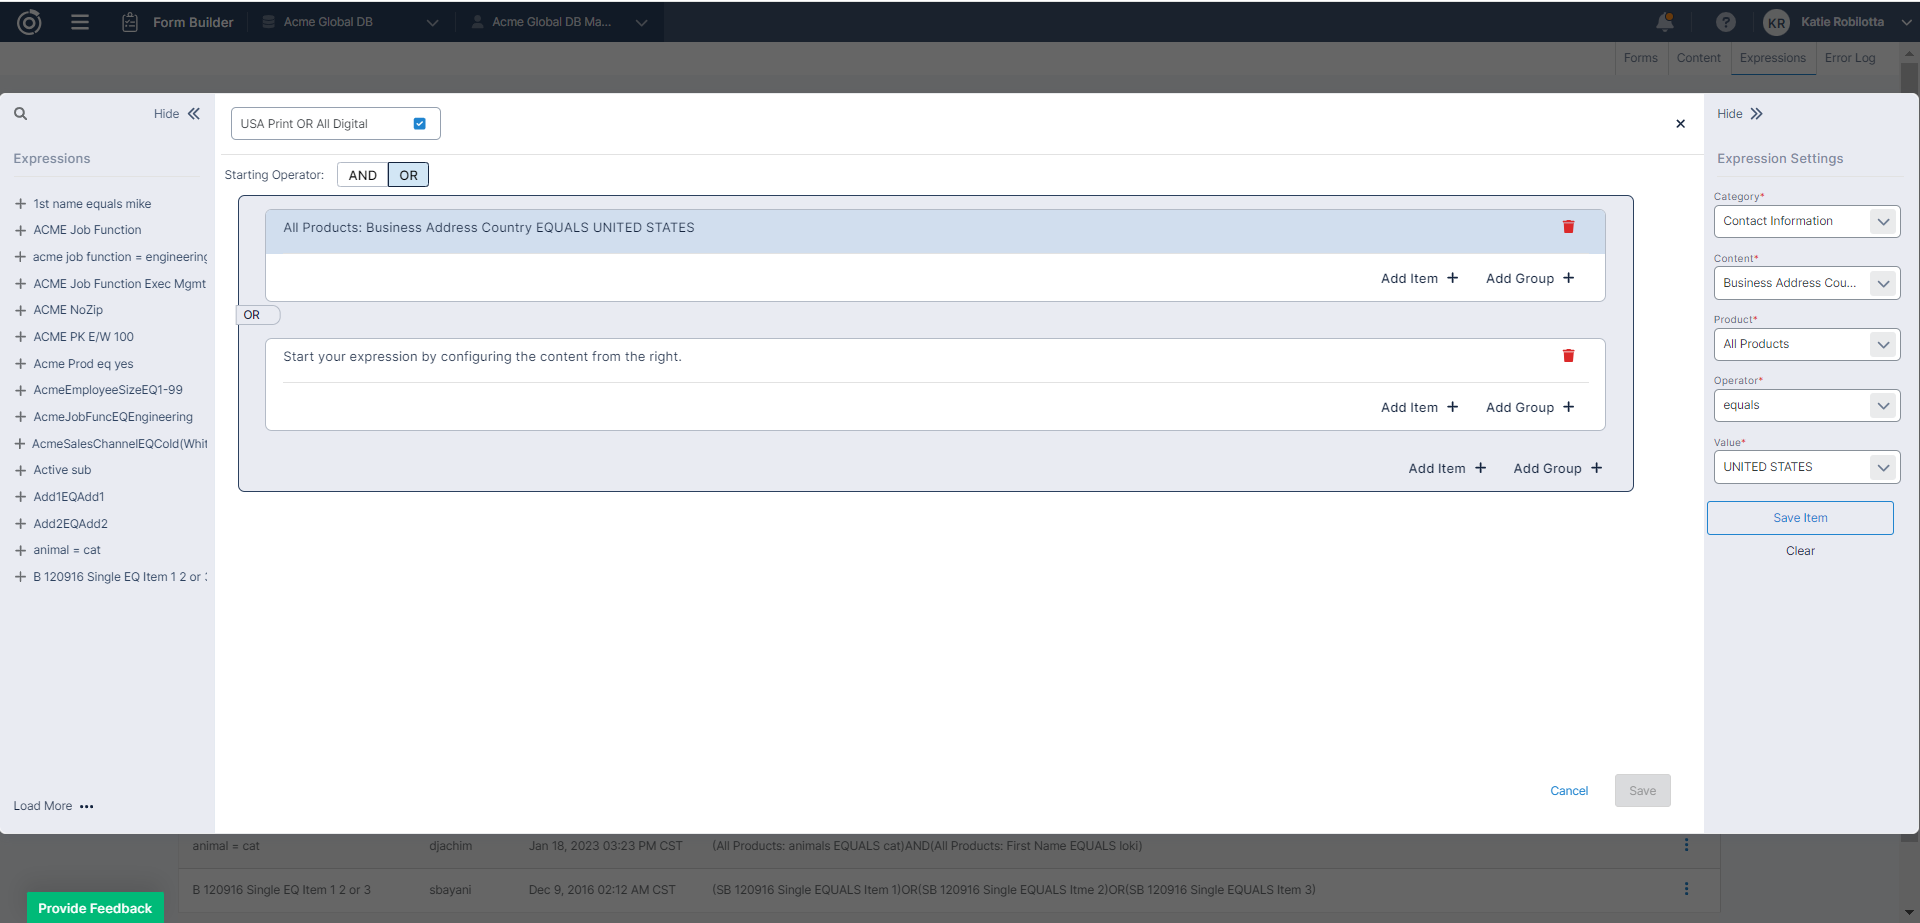
In the Expression Settings panel, click on the Category dropdown and select Contact Information. The Category field will drive what displays in the Content drop down.
Next, search for Country and select either the Business or Residential Address Country (whichever one you use on your forms).
If your expression should only be looking at elements of a particular product, select that product from the Product drop down. For this example, we are not looking at the Country field specific to a product so we’ll keep the default of “All Products”.
The operator will be set to “equals”.
We will set the value to “United States”.
Select Save.
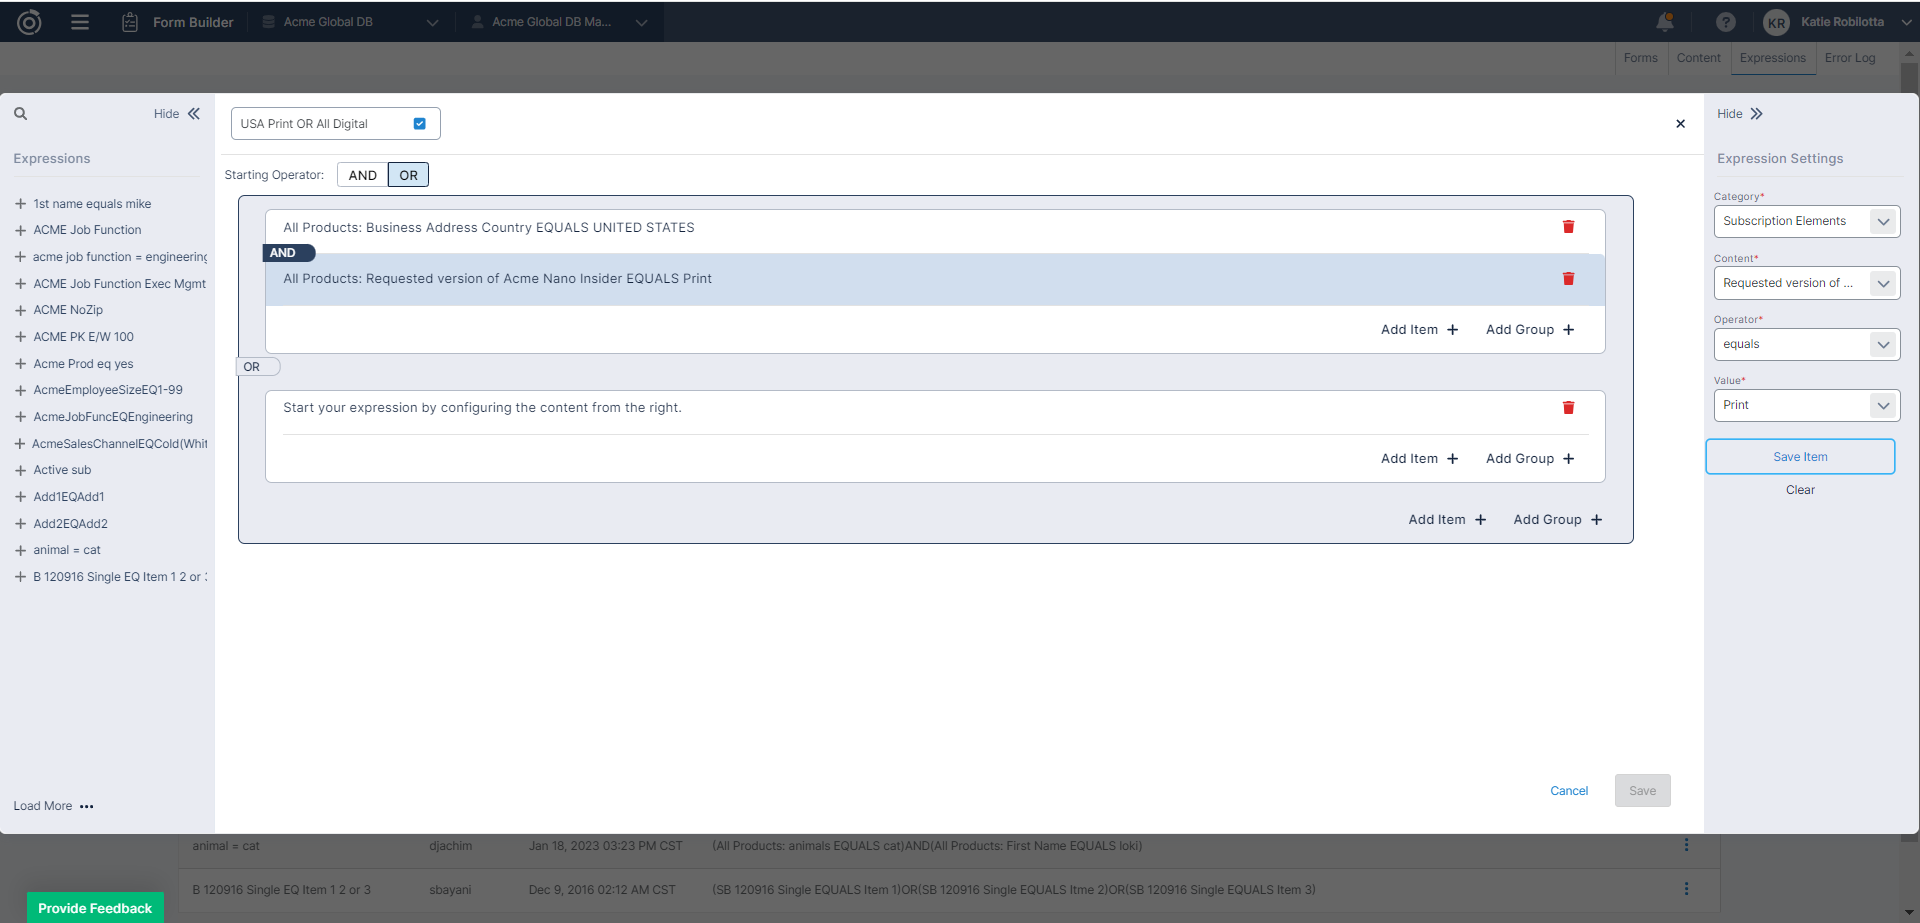
Now, let’s add the Requested Version equals Print to the first group (Country equals USA AND Requested Version equals Print).
Select the Add Item+ button in the first group.
Define the criteria in the Expression Settings panel. For this example:
Now we’ll want to add criteria to the second group: Requested Version equals Digital. By defining this criteria in the second group, any visitor who selects digital as the requested version, regardless of what they selected in the Country field, will skip the payment page of our form.
Click on the text in the second group “Start your expression by configuring the content from the right” to begin configuring the Expression Settings.
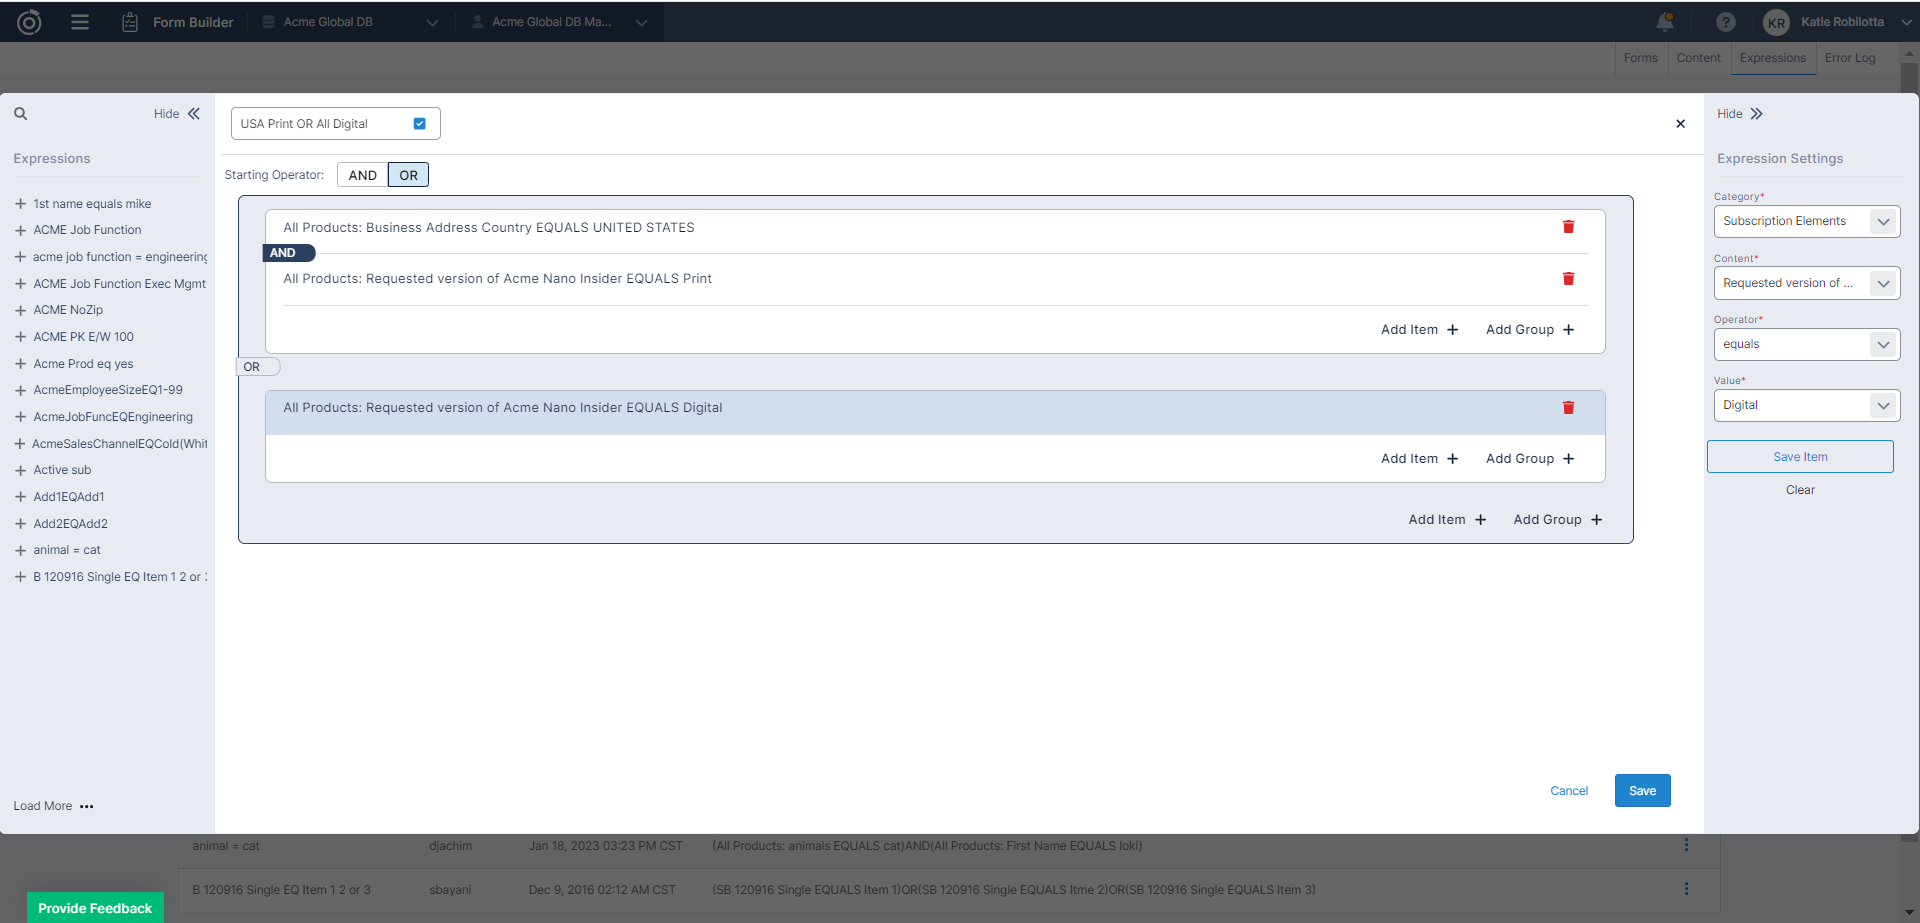
Save and you’re done! Now the expression can be used on any of forms that contain the fields defined in the expression.
Table of Contents
