Form Builder – Payment Gateways
With Omeda’s integration of three distinct payment gateways, Stripe, HostedPCI, and PayPal, businesses have the flexibility and security they need to process transactions efficiently. Whether opting for the robust security measures of HostedPCI, supplying different payment methods with Stripe, or the familiarity and convenience of PayPal, users can tailor their payment processing to best suit their needs. These payment gateways not only enhances the payment experience for customers but also provides a comprehensive solution that prioritize both security and convenience.
Stripe
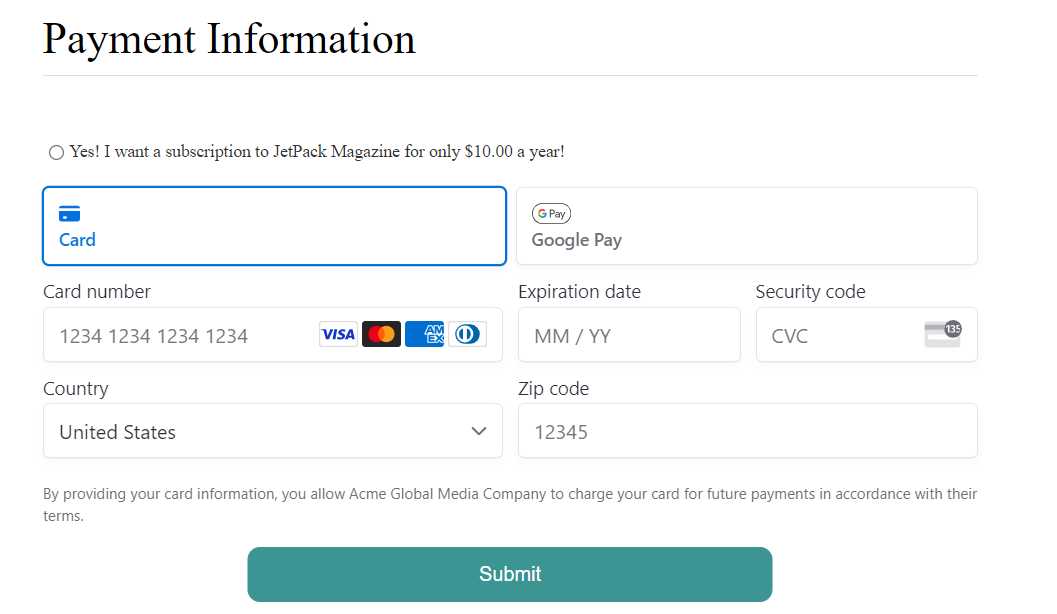
Our Stripe element simplifies payments on your form by providing a unified solution that supports credit cards, Apple Pay, and Google Pay. With this element, users can choose their preferred payment method for a seamless checkout experience and ensures a secure and consistent interface across all devices. By using Stripe’s element, you benefit from advanced fraud protection, compliance with industry standards, and a single integration that makes it easy to manage multiple payment options.
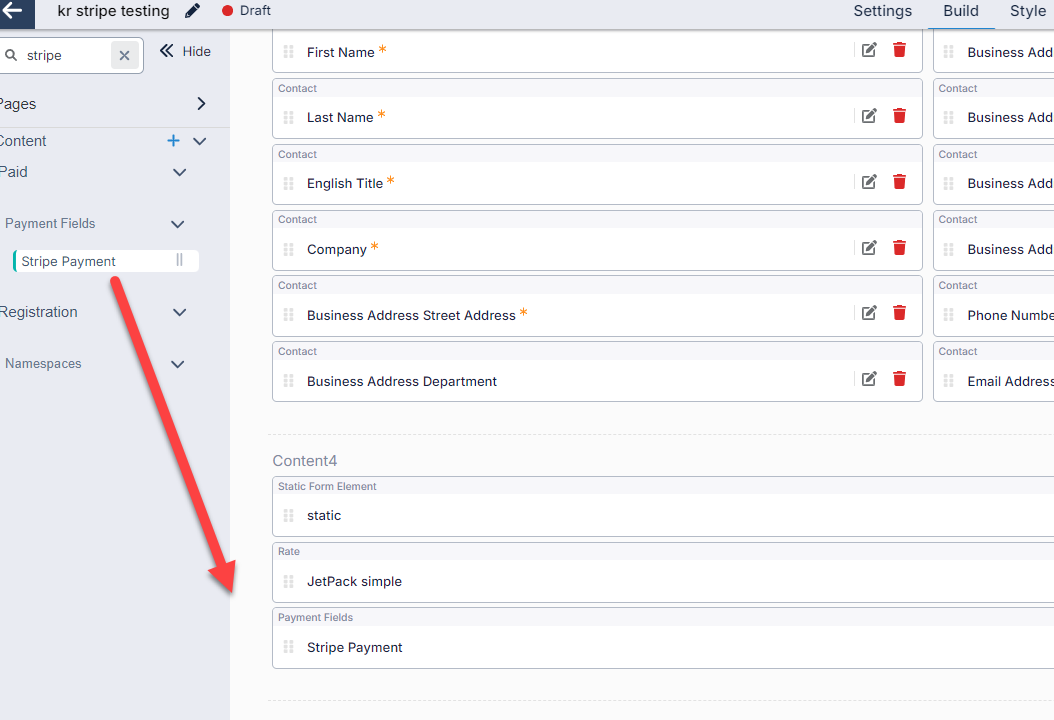
Once you have followed the instructions to setup the Stripe Payment Gateway for a given product, the Stripe Payment element can be added to a form built over that product.
The Stripe Payment element can be found in the Paid section of the builder. You will want to drag this onto your form where you want the payment fields to appear.
Using Apple Pay and Google Pay
Apple Pay is available on most modern Apple devices. Customers using Mac with Safari will see this option, as will iPhone and iPad users with iOS 16 or later. For more details, please visit: Apple Pay Support.
Google Pay functions on most Android devices and major browsers. However, it's not supported on some versions of Firefox mobile. Users must be logged into their Google Account and have Google Pay set up to see this option.
Apple Pay and Google Pay require domain registration for webforms. For Omeda forms, simply provide the URLs of the pages you want to enable these options, and we will handle the registration and required files for you. If you are migrating from an existing setup, let us know which URLs to pre-register.
Considerations
Testing Forms with Stripe
Testing a form in a Staging environment: Users can use a dummy credit card when testing both Test and Live forms for the Credit Card fields. Please use: 4242424242424242. Users will have to use real credit cards to test Apple Pay and Google Pay. No charges will be applied to the credit card.
Testing a form in Production: Users will have to use a real credit card number when testing both Test and Live forms for the Credit Card fields, Apple Pay, and Google Pay. No charges will be applied when filling out a Test form.
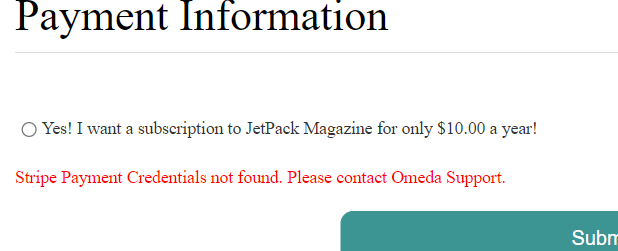
Stripe payment will only appear on the form if the form is built over a product that is linked to a Stripe Connect gateway.
If you add Stripe Payment to a form that is built over a product that is not setup for Stripe, expect to see the following error on your form:
HostedPCI
HostedPCI is actually not a payment gateway on it’s own. They work in conjunction with other popular gateways and processors to facilitate PCI Compliant credit card processing. It is designed to seamlessly integrate with these existing payment processing systems and provide a smooth and efficient credit card payment experience for customers.
With HostedPCI, the payment fields (credit card and CVV fields) are hosted by HostedPCI within an iframe that can be placed on Omeda’s forms. There are two iframes HostedPCI offers that Omeda has integrated with; Basic and Interactive.
The Basic iframe provides the standard Credit Card Number field along with the CVV Number.
To add the Basic iframe to your form for credit card processing:
Navigate to the Form Dashboard and select the Build option from the action menu of your form
Navigate to the page where you want to add the payment fields
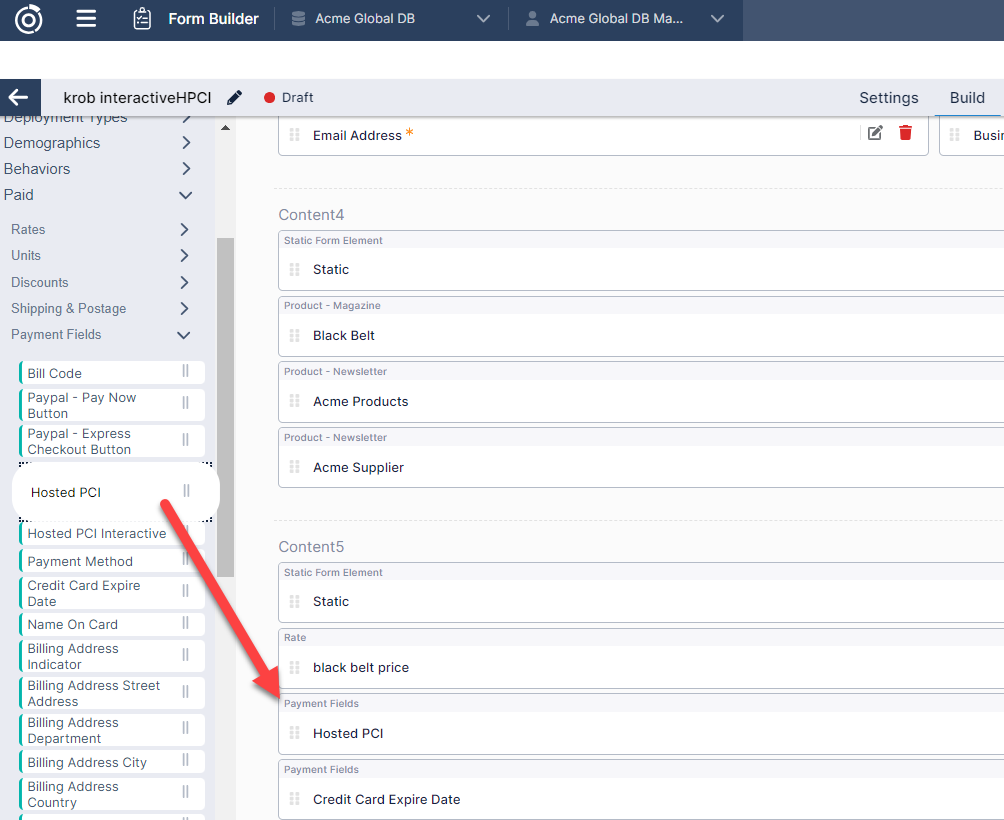
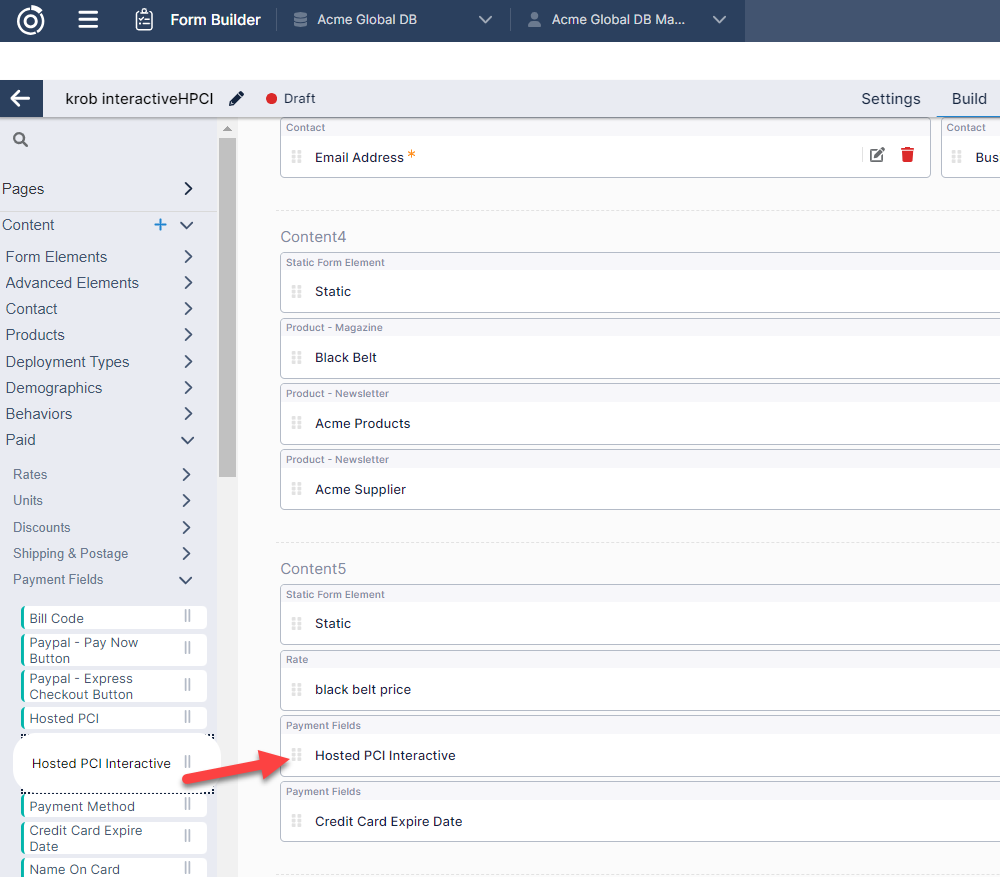
In the left panel, under the Paid -> Payment Fields section, you will see a Hosted PCI content. Drag that onto your form.
From the same section, drag Credit Card Expire date onto the form underneath the Hosted PCI element.
You’ll also need to include a Rate (either create new or select existing from the Paid -> Rates accordion) which will provide the amount to charge.

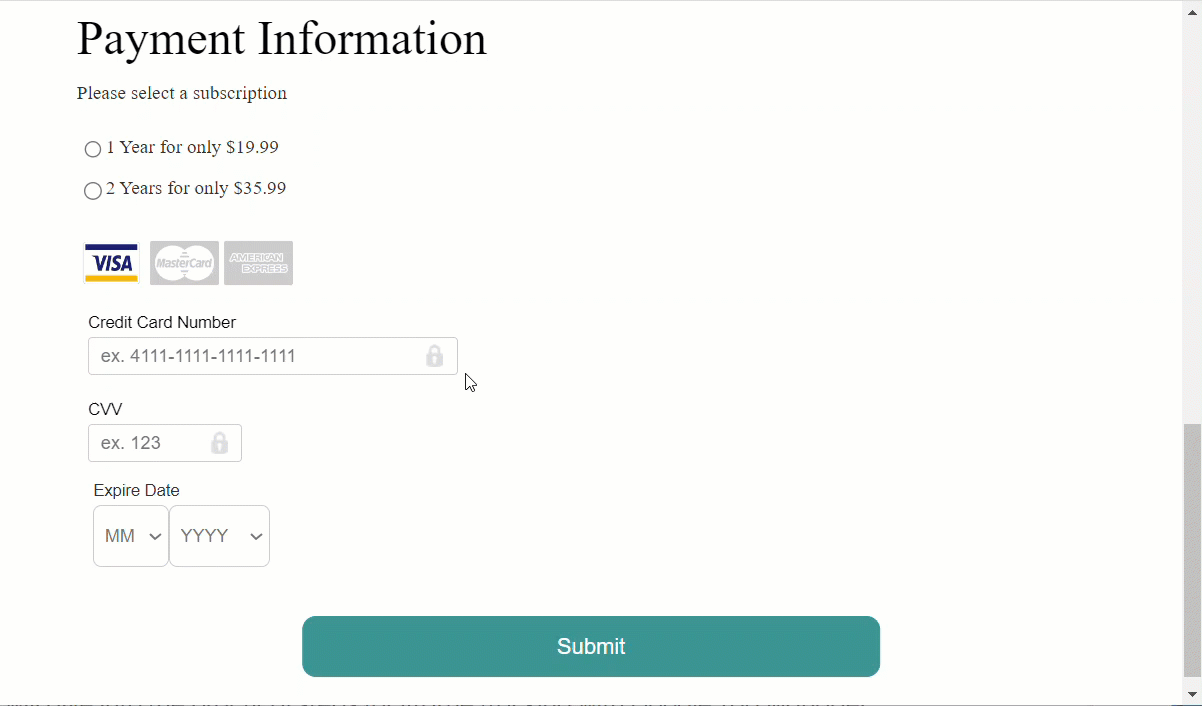
The Interactive iframe not only provides the standard Credit Card Number/CVV Number fields, but it also:
Automatically formats the entered credit card number.
Displays icons of the credit cards that are accepted.
Conditionally highlights the icon of the credit card being used as the numbers are being entered.
Changes the credit card number and CVV input box from red to green once a valid amount of numbers have been typed in.
Adds basic field styling to the credit card field, CVV field, and Expire Date field.
To add the Interactive iframe onto your form, follow the same instructions as the Basic iframe but search for the “Hosted PCI Interactive” element instead of the Hosted PCI element.
Note: The form used to collect payment using the Interactive iframe must be built over a specific Product. This iframe cannot be used on a form that is built over the Company Level.
PayPal
The PayPal Pay Now payment method can be used as an alternate payment method on Form Builder forms. This allows your customers to log in to their own PayPal accounts to make a payment using the various PayPal supported Payment Methods.
To get started, you will first need to determine and provide the Rest API Client Id and Client Secret for your PayPal Business account. You can access this information within your PayPal account by searching for API in the App Center.
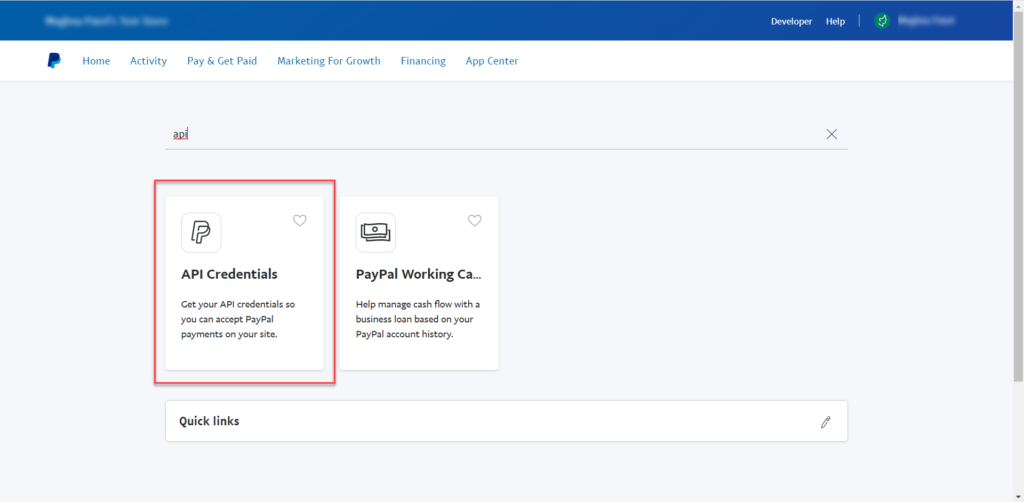
You will need to provide the Client Id and Client Secret to Omeda and these credentials will be used to create the Payment Credentials in Settings.
After the Payment Credentials have been created, the PayPal elements can then be added to a Form Builder form.
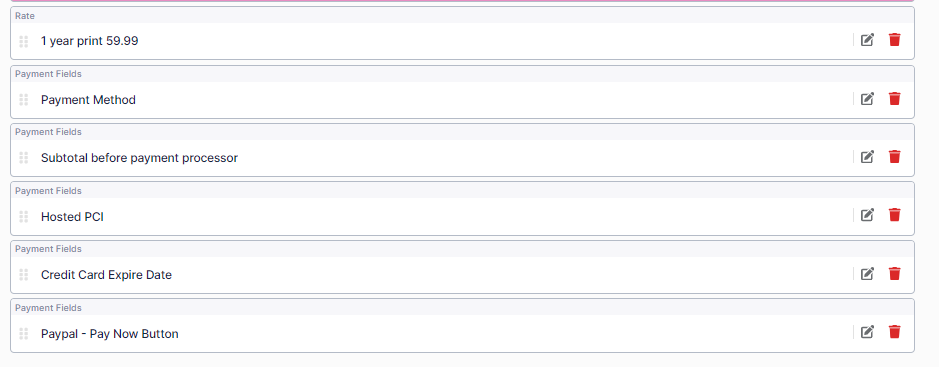
The PayPal Form Builder elements can be found in the Paid section of the builder and include the following:
The Payment Method element – this element will allow your customers to choose whether they would like to pay using a credit card or PayPal. With no additional setup, the element will display either the HPCI credit card information and the standard Submit button or the PayPal Pay Now button.
The PayPal – Pay Now Button – this button will replace the submit button on the payment page of your form if the PayPal Payment Method is selected. Customers can click this button to make a payment with their PayPal account.
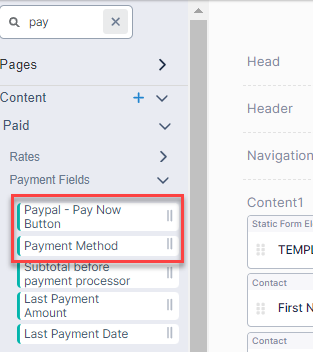
These elements will need to be pulled onto the payment page in Form Builder. The resulting page should look something like the screen shot below.
On the form itself the Payment Flow will work like shown in the video below:
Testing Note: In Staging, PayPal transactions will be visible in the PayPal Sandbox. In Production, transactions from the the Test will not be processed to PayPal. Transactions from the live form will be processed to your PayPal Business account.
Table of Contents
