A promo code is used to track information about a subscription so the success of a campaign can be measured in reporting. A promo code can also be used to dynamically populate rates in Form Builder forms as well as custom webforms.
Promo Code Dashboard
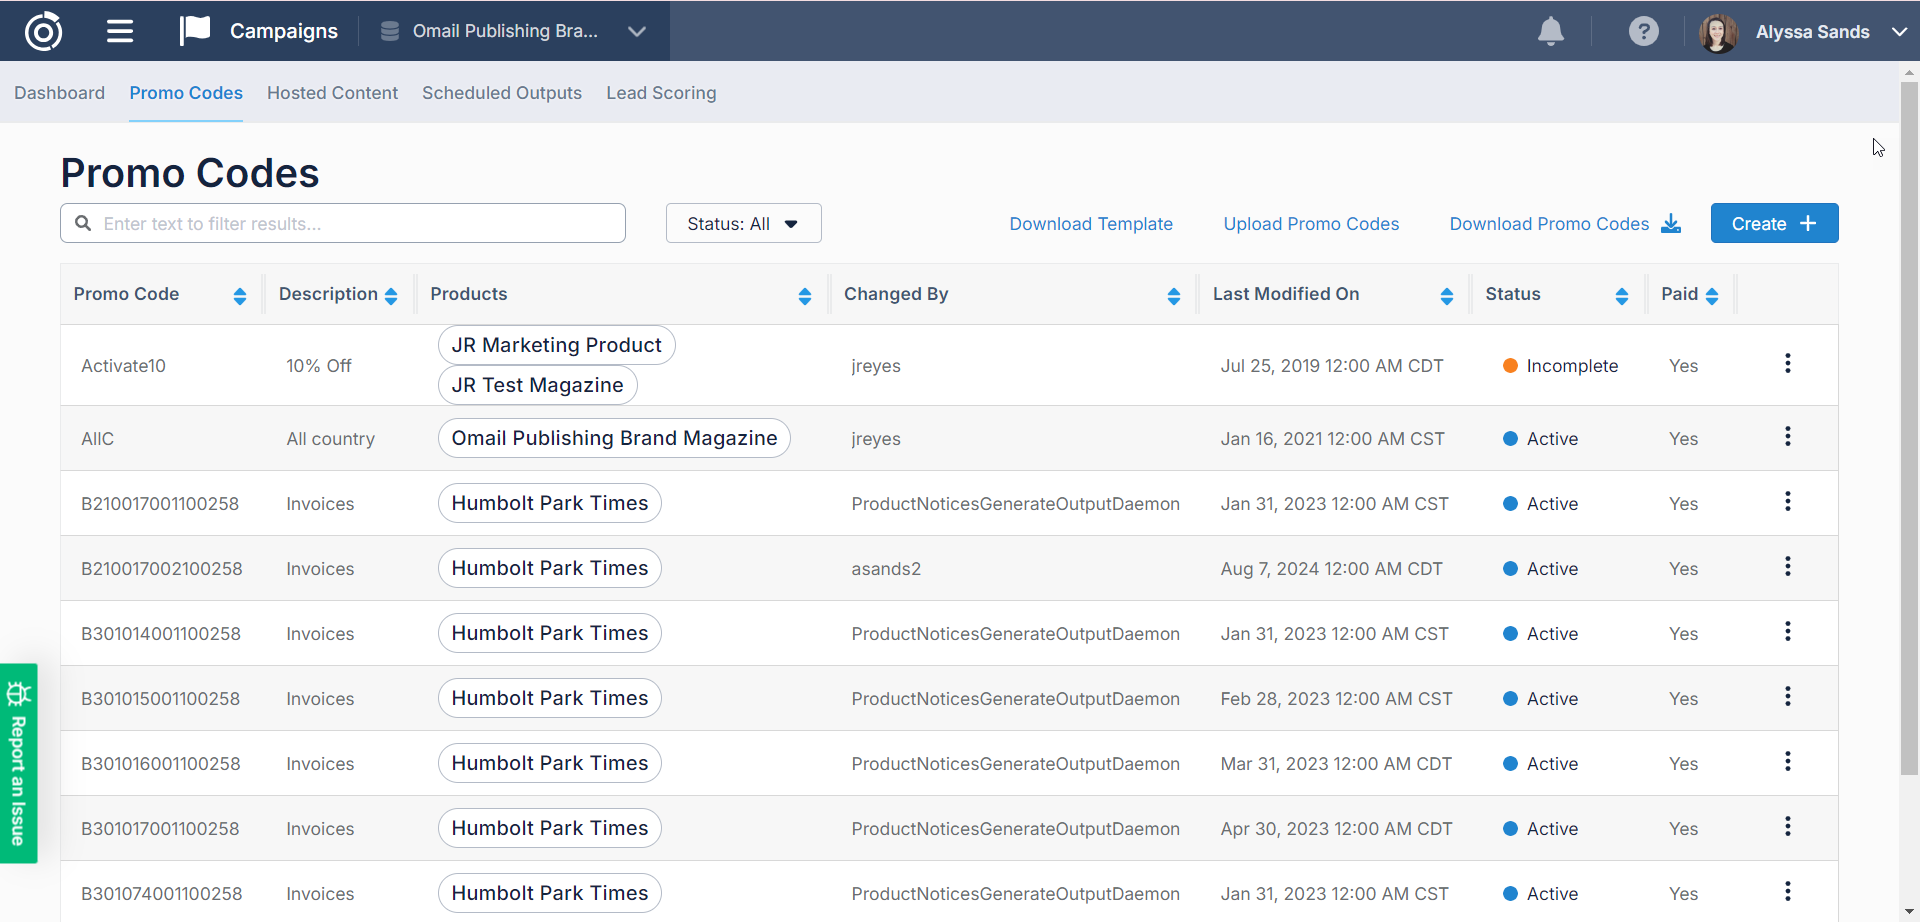
In the Promo Codes dashboard, you can access Active, Inactive, and Incomplete Promo Codes and filter your view based on those statuses. You can also use the search bar to further limit the Promo Codes displayed in the table.
Within the Promo Code table, you will see the following information about each Promo Code:
-
The Promo Code name
-
A Description of the Promo Code
-
The product or Products associated with the Promo Code. Every promo code must be associated with at least one product in order to be activated.
-
The user the Promo Code was last Changed By
-
The date the Promo Code was Last Modified On
-
The Status of the Promo Code
-
and the Paid status of the promo code.
On this screen users can also:
-
Download Active Promo Codes into an Excel file. Users can choose to download Active Promo Codes that have a set End Date or those without.
-
Upload a csv file of Promo Codes to create many Promo Codes at once. Click ‘Download Template’ to receive an example of how the data must be uploaded. Once the file is uploaded, you will see a confirmation message display along with information about any Promo Codes that were not able to be loaded.
-
Note : If you upload the same Promo Code twice within the same file, only the first instance of the Promo Code will be created. If a Promo Code already exists in the database, the incoming Promo Code will be ignored.
-
-
Create a new Promo Code
Creating a Promo Code
When you click Create + you will be navigated to the New Promo Code page. Here you will walk through three steps to create your Promo Code
Step 1 : Promo Code Details
In the Promo Code Details step there will be several sections where you will need to provide information about your Promo Code.
General
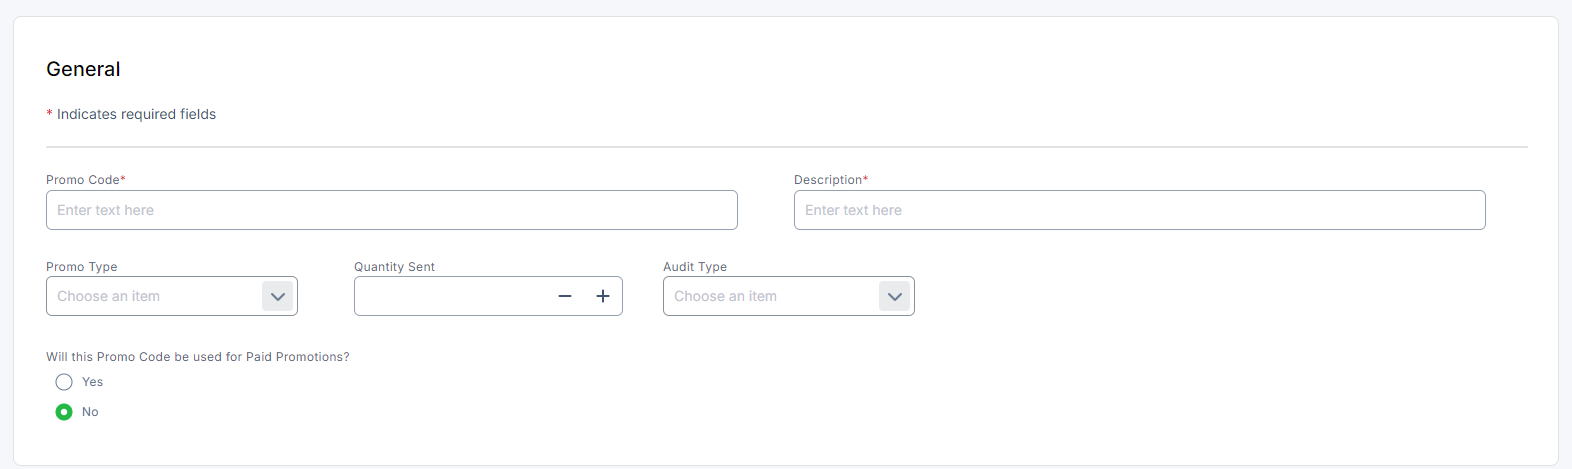
In the General section, the fields listed below will display:
-
Promo Code : Provide the alphanumeric value for your promo code. Spaces and special characters are not allowed in this field.
-
Description : Provide a simple description for how your promo code will be used.
-
Promo Type : Optionally, specify the type of Promo Code you are creating.
-
Quantity Sent : If you know how many Promotions you will send using this Promo Code, provide that value here.
-
Audit Type : If the incoming subscriptions using this Promo Code should share a specific audit type, set it here.
-
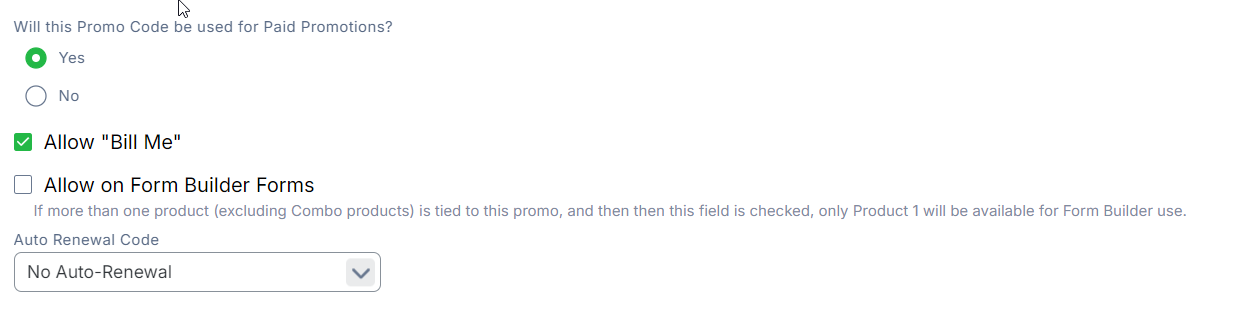
Will this Promo Code be used for Paid Promotions? : By default this field will be set to No, but if the Promo Code will be used to drive Campaign pricing, additional fields will display.
-
Allow “Bill Me” : If a subscriber can opt to receive an Invoice for the subscription, select this option.
-
Allow on Form Builder Forms : If the Promo Code will drive pricing on a Form Builder form, select this option.
-
Auto Renewal Code : Specify whether subscriptions with this Promo Code should force autorenew, allow autorenew, or disallow autorenew.
-
Channel

In the Channel section, the fields listed below will display:
-
Promo Channel : Provide the Channel for the Promo Code. This is the channel where the subscriber will receive the promo code. If the Promo Code will be used on a Form Builder form, select Web.
-
Sales Channel : If Web was selected for the Promo Channel this field will be required. The Sales Channel is an identifier which describes how the subscriber’s transaction will be added to the database e.g., Direct Mail, Gift, Internet, Post Card, etc.
Timing

In the Timing section, you will need to provide a Start Date for the Promo Code, the date when the Promo Code should start accepting transactions. Optionally you may provide an End Date, the date when the Promo Code should expire.
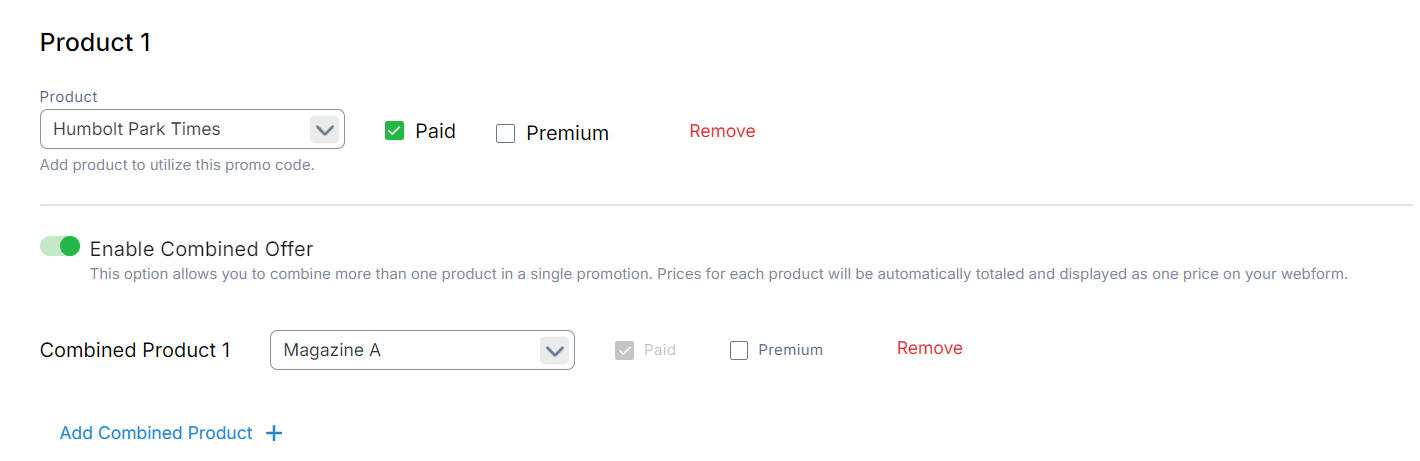
Step 2 : Product Group
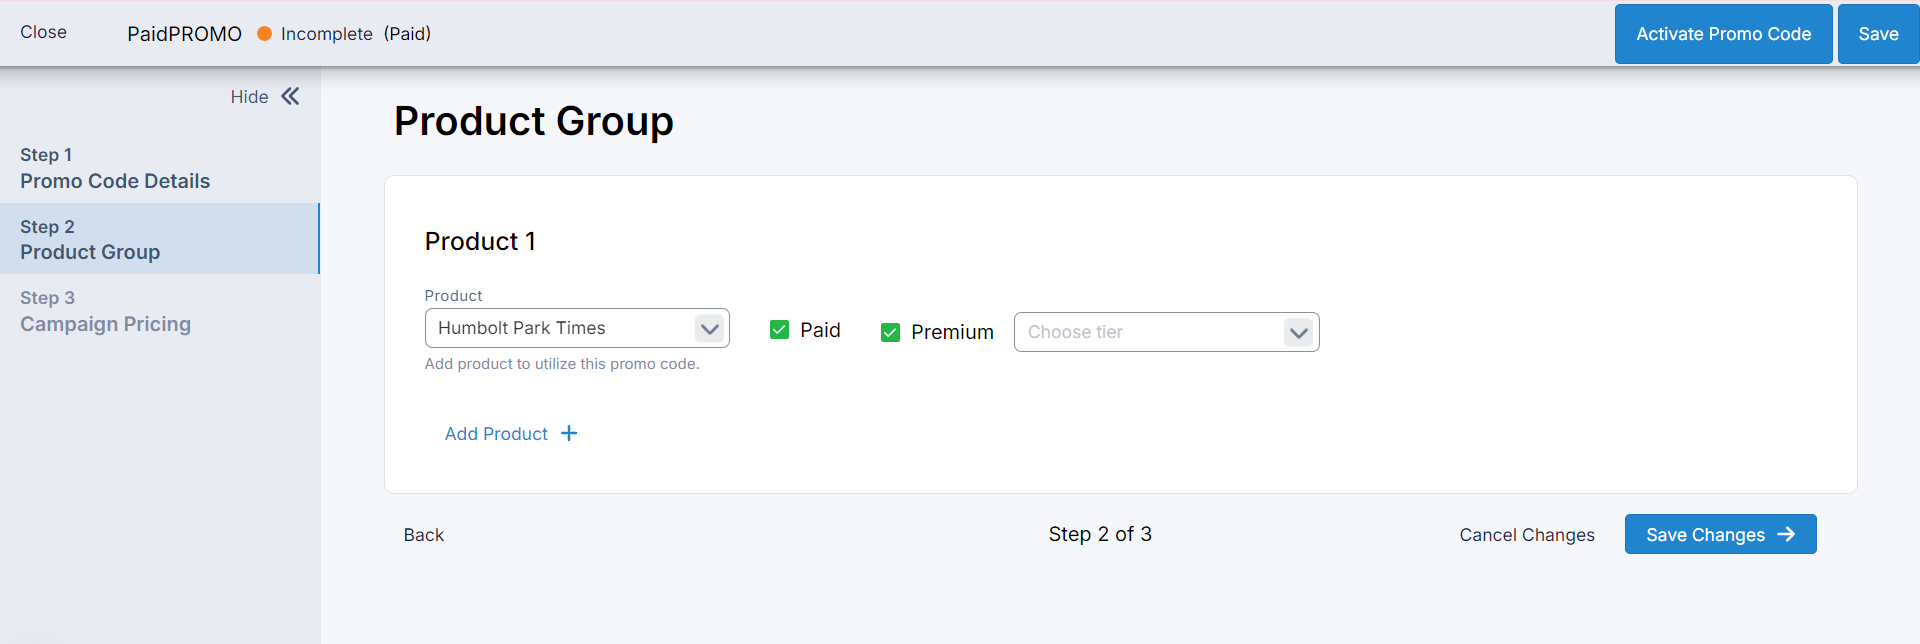
In the Product Group Step you can select the product or products that your Promo Code will be used for.
If your Promo Code is non-paid, you can select ‘Add All Products’ to automatically add all products except for single copy sale to this promo code.
If you selected Paid in the first step, select the Paid checkbox to enable the Campaign Pricing Step for the product. If your Promo Code will be used on Form Builder forms, you can also select to create a combo offer which will include multiple products with different price points for each.
Step 3 : Campaign Pricing
If you are creating a Paid Promo Code with Paid Products, the Campaign Pricing Section will be available.'

In this section, you will see some information about the product you’ve selected like the Product Name and frequency. You can create a rate or Product Price Choice by clicking ‘Add Price’. After clicking, a row will appear in the table with the following columns. Provide the information for each column.
-
Product Price Choice: Here you can select or create the label for your Product Price Choice. This will be what will display on your forms for your customers to select. Labels that have already been created can be selected and modified if desired.
-
Term: This is where you can provide the term for the Product Price Choice. If you’ve selected a previously created choice, this field will be prepopulated and will not be editable.
-
Location: If your rate should change according to the customer’s location, select the appropriate location here.
-
Price: Provide the price.
-
Requested Version: If your rate should change according the version the customer selects, choose the appropriate version here. If the rate should apply to all versions, you can leave this field blank.
-
Form Label: This is what will display on an Omeda form. Leave blank to use the standard ‘Product Price Choice’ description or add in text or HTML here to customize what is displayed.
When all steps are complete, click the Activate Promo Code button. Your promo code is now ready to be used!