Scheduled Outputs Dashboard
In the Scheduled Outputs (previously known as Lead Gen) dashboard, you can access both Active and Inactive Scheduled Output events. Scheduled Output is a tool used to output files on an automated, recurring fashion, based on an Audience Builder query. The generated lists can be distributed via email, to an SFTP location, or to an Amazon S3 bucket.
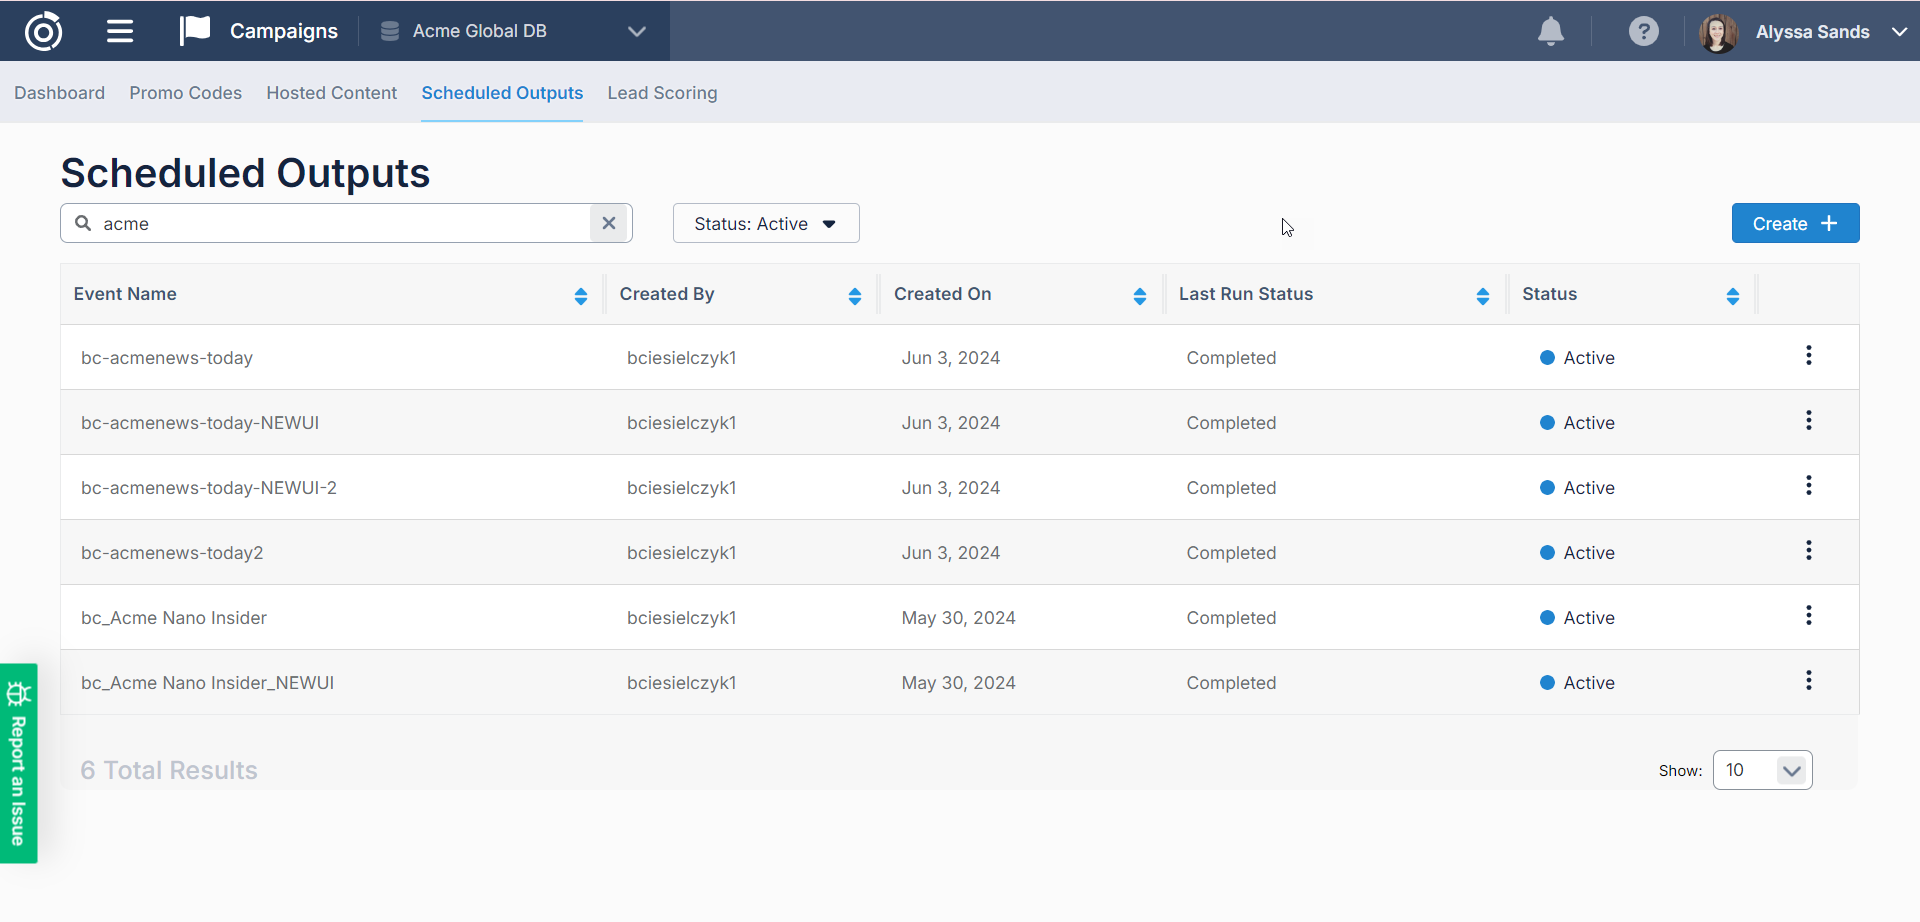
In the table on the dashboard, you’ll see information about each Scheduled Output event including:
-
The Event Name
-
The who user who the event was Created By
-
The date the event was Created On
-
The Last Run Status for the event. This is where an error will display if the file could not be Output or sent to its destination.
-
The Status of the event.
On this screen, users with access can also:
-
Create a new Scheduled Output event by clicking the Create + button
-
Edit an existing Scheduled Output event by clicking the option in the ellipsis menu on the right side of the table
-
Activate or Deactivate an existing event by clicking the option in the ellipsis menu
Creating a Scheduled Output Event
When you click Create + you will be navigated to the New Scheduled Output page. Here there are several sections where you will need to provide information about the event.
Event Details

In the Event Details section, you will need to provide some basic information like the Event Name. By default the creator will be set as the Owner of the event but Owner or a user with Edit access can change this.
File
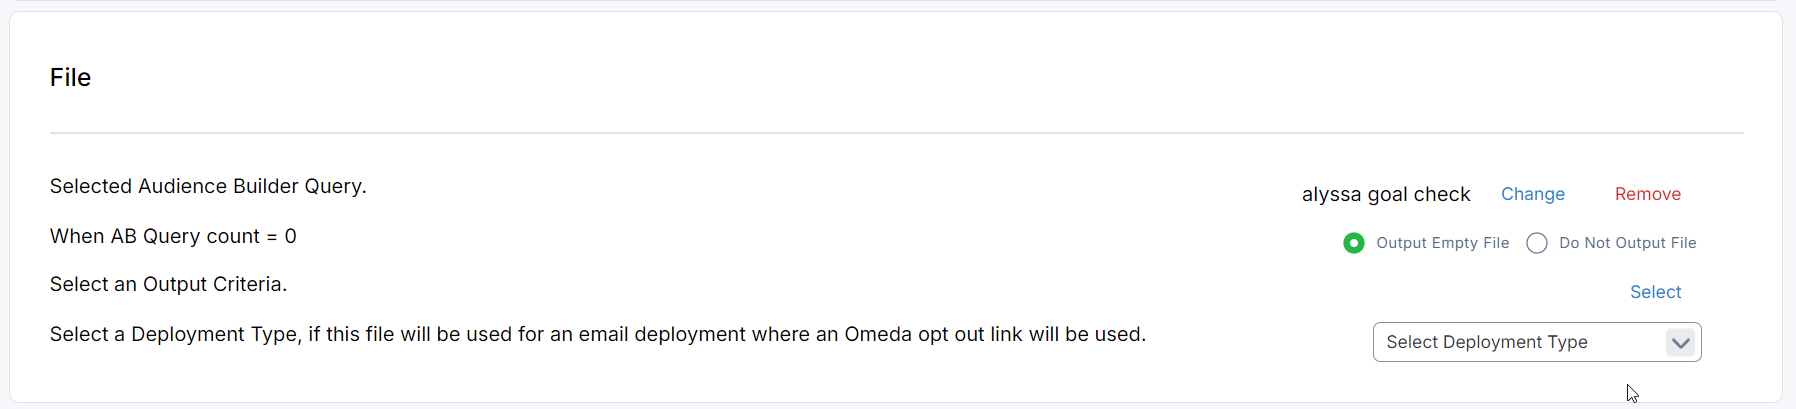
In the File section, you must select the Audience Builder query and the Output Criteria you’d like to use for your Output event. The Audience Builder query will be refreshed whenever the Output event is run and will be output with the fields, file type, and other settings selected in the Output Criteria. You can choose to select an existing Output Criteria or create a new one. For more information on the various Output Criteria options, check out the Audience Builder – Query Result Outputs page.
If the Audience Builder query count is zero when an event is run, you can also choose whether you’d like to output an empty file or skip the output entirely.
Optionally, you can also choose to Select a Deployment Type. By doing so, your output file will automatically exclude any audience members who have opted out of that Deployment Type.
Time Period

In the Time Period section, you can set the Start Date and, optionally, the End Date of the Scheduled Output event. The Scheduled Output event will no longer run after the End Date is met.
Frequency
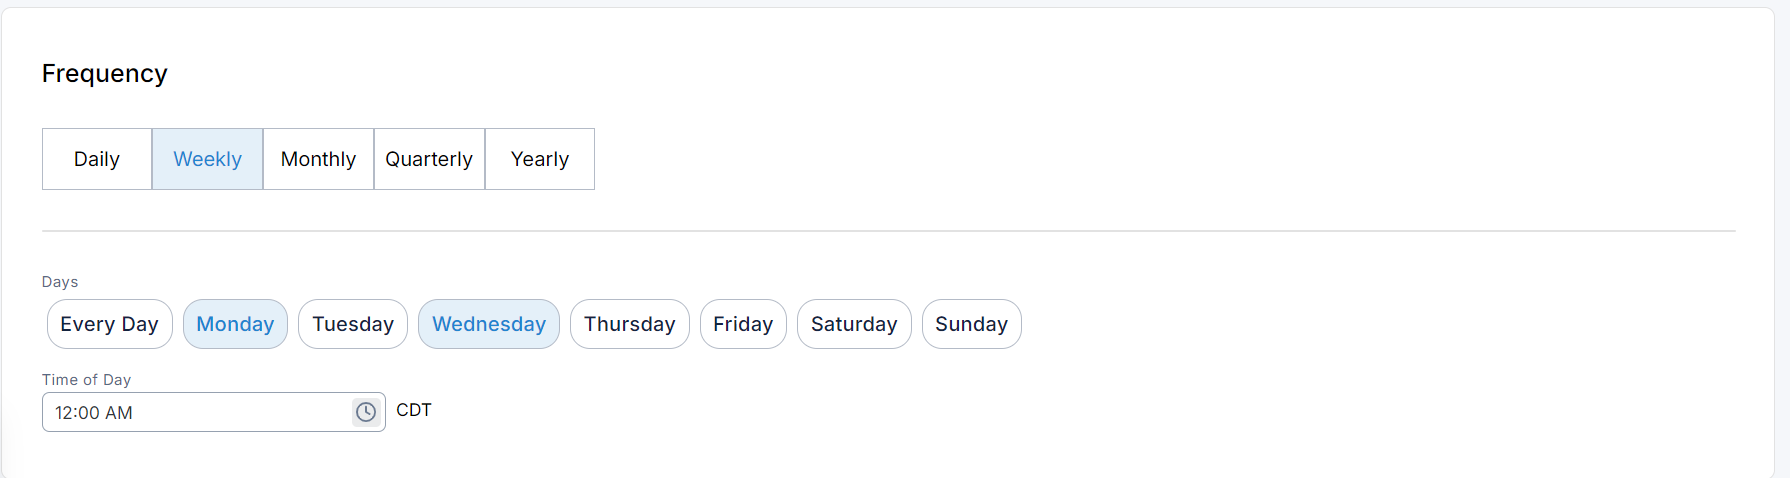
In the Frequency section, you can set how often you’d like your Output event to run.
Output
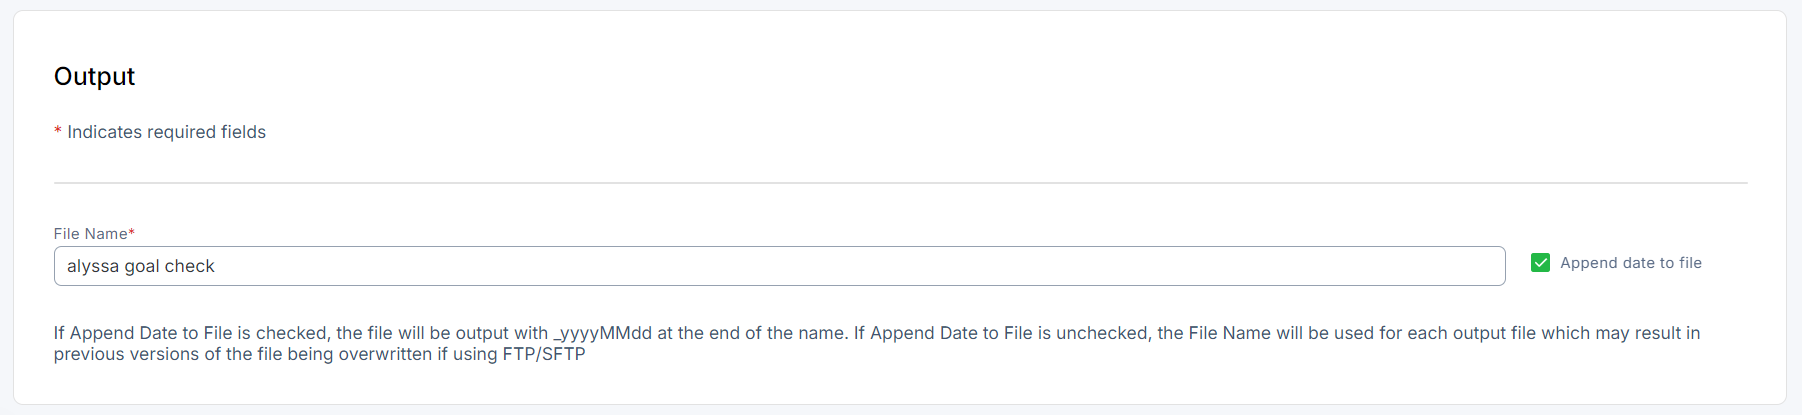
In the Output section, you can specify the name of the File you would like to use. By default this will be set to the query name you’ve selected. Optionally, you can also choose to append the output date to the file. This can be helpful if you are sending your files to an SFTP site and files and you don’t want your current file to overwrite the file from the last run.
Below, you can toggle which of the Output options you would like to use from the following:
Output to Email

You can add one more more email addresses that you would like to send a link to the Output files.
Output to FTP/SFTP
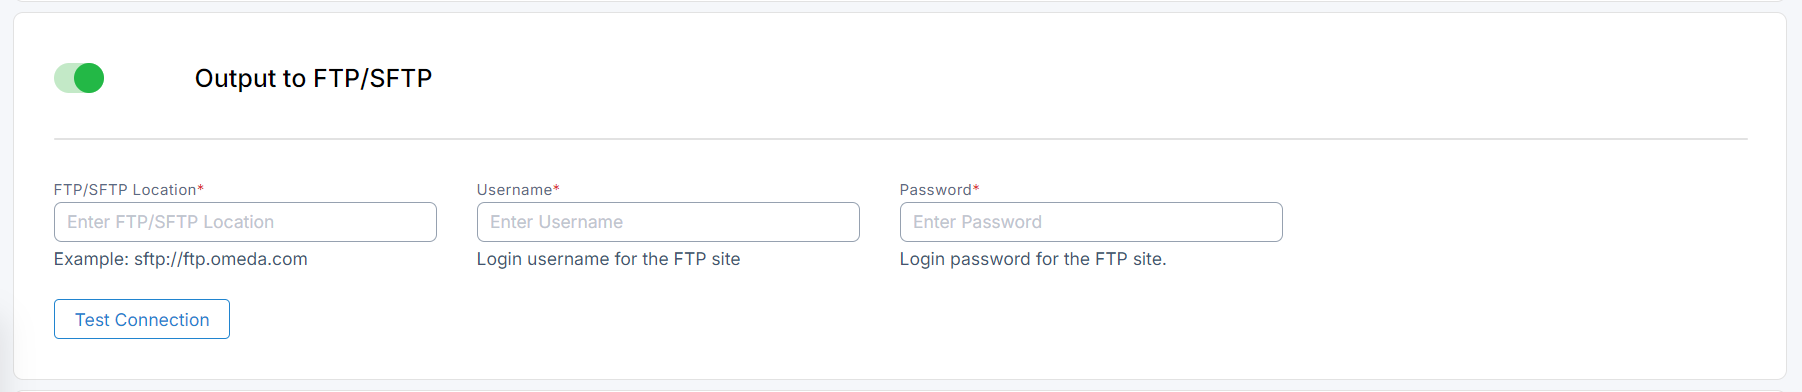
You can provide the SFTP site information where you would like the file to be sent to. Click Test Connection to confirm that the destination can be successfully connected to.
Output to S3 Bucket

You can connect to Amazon S3 and select and S3 bucket to output your files to.
For a successful setup, you will need the following things:
-
Access Key and Secret Key provided in your AWS Console.
-
The Region where the bucket is located. This can also be found in your AWS Console under the bucket’s properties.
-
Once the Access Key and Secret Key are provided and saved, a dropdown field will appear under Display Name that will be populated with the connected account’s S3 Buckets found within the selected Region.
Activating your Scheduled Output Event
After you Scheduled Output setup is complete, you can select the Create button at the top of the page to save your event. Click Create and Activate, to activate the event. After activation, the output will begin according the the Start Date and Frequency.