Getting Started
Metering is Omeda’s tool for using paywalls, gating content, and providing subscription based services for digital media providers. The Meters are customizable for your specific site, so you can configure your gated pages in exactly the way you want to. They will be used to limit the number of page views visitors have on a website before being prompted to perform an action such as Log In, Register, or Pay for a subscription or access to the page/site.
Metering Dashboard
The Metering dashboard can be accessed by clicking CDP in the navigation, under Acquire, then clicking Personalized Content. Here you can define a new site on which you can implement the metering tool, as well as view and edit meters that have already been created.
Conversion Tracking
When a meter includes an Omeda Form Builder form, Omeda automatically captures a conversion any time a visitor submits that form while the meter message is active. This gives you a direct measure of how your meters are driving audience action — beyond the promo code method previously required.
Conversions are captured across all supported form delivery methods:
-
Embedded Form – A Form Builder form embedded directly within the meter message content
-
Link or Button – A form linked via a clickable text link or button within the meter message. (When embedded via the Embed Omeda Form option on the linked page).
Note: Conversion tracking only applies when the form is submitted within the context of the meter message. Submissions from the same form accessed elsewhere on your site are not counted.
Each conversion records the following context:
-
Page URL – The full URL of the page where the meter message was displayed
-
Source Type – Meter
-
Meter Message ID – The ID of the meter message that prompted the submission
Conversions are tied to the submitting customer's record. If the visitor is unknown at the time of submission, the conversion is linked to the customer record created during form processing.
Note: The existing Conversion Tracking Code (promo key) in the Audience step remains available for tracking conversions via promo code. The new conversion tracking described here operates independently of that setting and does not require a promo key to be configured.
Viewing Conversion Performance
.png?cb=d2deabe5fdfb4b9a0676e82bd908ed1c)
When a meter includes an Omeda Form Builder form, four summary tiles will appear on the Personalized Content page, reflecting a rolling 30-day view:
-
Total Conversions – Total conversions in the last 30 days, with a month-over-month comparison
-
Conversion Rate – Total conversions divided by total impressions in the last 30 days, with a month-over-month comparison
-
Personalization Conversions – Conversions attributed to personalizations, with a month-over-month comparison
-
Meter Conversions – Conversions attributed to meters, with a month-over-month comparison
Querying Conversions in Audience Builder
A Personalization Conversions attribute is available in Audience Builder, in the same section as Personalization Impressions. Users can filter by date range, site domain, meter message name, parent URL, and minimum conversion count to build targeted segments based on conversion activity.
Metering Sites Table
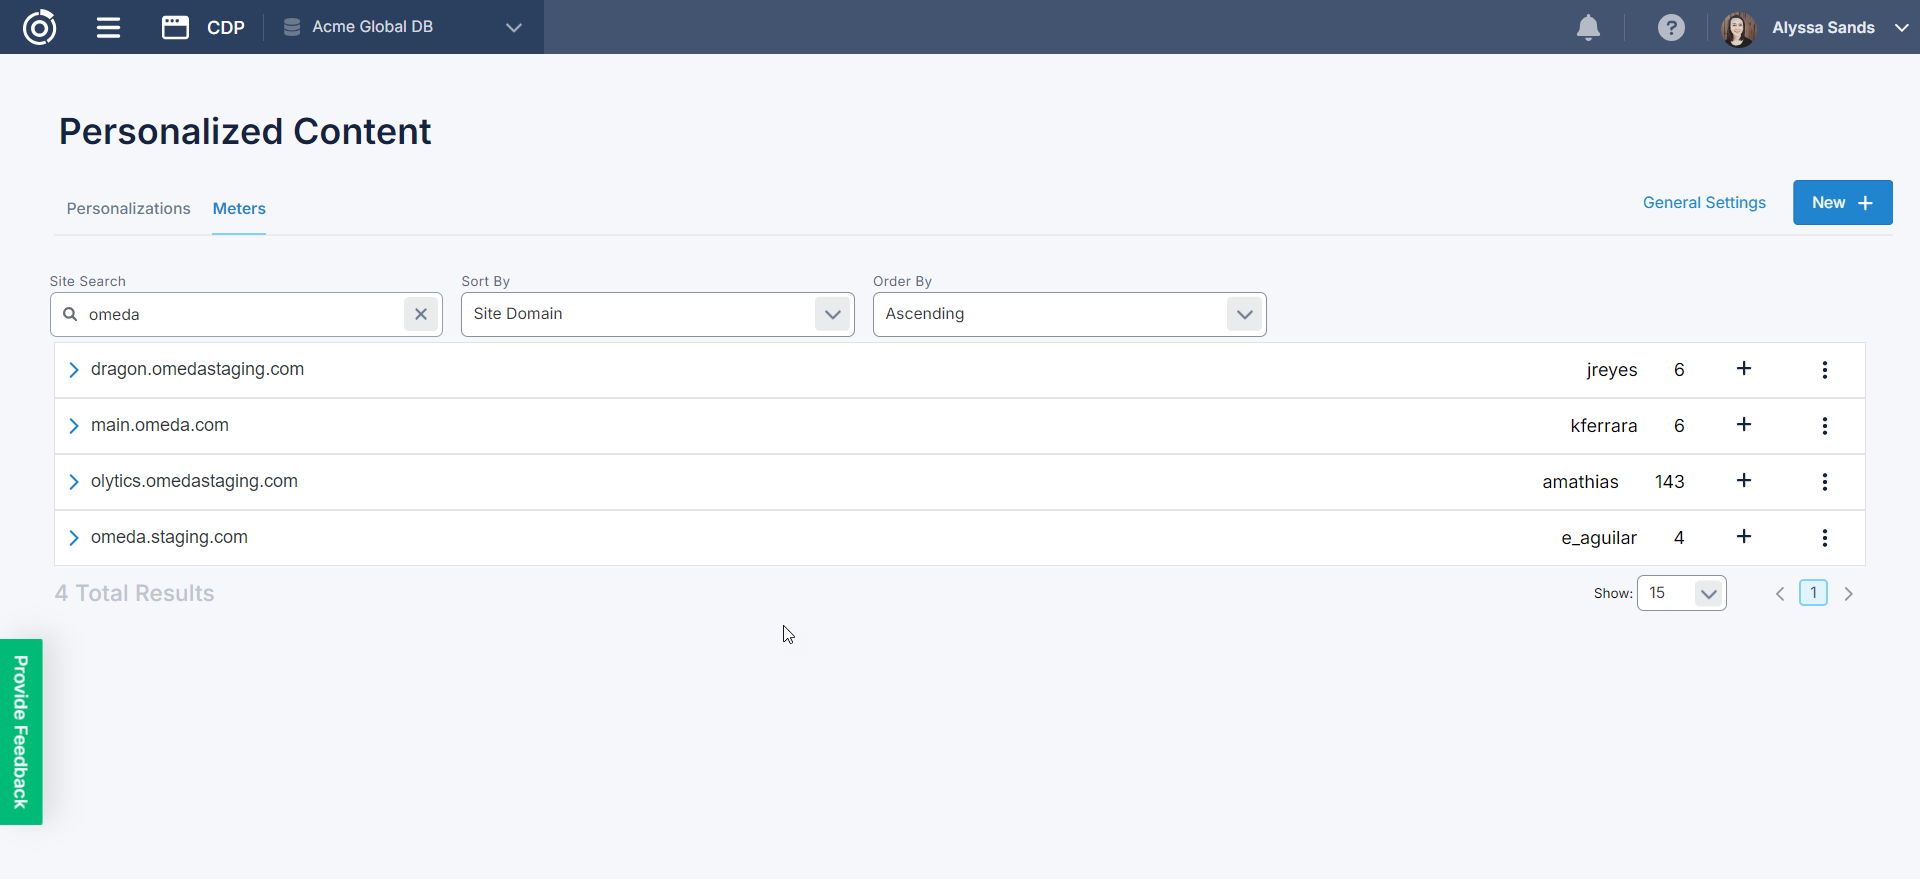
On the Metering landing page, each site that has been configured to run meters will be displayed in a table on the center of the screen. You can search for individual sites as well as sort sites by the domain, the creator or by the number of meters created. The table will display a row for each site, with the name on the left and then the creator and meter count on the right. You can click the plus sign ( + ) to add a new meter to a Site or the ellipsis to:
-
Edit Site : here you can manage the general settings and site level restrictions for the domain
-
View Archived : you can view all of the Archived Meters for the site
-
View Report : View a report of the impressions across all meters on the site
-
Delete : you can delete the site if there are no Active meters
Meters Table
You can expand the row for each site to review the site’s meters using the > icon on the left side of the row.
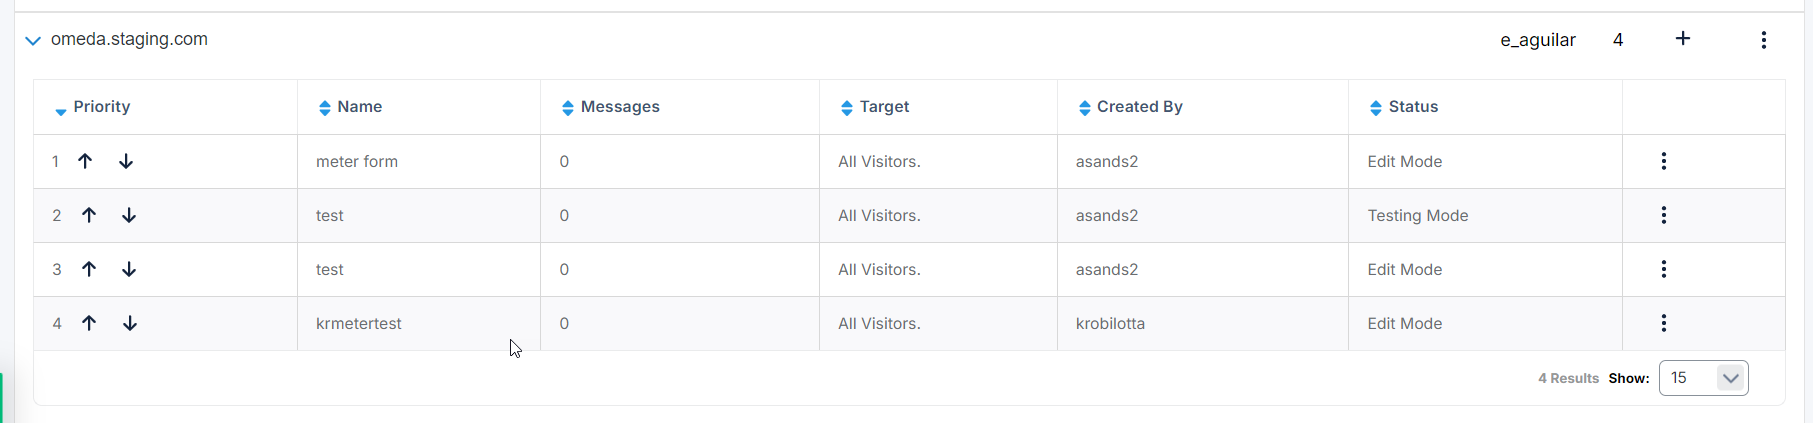
The following columns will display:
-
Priority : If two meters have been configured to display on the same page, and target the same audience, the priority will determine which meter messages the visitor will see. You can change the order by clicking the up and down arrows next to the priority number. If a visitor belongs to several different audiences and falls into multiple meters, they will be put in the highest priority meter flow. Once the visitor is within a specific meter flow, they will stay in that flow for the lifetime of the meter (until the next reset date). If the priority changes for which meter is highest priority, then on the reset date, the visitor would be transferred to the new highest priority meter they fall in.
-
Name : the name of the meter as it will display in reporting.
-
Messages : The number of messages that will display for this meter
-
Target: The audience the meter is set to target.
-
Created By: The user who created the meter
-
Status: The status of the meter. Possible statuses include: Edit Mode, Testing Mode, Activated or Inactive.
In the ellipsis menu on the far right, you can do various actions including:
-
Edit: This allows you to edit the meter’s settings
-
View Report: This allows you to view and output a report specific to the meter. Learn more about individual meter reporting here.
-
Clone: This allows you to clone a meters settings and messages.
-
Archive: This allows you to Archive a meter. This will deactivate the meter and remove the meter from the Meters table. Archived meters can be viewed by clicking View Archived on the Site row.
-
Delete: This will delete a meter and its messages.
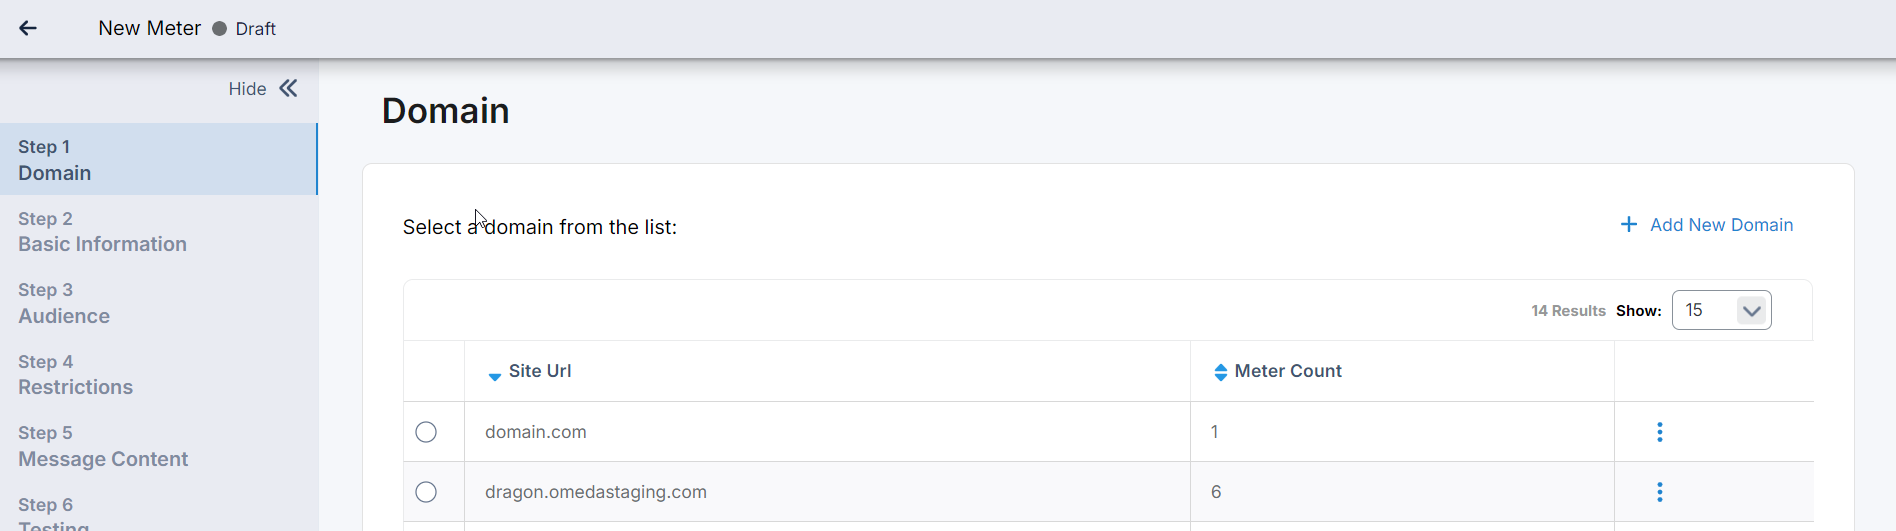
Creating a New Meter
A new meter can be created for a site by clicking New + and then Meter from the Meters dashboard or by clicking the plus (+) icon to the right of a Site name in the Sites table.
Step 1 : Domain
Here you can select an existing domain for your Meter to apply to or create a new domain by clicking the + Add New Domain link on the top right.
Adding a New Domain
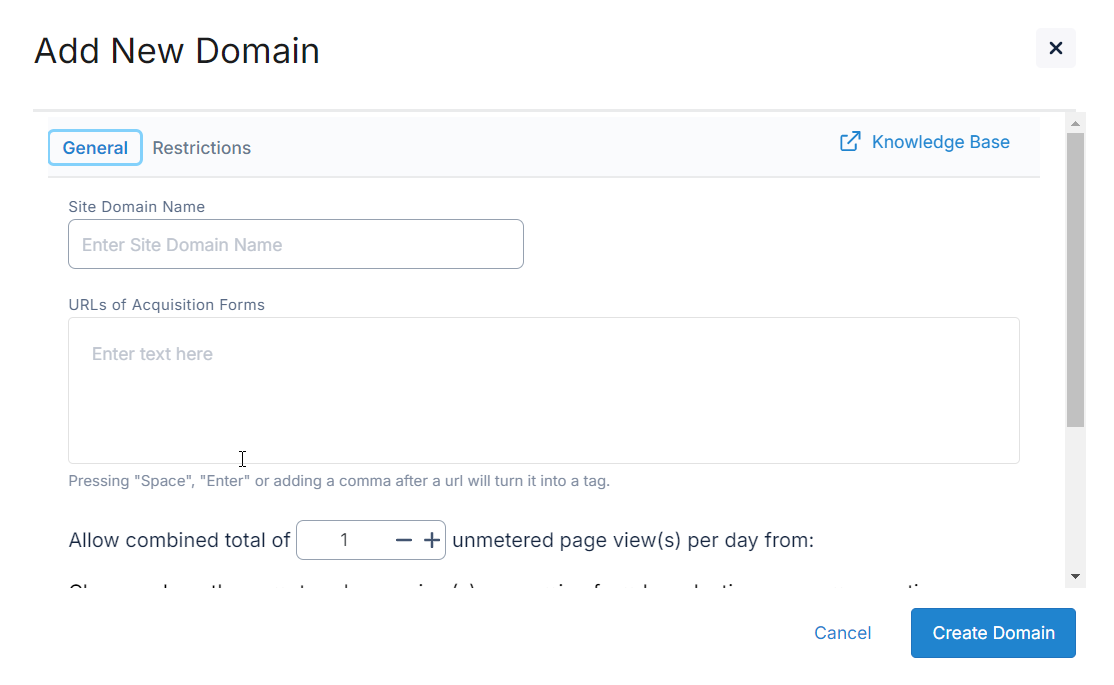
General
-
Site Domain: This is the domain where your meter will be applied. The value here will include the sub-domain; for example, if I wanted to create a meter for http://omeda.com and http://main.omeda.com , then I need a site domain for http://omeda.com and another site domain for sub-domain http://main.omeda.com .
-
URLs of acquisition forms: If your acquisition forms use the same domain, list the form URLs here. By providing these URLs, any meters that are created for this domain will not be applied to the forms and users will not be blocked from using these pages.
-
Allow a content total of X unmetered Page View(s) Per Day From: This setting allows you to provide a limited number of unmetered views to your page if a visitor has reached your page through a selected website. This might be used to give assumed new visitors a taste of your content without prompting them to register immediately. Keep in mind, if a visitor is at the blocking stage in a meter series and reaches your site through one of the selected websites, the visitor will be able to access your content if unmetered visits are allowed via this setting.
Restrictions
In the restrictions tab for a Site Domain, domain level restrictions can be created for all meters created within the domain. Here you can:
-
Target Meters to Only Specific Url Pattern(s): Provide specific Url patterns that all meters should target. For example, if “http://main.omeda.com ” is provided, all pages that contain this pattern will be targeted including “main.omeda.com/profile”, “main.omeda.com/profile/business/today”, etc.
-
Exclude Meters from Specific URL Pattern(s): Provide specific Url patterns that all meters should exclude. For example, if “http://main.omeda.com ” is provided, all pages that contain this pattern will be excluded from metering including “main.omeda.com/profile”, “main.omeda.com/profile/business/today”, etc.
-
Target Meters To Specific Pages: All meters for this site will appear only on the specific pages provided.
-
Exclude Specific Pages for All Meters: All meters for this site will not be applied to the specific pages provided.
These restrictions are ideal to use when there are pages or URL patterns that you will want to always target or exclude, regardless of the meter.
Step 2 : Basic Information
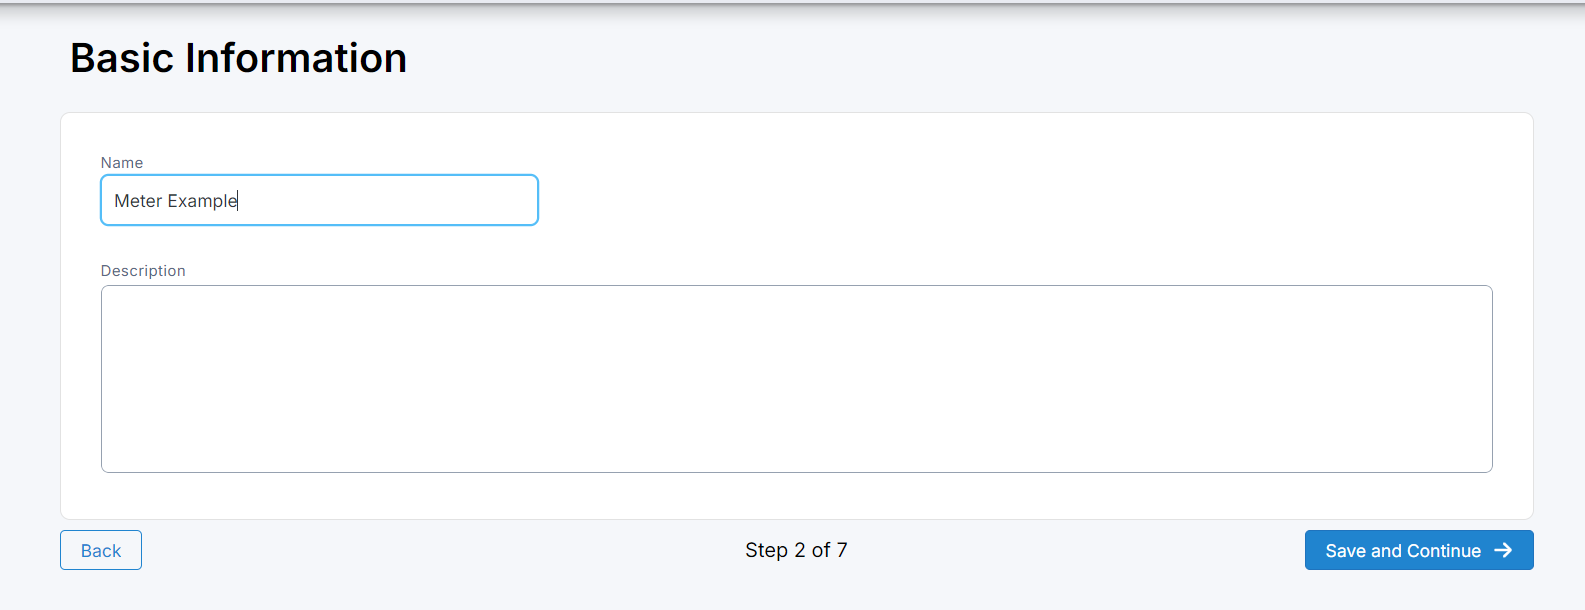
After a the domain is selected, you can click continue to proceed to the Basic Information step. Here you can provide the Name and a brief Description of your meter.
After a Name is set and your meter is saved, you can now navigate to any section on the left-side of the page to continue your set up.
Step 3 : Audience
In the Audience step you can specify the audience you would like to target with your meter in the following sections.
Bypass Condition
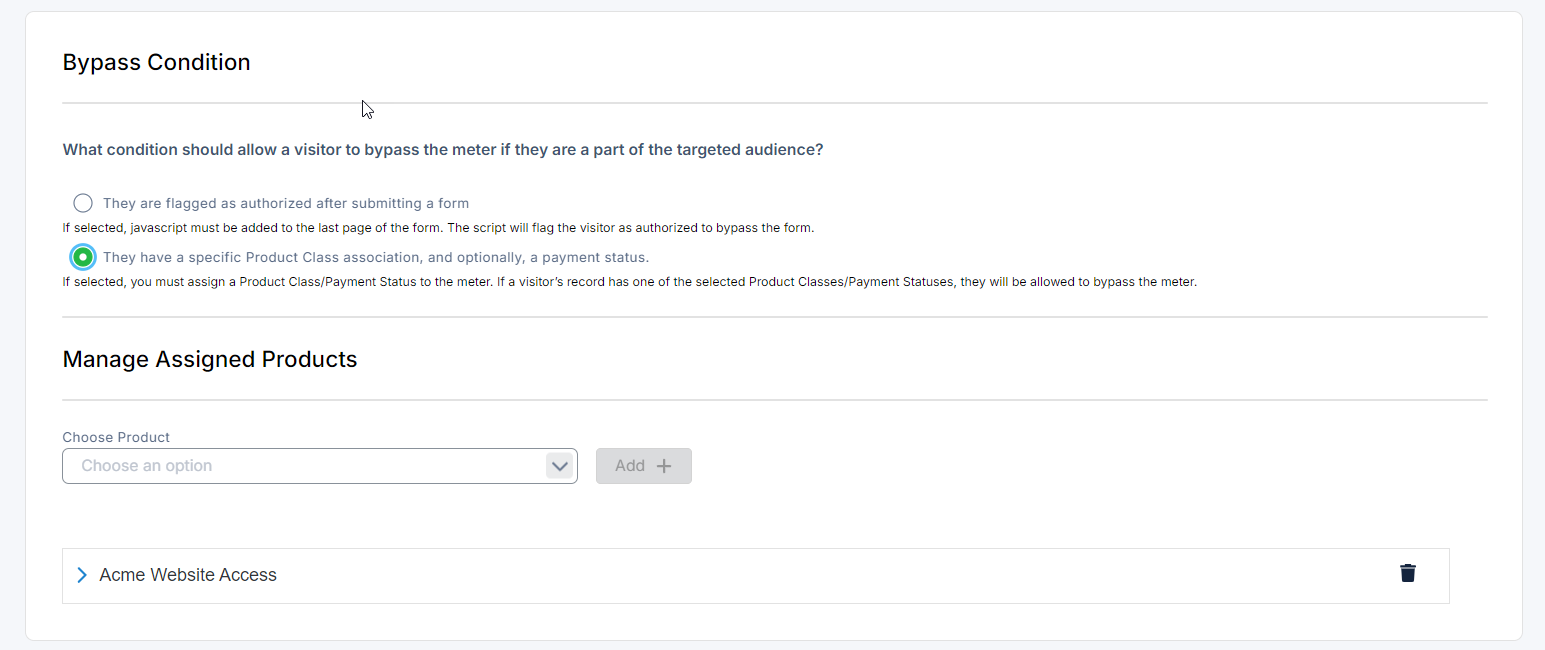
The bypass condition is the primary condition that an audience member must meet to no longer see the meter messages. There are two options for the bypass condition:
-
The audience member has been flagged as authorized after submitting a form. This method relies on JavaScript setting a flag on the user's cookie and will require updates to the form to work affectively.
-
The audience member has a specific Product and Class and, optionally a Payment Status. To select one or more products, choose the Product in the dropdown, and click Add +. The product can then be expanded to select the Classes or Payment Statuses that authorized audience members must have on their record in the Omeda database.
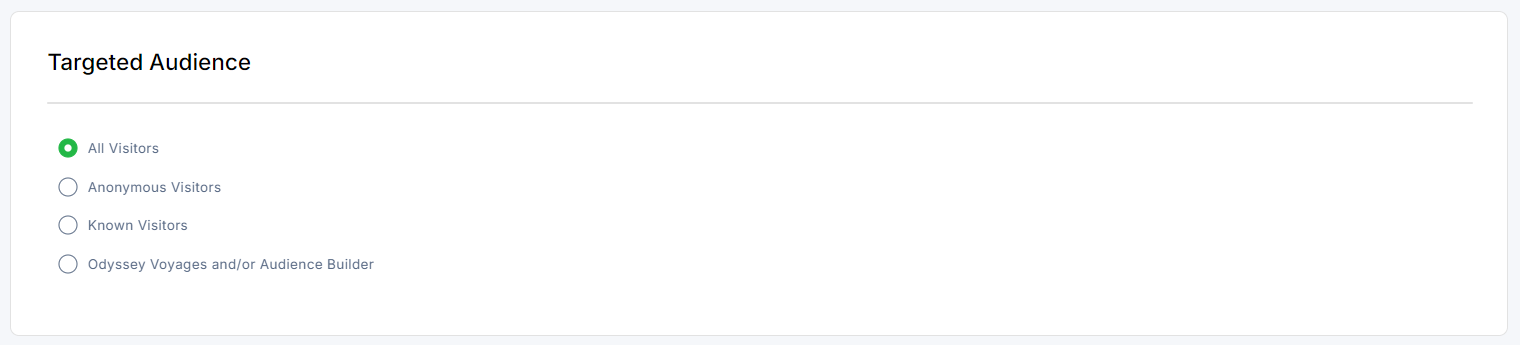
Targeted Audience
-
All Visitors: You have the option to target all visitors to your page with the meter
-
Anonymous Visitors: You can target anonymous visitors
-
Known Visitors: Visitors you have information on – perhaps you are offering ‘gold-level’ access behind a paywall to previously-free visitors.
-
Odyssey Voyage(s) and/or Audience Builder: This option allows you to select one or more Audience Builder queries to target. If the meter is linked to an Odyssey Voyage, the voyage will be listed here.
Excluded Audience
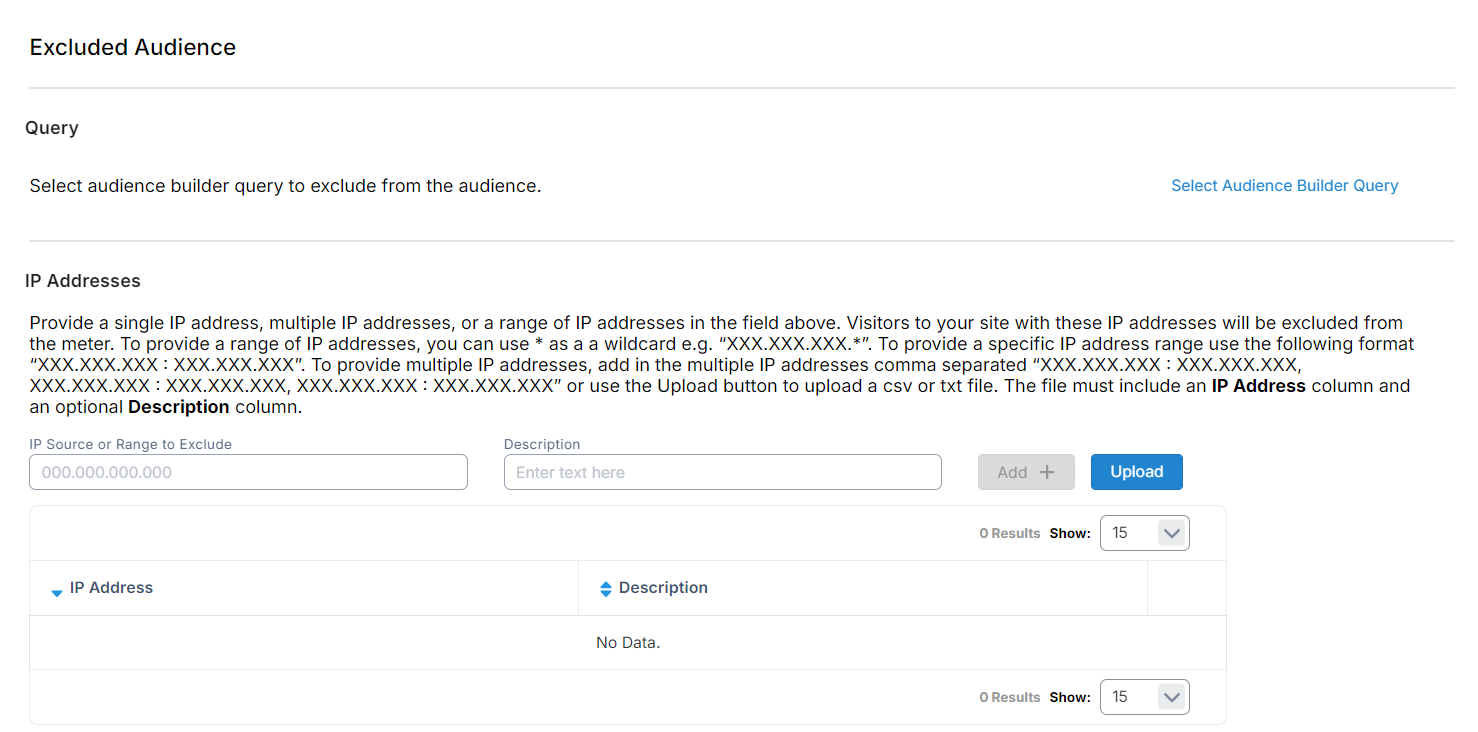
In this section you can select an Audience Builder query or provide one or more IP Addresses that should never see this meter, regardless of whether or not they meet the bypass condition. You may want to use this for known advertisers or users with Site Licenses.
Reset Timer
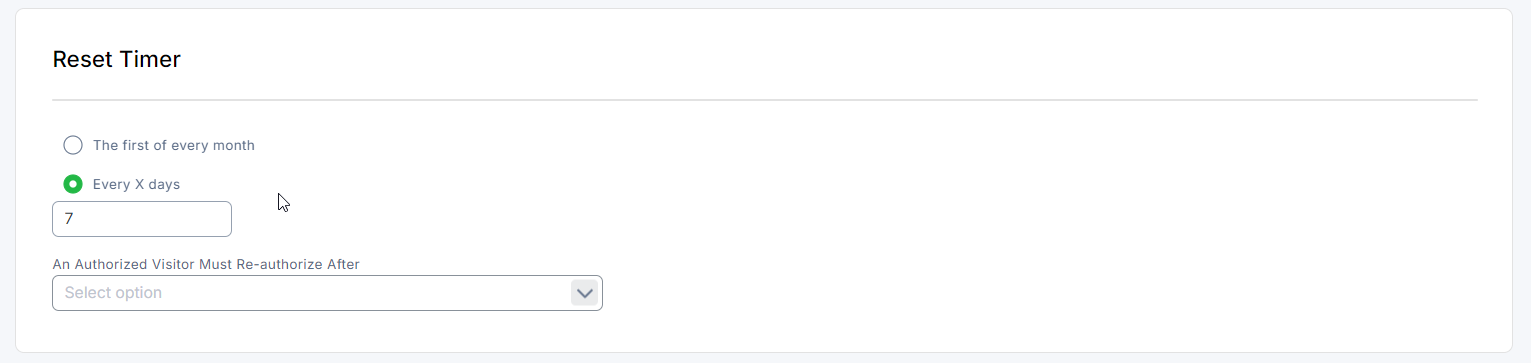
In this section, you can choose how often each visitor’s visit count resets.
For example, if you allow three visits before blocking the viewer from accessing your site, you can reset this block every x days or every month so they can have three visits again in the next time period. This feature is specific for individual cookies, therefore each user’s time frame is personal to their cookie (for when the reset is every x days). Each individual visitor’s visit date will be used to then reset the date. 1st of the month refresh would be the same for every visitor.
If you are using an authorization flag as your bypass condition, you can also choose the expiration date for that flag, after which point a user will need to reauthorize.
Conversion Tracking Code
In this section, you can enter in a promo key to be used as the promo key for customers that complete a Form Builder form linked within the Meter.
Step 4 : Restrictions
This tab allows users more options for managing which part(s) of a site are metered and allows them to target specific parts of a site more easily.
URLs
-
Target this Meter to Only Specific URL Pattern(s): This will only display the meter if the site contains the provided URL patterns. Therefore, you can do a wildcard match that will display the meter on all the the sites that have the URL inclusive of the site.
-
Exclude this meter from Specific URL Pattern(s): This will exclude the meter from the specific URL parameters that are provided. You can do a wildcard match that will encompass any sites that are included within the URL parameters.
Pages
-
Target this Meter To Specific Pages: The meter will only appear on the specific site pages designated.
-
Target this Meter To Specific Pages: The meter can be excluded from specific site pages.
URL Parameters
-
Target Parameters in a URL(s): This meter will only appear if parameters and their values are included in the URL string.
-
Exclude Parameters in a URL(s): This meter will be excluded from sites where these parameters are found in the url string.
Entry Points
-
Target Entry Points: This meter will only appear if the user visits from any listed entry point. Exact URL matching is required. Wildcards are not currently supported.
-
Exclude Entry Points: This meter will be excluded from sites if the user visits from a listed entry point. Exact URL matching is required. Wildcards are not currently supported.
Target Meta Tag
Target by Meta Tag: When this option is selected, we will only meter pages that contain this meta tag. This can be useful if you have a data layer you want to target – as you can code your site to only write this meta tag to certain pages based on values in your data layer. Other settings on your Meter are still applied as well.
This allows you to target pages of your website that might not follow URL patterning. You will find the option within the Configuration tab. Each meter will generate a meta tag unique to that job. If you want to target using Meta Tag, check this box and implement the code on your website to the desired pages. If you are not targeting by Meta Tag, simply leave this box unchecked.
Olytics.Fire Parameters
-
Target or Exclude Pages using Olytics Parameters: Personalizations can be targeted to appear or on sites based on their Olytics.Fire parameters or excluded based on the Olytics.Fire Parameters. The link can be clicked to open a modal where Olytics parameters can be selected from a drop down and values can be added. Multiple parameters and their values can be targeted using AND or OR conditions. To exclude, check the exclude checkbox that appears.
Step 5 : Message Content
In this section, your metering messages can be created and stored.
Creating Message Content
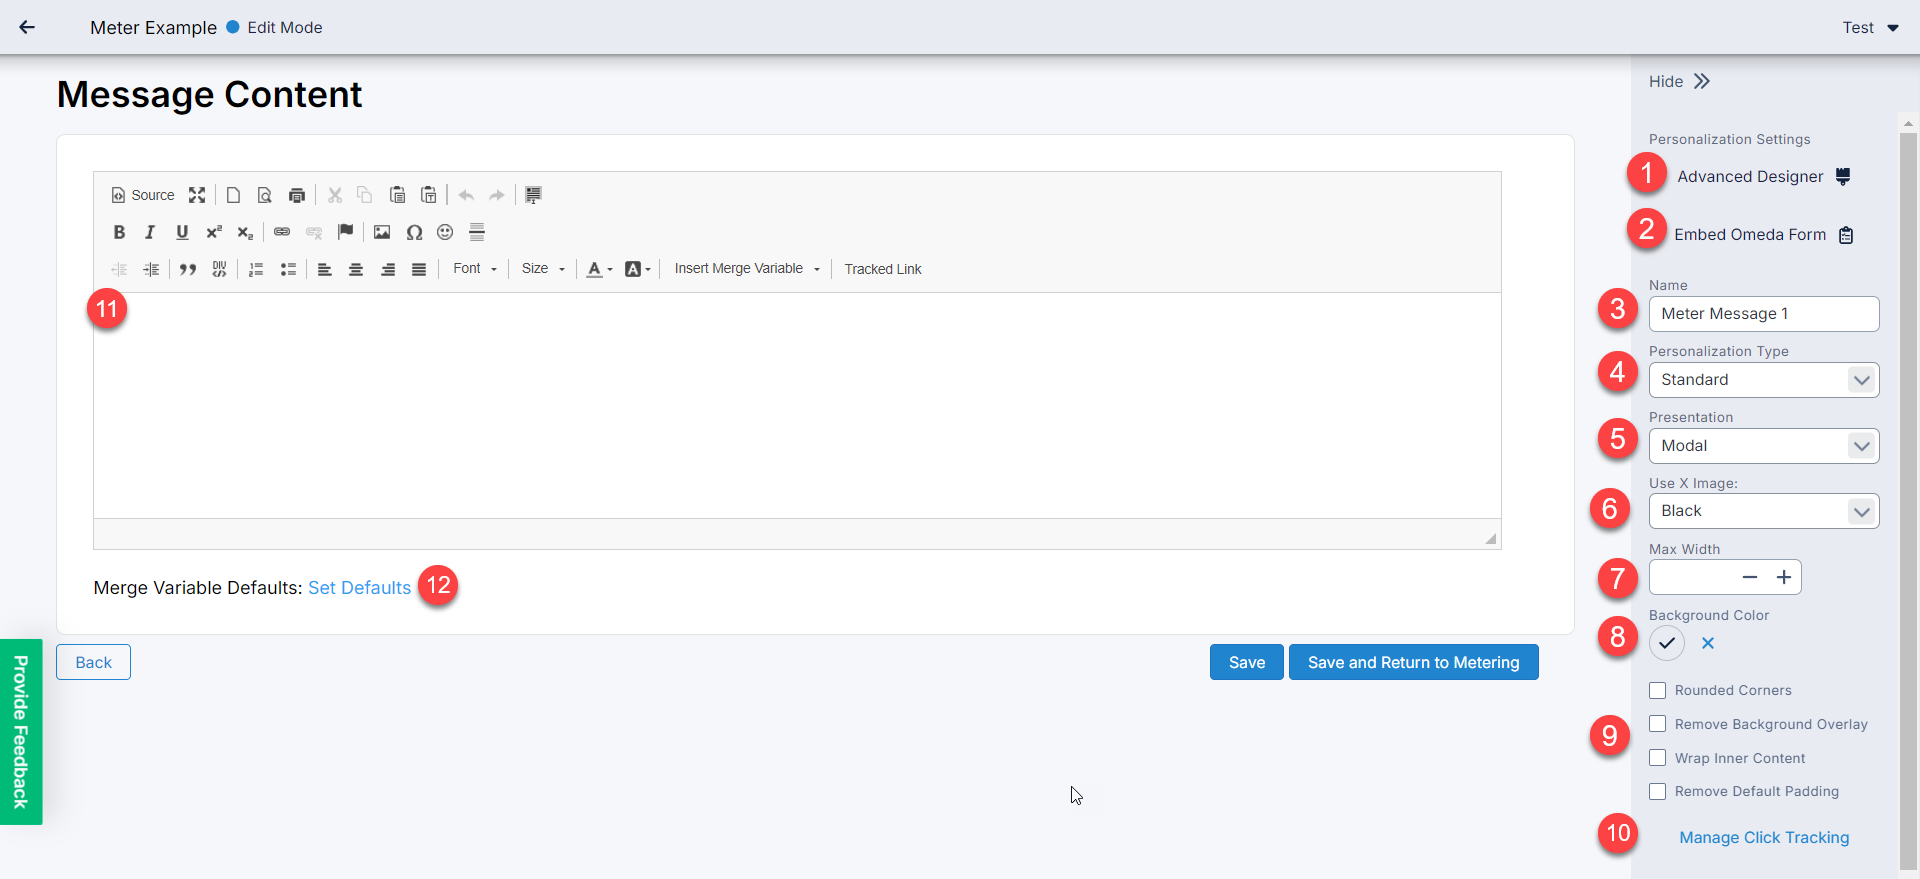
When you click on the “Create Message Content” button, you will be taken to the Message Content editor. This page is very similar in format to our Personalization tool.
-
Advanced Designer : Using the Advanced Designer, users can create an attractive meter message using drag and drop functionality.
-
Embed Omeda Form : To include only an embedded Omeda form in your content, click this button to select your form.
-
Name
-
Personalization Type : By default the Standard message type will be selected, but you can also choose to select a Scroll Trigger or Inline (HTML Injection) message type. The Scroll Trigger type will display the meter message after the user has scrolled a percentage of the page, while the Inline type will replace content on your site with the meter message. The HTML Id field will display for these message types which should be populated with the HTML id of the div containing the content that should be replaced.
-
Presentation : There are currently 10 placement options to choose from including: Modal, Bottom Right, Bottom Left, Top Right, Top Left, Bottom Middle, Bottom Footer, Top Header, Top Persistent Bar, Bottom Persistent Bar, Right Persistent Box, and Left Persistent Box
-
Use X Image: Allows you to choose how a visitor can close a non-blocking display and in what color(s).
-
Max Width: This is applicable to the bottom right and bottom middle modals only. The current defaults for bottom right is 1/4 screen width and bottom middle is 1/3 screen width.
-
Background Color: Color of the meter message background
-
Additional Options:
-
Rounded Corners: This simply rounds the corners on the message boxes.
-
Remove Background Overlay: By default, the web page will have a gray overlay when the message appears on the screen. Clicking this box will keep the web page as is, so the background behind the modal/banner will still be active and not be hidden behind the gray overlay.
-
Wrap Inner Content
-
Remove Default Padding
-
-
Manage Click Tracking : Use this option to manage the links in your message. Toggle on click tracking to track the clicks from your users.
-
WYSIWYG Editor : You have the option to start from scratch or even using HTML by clicking the source button to build your message. Get a jumpstart by using the “Generate Message” button on the bottom right. For a list of the merge variables and how to use them, see Merge Variables
-
Merge Variable Defaults : This option will allows users to set default values for the merge variables when that field isn’t present. For example, if you have a known user, but their company isn’t in their profile, you could set a default to put in the place of their company name.
-
With Merge Variable and company is present: We hope to see everyone from Your Company at the conference.
-
Merge Variable without a company present and without a Default: We hope to see everyone from _______ at the conference.
-
Merge Variable without a company but with a Default (default – your team): We hope to see everyone from your team at the conference.
-
Each meter message can be tested up to 3 different ways by clicking the Test button in the top right corner of the page. It is recommended that you test using each of them before turning the meter on.
-
Quick Test: Will display meter message right on current screen (you can also access this from the ‘Actions’ dropdown)
-
Test with a Customer Id: If you are using merge variables, then you can test with a Customer Id from your current database
-
Save and Test on My Site: Enter a URL to verify how the meter message will display on your site. This option creates a temporary link that will expire after 4 hours. This is ideal for testing as the CSS script on your site will sometimes impact how the meter job appears when live.
Manage your Meter Message Content Steps
Once a meter message is created, it will display in the meter message table. Here you can edit of the name, trigger condition, count, targeted device and display type for your message.
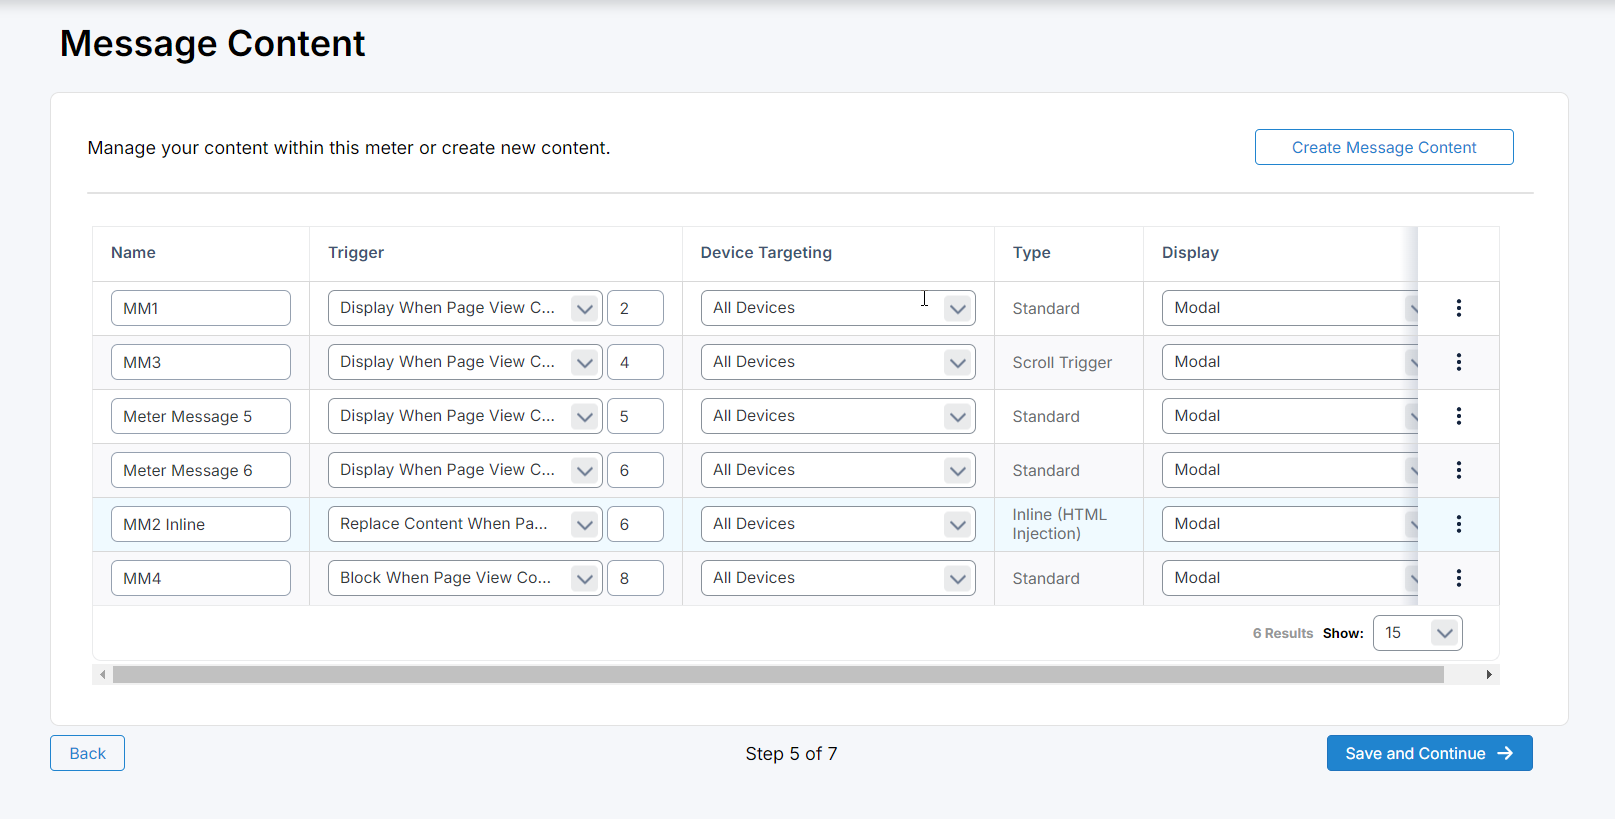
In the ellipsis menu on the right you can edit, test, clone or delete your message.
Step 6 : Testing
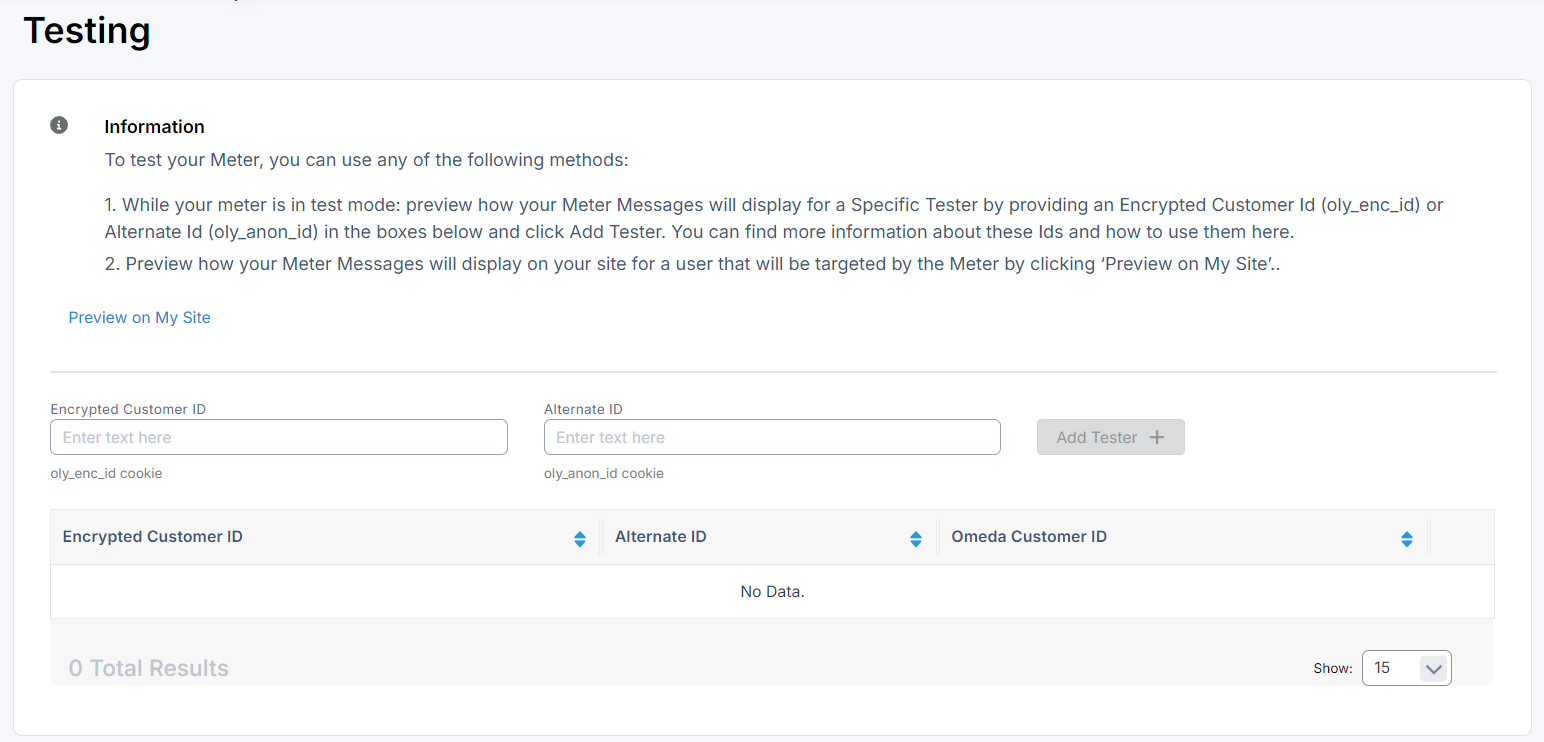
Once you have set up your meter messages and targeted an audience, you are ready to start testing. Testing the meter flow as a whole is important because it will help you verify
-
Your URL targets/exclusions are set up and working properly
-
Your message flow is counting/firing/displaying properly
-
Your forms are passing the data properly
Setting Up Testers
-
You can test with a specific customer id
-
You can test using your anonymous cookie id
-
You can create a small ‘test’ audience in Audience Builder (internal team members, etc) and then activate this for them. You can do so on the “Configuration” tab by selecting “Odyssey Voyage(s) and/or Audience Builder.”
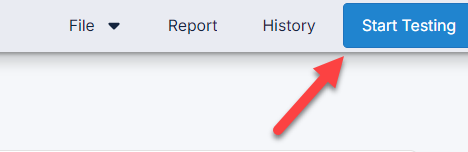
Launching Test Mode
Once you have set up your testers, return to the ‘Meter Info’ tab and click ‘Save and Start Testing’.
Once in test mode, the meter will only run for the testers and you will not be able to make any changes.
To exit test mode and return to edit mode, click ‘Return Meter to Edit Mode’ in the ‘Meter Info’ tab. If everything appears in order, you can activate the meter.
Step 7 : Summary
Once you’ve confirmed the meter works as expected you can review your a summary of the configuration in the final step. From any step though, the meter can be activated from the Testing status.
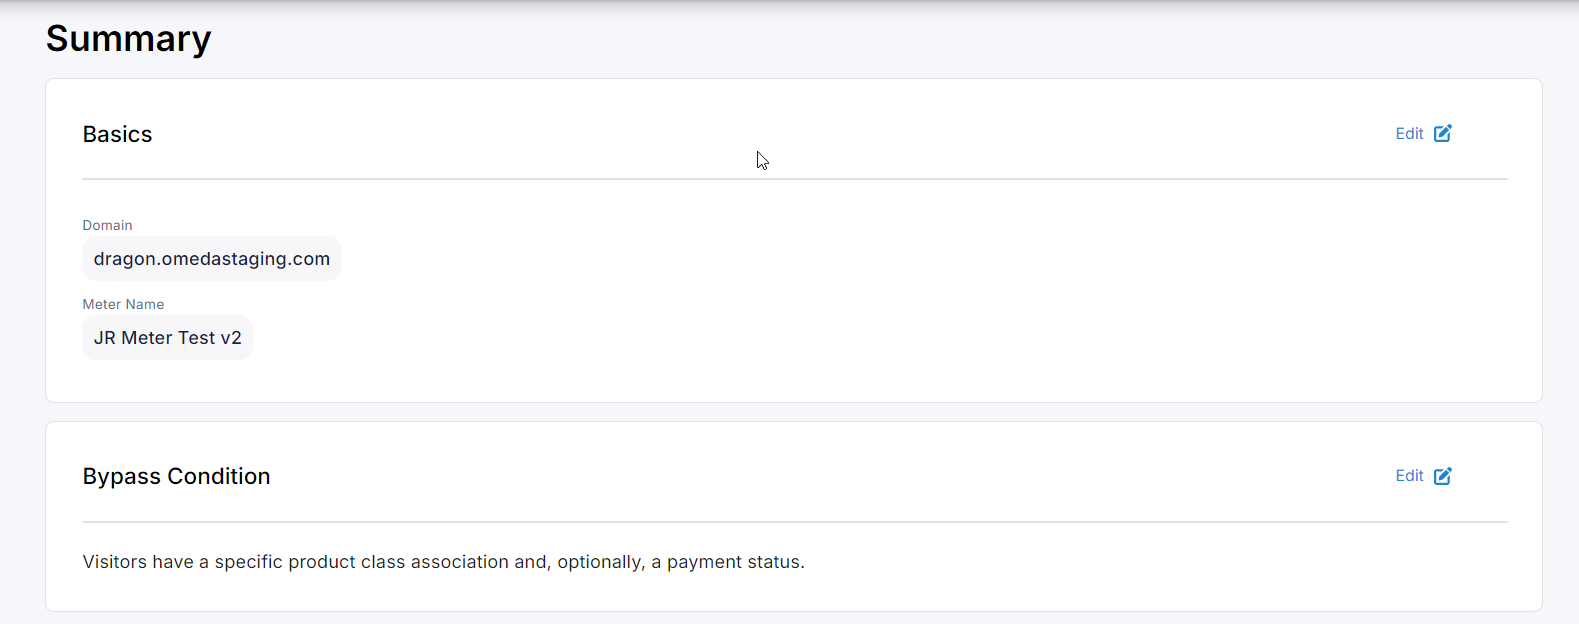
Table of Contents