Voucher Campaigns
Voucher Campaigns allow you to generate and distribute unique, one-time-use codes that customers can redeem for a specific promotional offer. Unlike standard Promo Codes, which can be used by any customer who has the code while the promotion is active, each Voucher Code can only be redeemed once; after a code has been used, it cannot be applied again.
Voucher Campaigns are linked to a Promo Code to define the pricing and product offering for that campaign. For example, if a partner wants to offer their customers a code to redeem a magazine subscription at a special rate, you would set up a Voucher Campaign tied to the relevant Promo Code, generate the codes, and distribute them. When a customer redeems a code, the pricing and product details from the linked Promo Code are applied, and the code is marked as used.
Voucher Campaigns are managed under the Campaigns section of the Omeda portal.
Permissions
Access to the Voucher Campaigns feature is controlled by the following permissions, which can be assigned in the Omeda admin settings:
-
View Vouchers – Allows the user to view existing Voucher Campaigns and their associated reports.
-
Create Vouchers – Allows the user to create new Voucher Campaigns.
-
Edit Vouchers – Allows the user to edit campaigns that are in In-Progress or Pending status.
-
Delete Vouchers – Allows the user to delete Voucher Campaigns.
Contact your Omeda administrator if you need access to any of these permissions.
Accessing Voucher Campaigns
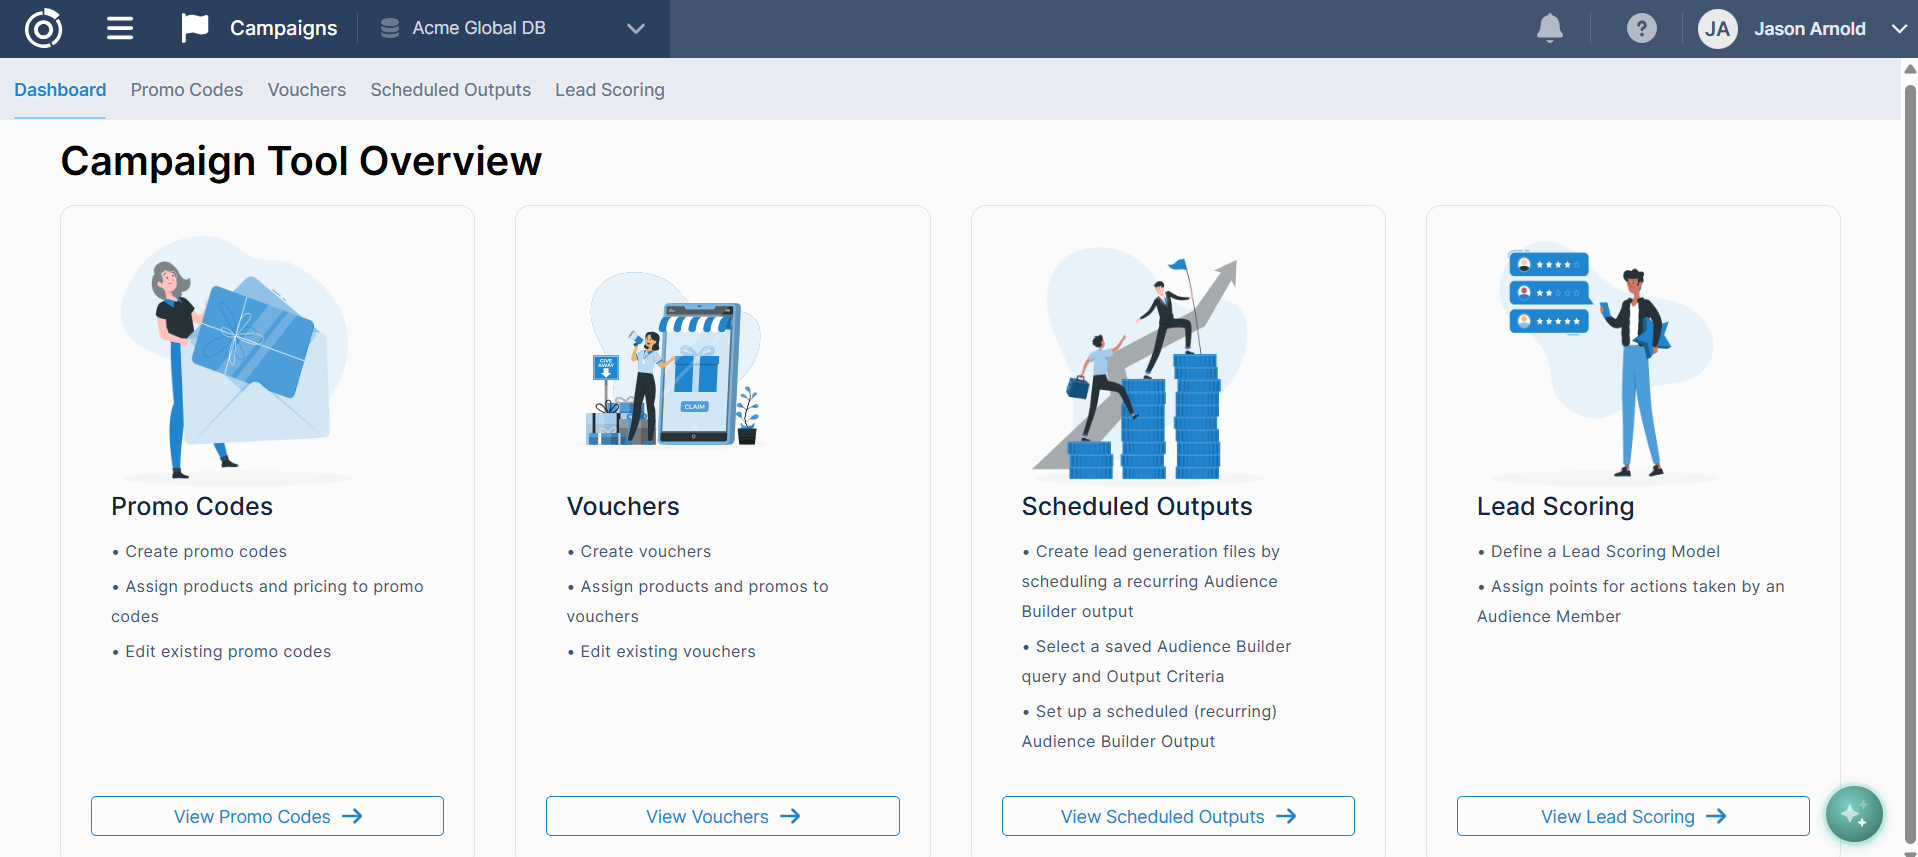
To access the Voucher Campaigns dashboard:
-
In the navigation menu, click Campaigns.
-
Click the View Vouchers option from the campaign tools listed on the page.
From the Voucher Campaigns dashboard, you can view all existing campaigns and their statuses, create new campaigns, or access campaign history and reporting.
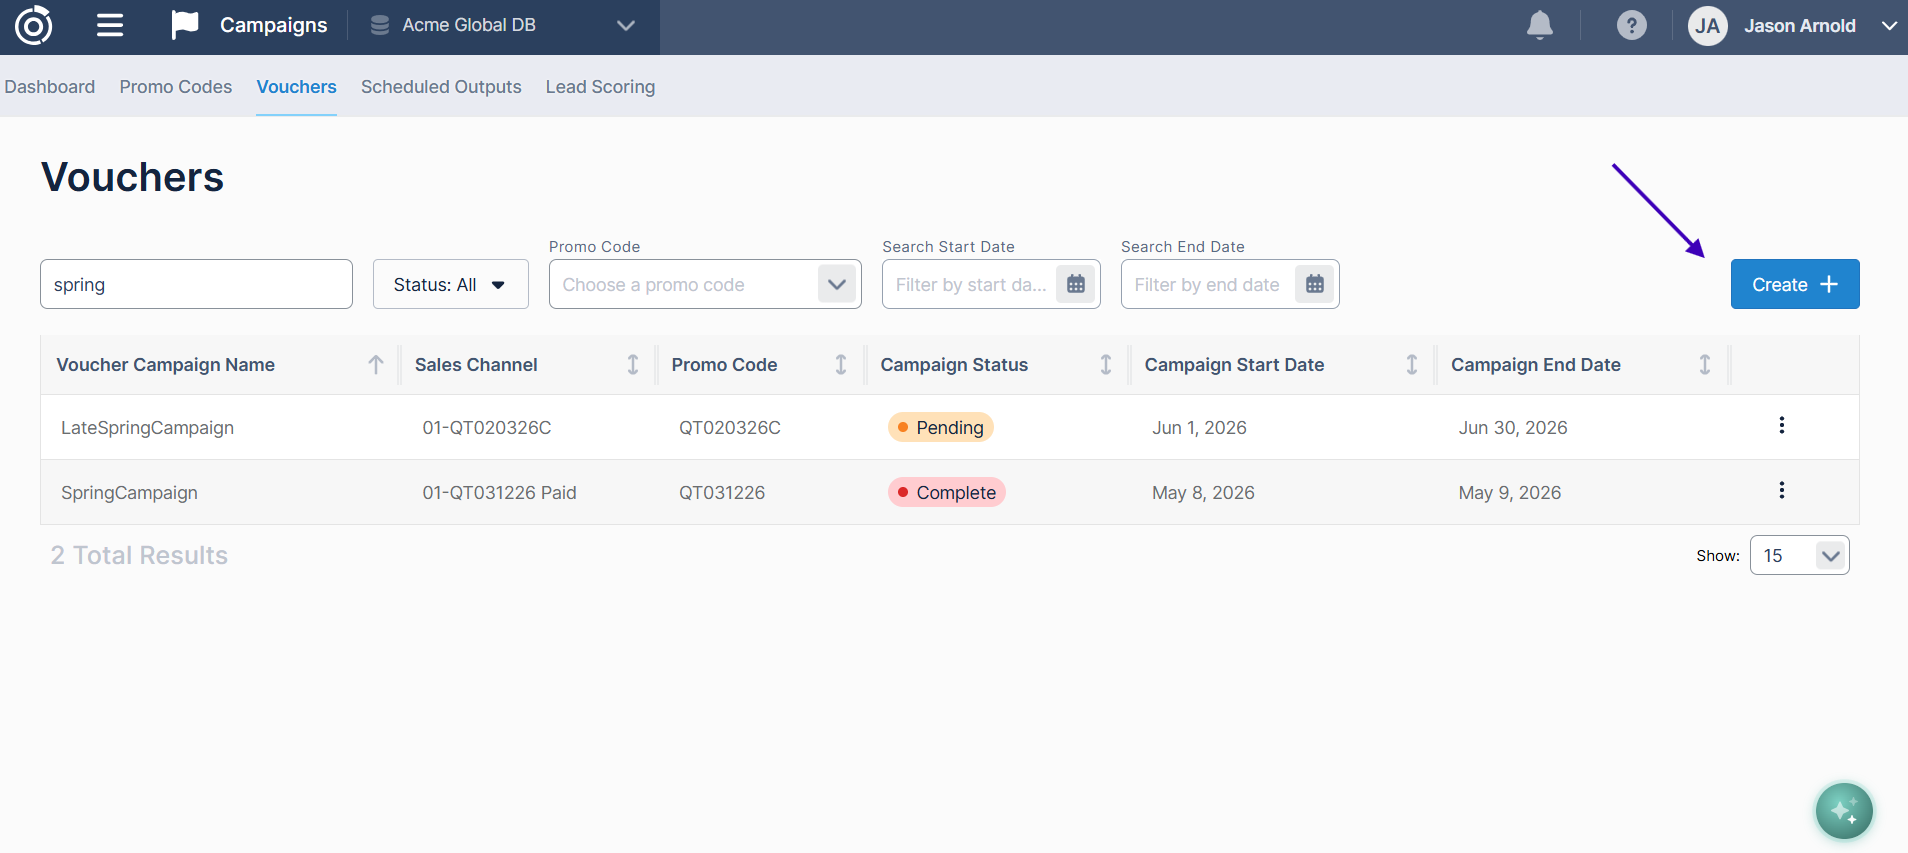
Creating a Voucher Campaign
Creating a Voucher Campaign is done through a three-step workflow. You can save your progress at any step and return to complete the setup later. The campaign will not become active until all required steps have been completed and you have clicked Save and Create Campaign. To get started, click the Create button on your dashboard:
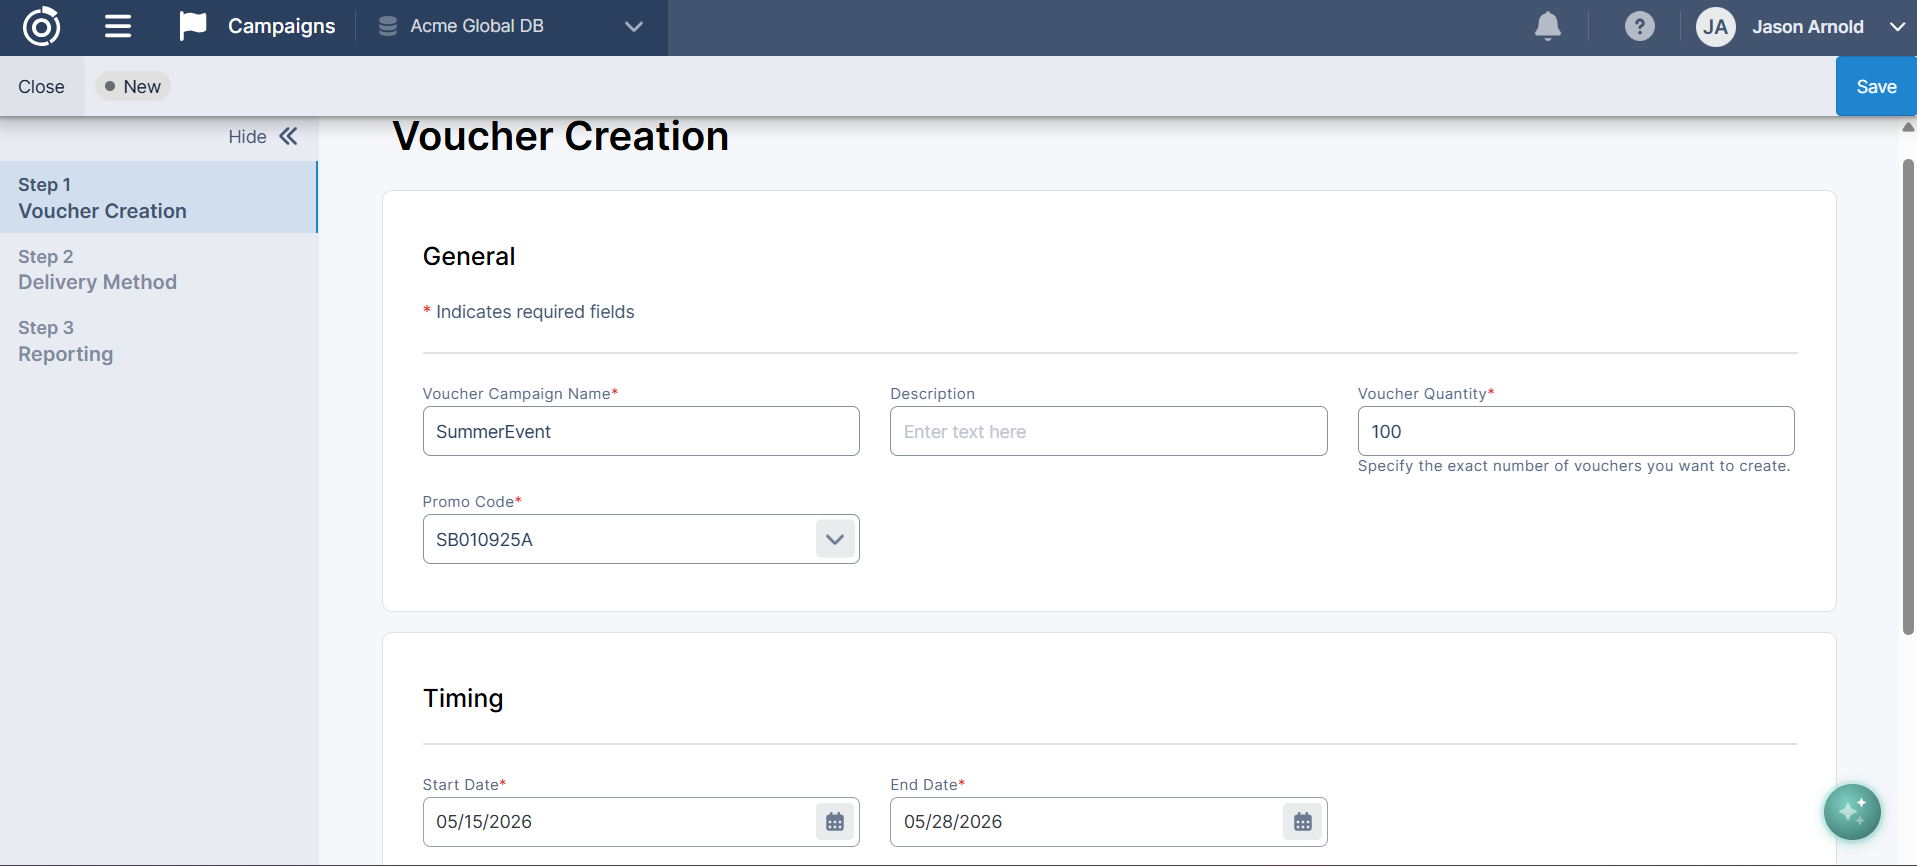
Step 1: Voucher Creation
Provide the general configuration for your Voucher Campaign and choose how your voucher codes will be supplied.
-
Campaign Name – required – Enter a name for this campaign. Campaign names follow the same naming convention as Promo Codes: spaces are not allowed, but you can use camelCase or underscores (e.g.,
SpringPartnerCampaignorspring_partner_campaign). -
Promo Code – required – Select the Promo Code that defines the pricing and product offering for this campaign. All voucher codes for this campaign will be tied to the selected Promo Code.
-
Start Date – required – Select the date the campaign should begin accepting voucher redemptions.
-
End Date – required – Select the date the campaign should stop accepting voucher redemptions. After this date, any unredeemed codes will no longer be valid.
-
Number of Vouchers – required – Enter the number of voucher codes needed for this campaign.
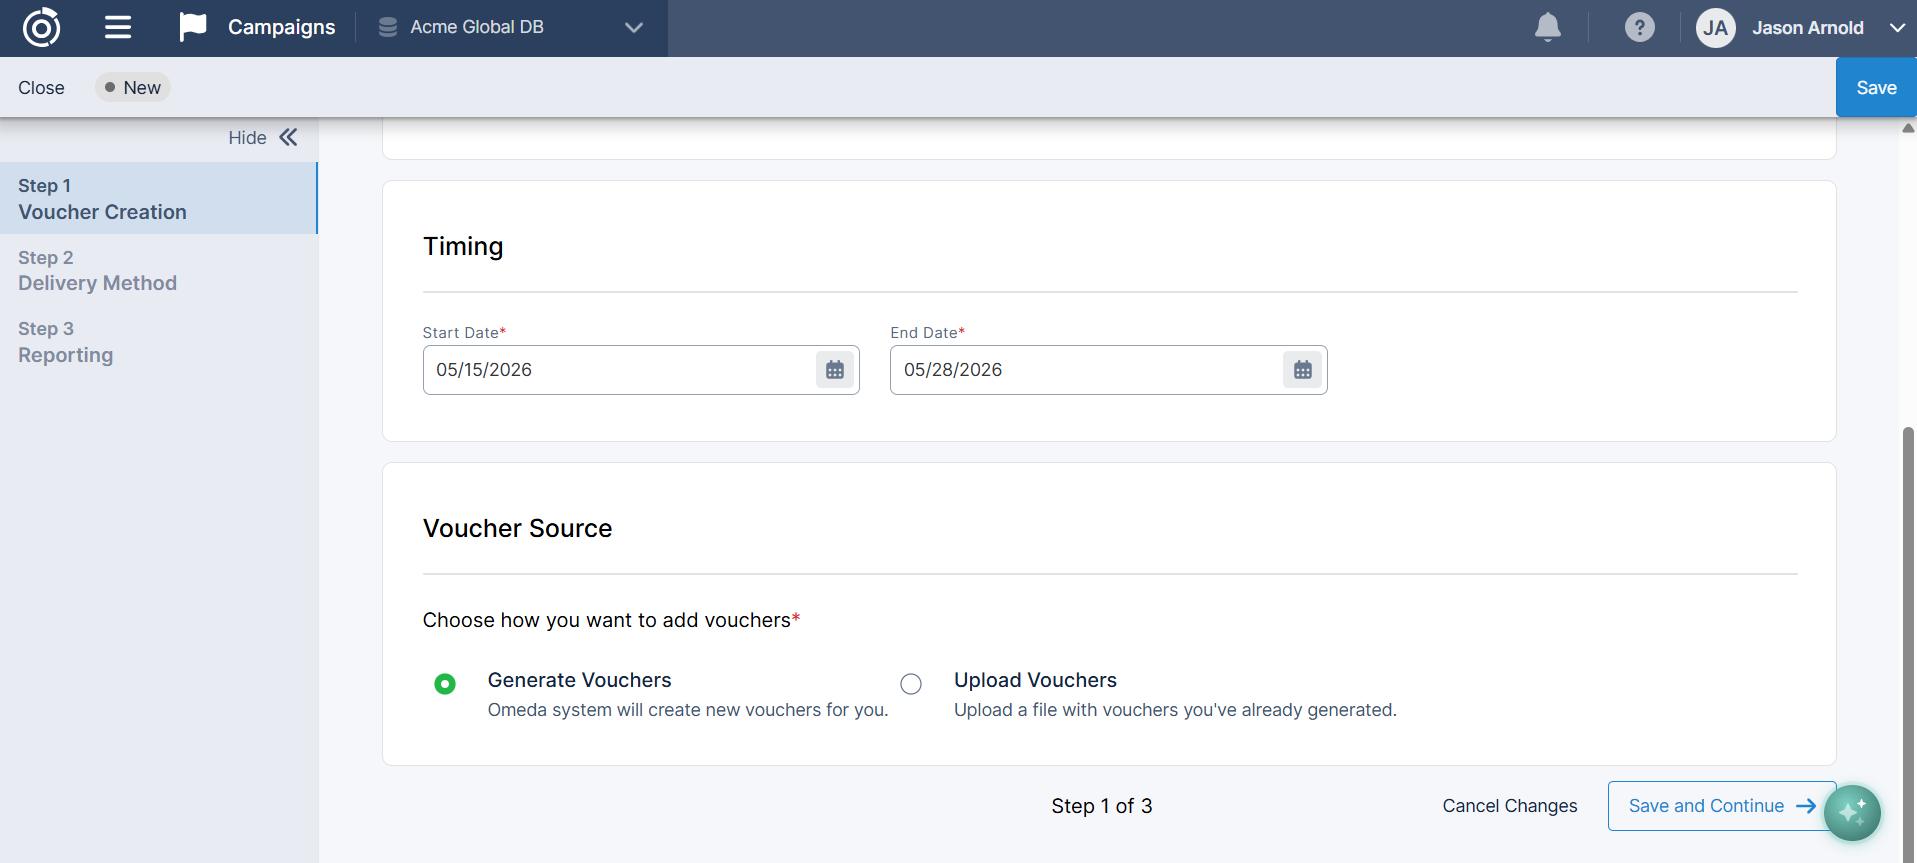
Voucher Code Method
Select how you want to provide voucher codes for this campaign:
-
Generate Codes – Omeda will automatically generate as many unique voucher codes as you need. The codes will be created and delivered to you on the delivery date you configure in the next step. If your delivery date is before the campaign Start Date, you will receive the codes on that date. If the delivery date is the same as the Start Date, you will receive the codes shortly after clicking Save and Create Campaign.
-
Upload Codes – If you have your own list of codes to use, select this option. A window will appear with upload instructions and file specifications. Follow the prompts to upload your file.
-
Uploaded files will only need one column with the voucher codes you want to upload.
-
Tip: We recommend generating or uploading more codes than you plan to distribute. Having extras on hand means you can reissue a code to a customer if needed, or use a few for testing while the campaign is active, without running short on codes for your intended audience.
After completing this step, click Save & Continue to proceed.
Step 2: Delivery Method
Configure how and when your voucher codes will be delivered to you. This step covers the delivery of the codes themselves, not campaign reporting, which is configured in the next step.
Delivery Method – required – Select how you would like to receive your voucher codes:
-
Email – The codes will be sent as a file attachment to the email address(es) you specify.
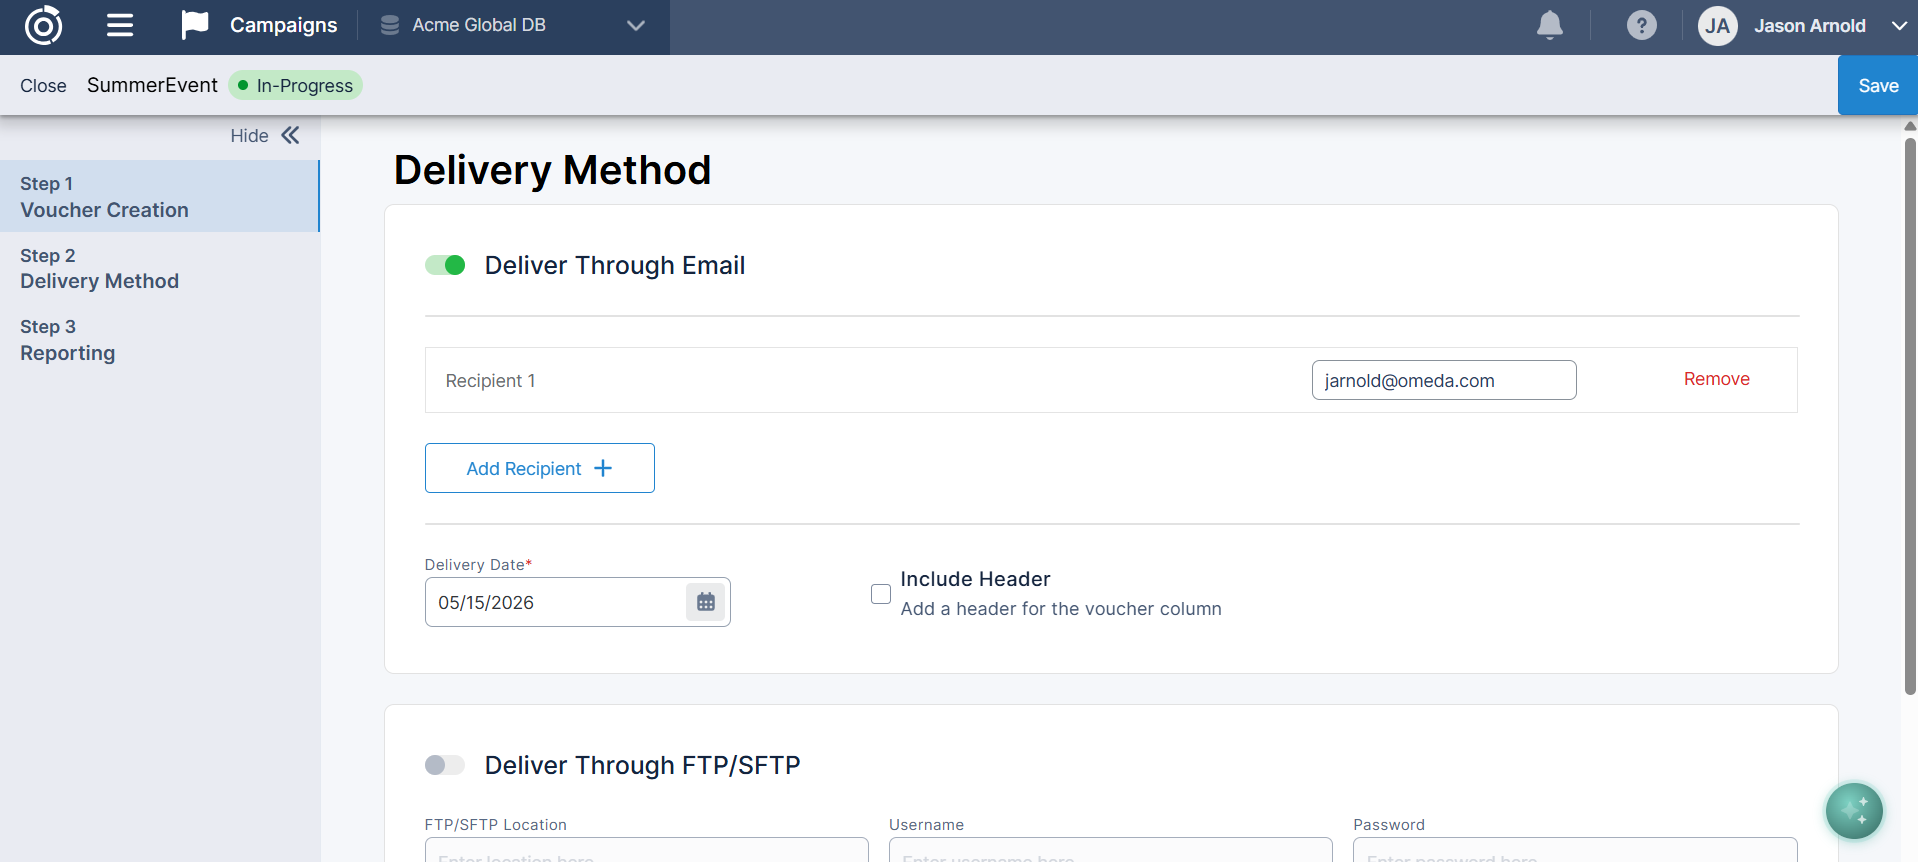
-
SFTP/FTP – The codes will be deposited to your configured SFTP or FTP location.
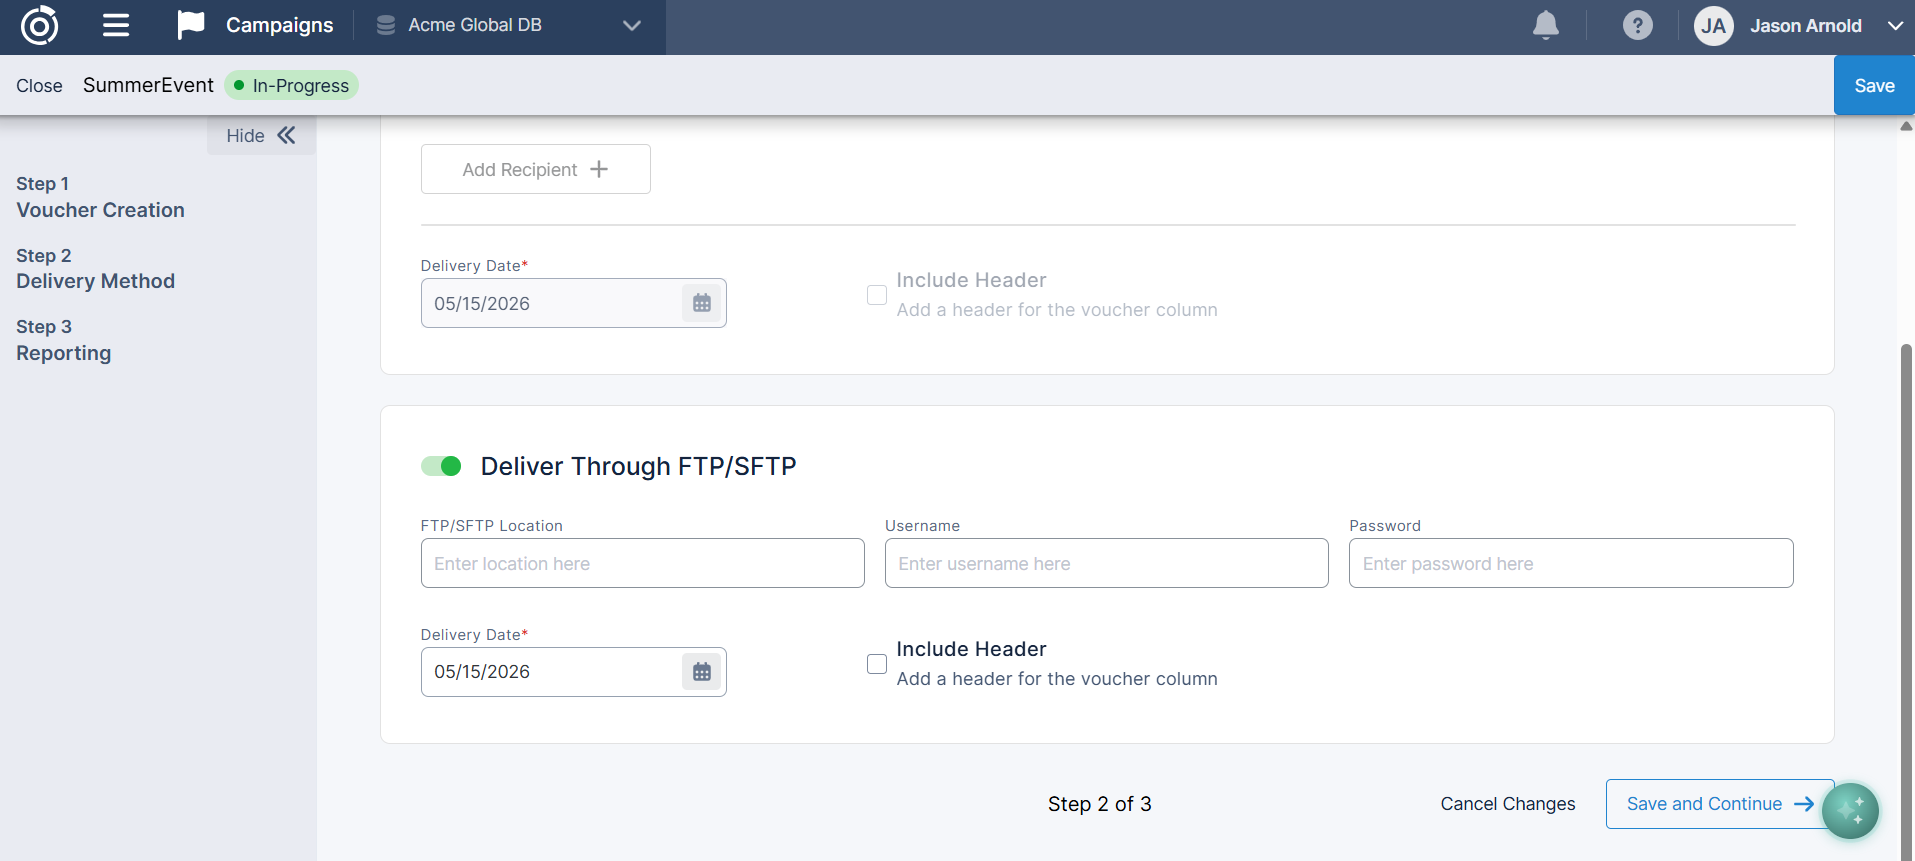
-
Delivery Date – required – Select the date you want to receive the voucher codes. This can be before or on the campaign Start Date:
-
If the delivery date is before the Start Date, you will receive the codes on that date.
-
If the delivery date is the same as the Start Date, the codes will be sent shortly after you click Save and Create Campaign.
-
After completing this step, click Save & Continue to proceed.
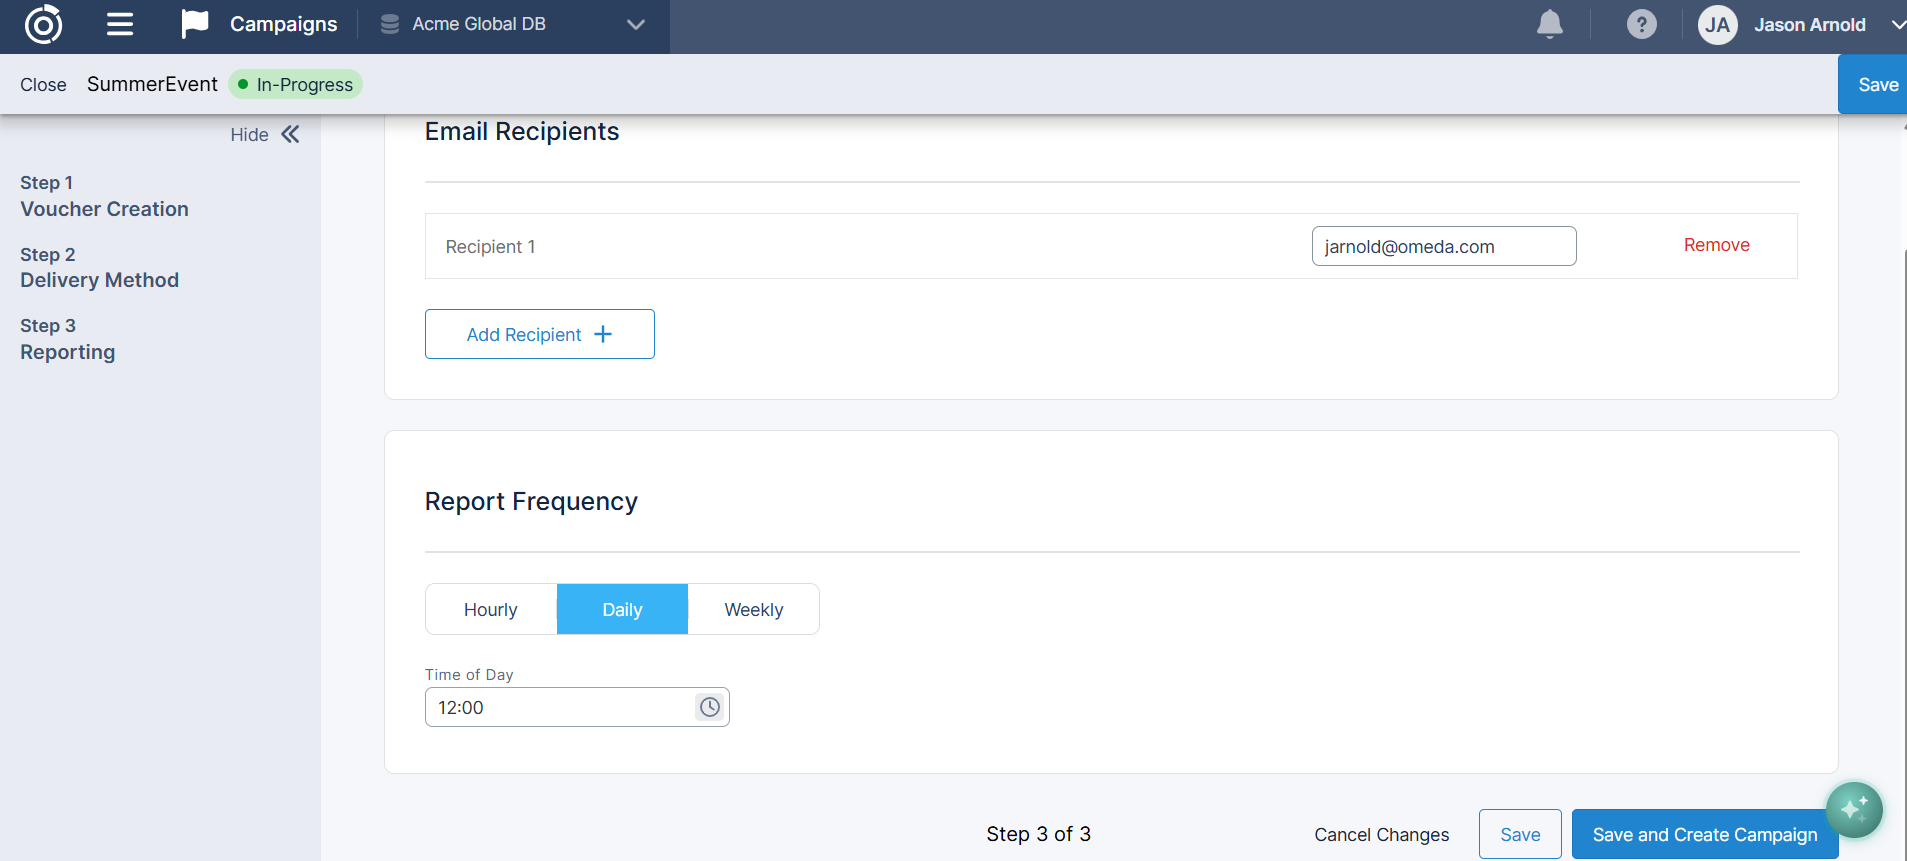
Step 3: Reporting
Configure how and when you want to receive automated campaign performance reports. Reports are delivered by email only.
-
Report Recipients – required – Enter the email address(es) that should receive campaign reports. Multiple addresses can be added.
-
Report Frequency – required – Select how often automated reports should be sent during the campaign. Options are:
-
Hourly – Best suited for short-term campaigns or situations where high-frequency monitoring is needed.
-
Daily – Recommended for most campaigns.
-
Weekly – Recommended for longer campaigns where a high-level view of performance is sufficient.
-
For most campaigns, Daily or Weekly reporting provides the right balance of visibility without generating unnecessary email volume. Hourly reporting should be reserved for situations where near-real-time tracking is required.
After completing this step, review your setup before finalizing (see below).
Review Before Finalizing
Before clicking Save and Create Campaign, save your progress and take a moment to review your full campaign configuration across all three steps. Once the campaign is created, certain fields, such as the linked Promo Code, cannot be changed. You can always delete a pending campaign should you need to reconfigure one.
When you are ready, click Save and Create Campaign to finalize and create the campaign. If you need to come back later, click Save to preserve your progress. To discard your changes, click Cancel Changes.
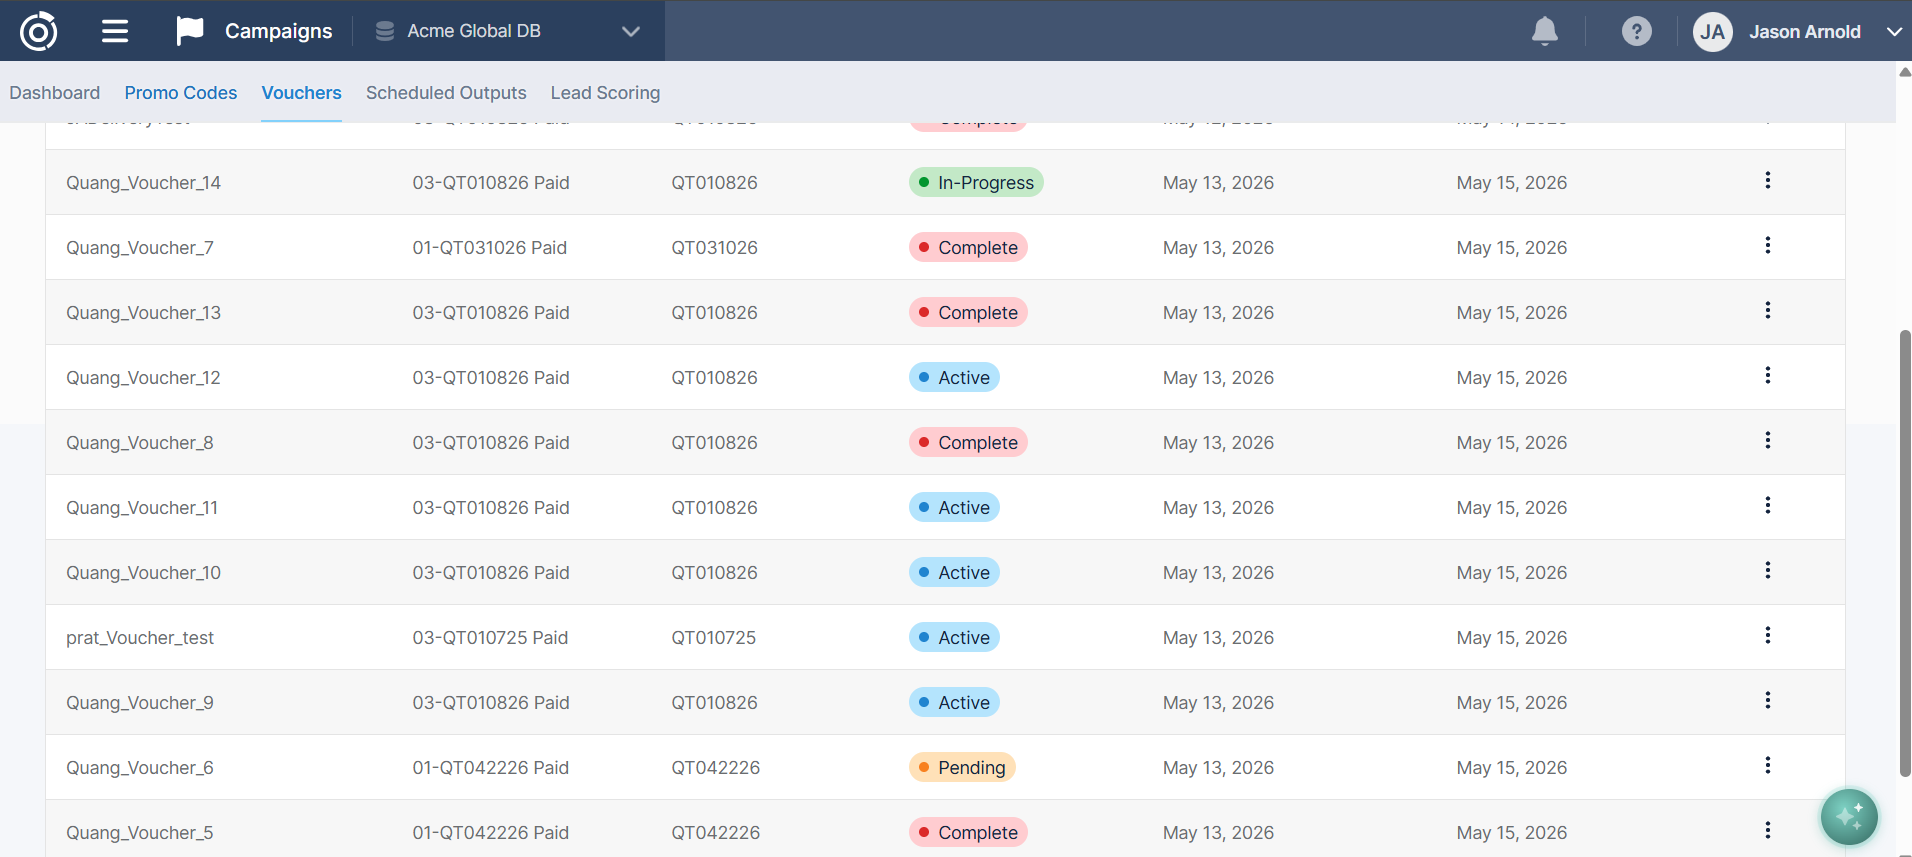
Managing Voucher Campaigns
From the Voucher Campaigns dashboard, you can manage your campaigns depending on their current status by clicking the kabob menu on the right (the three dots).
Campaign Statuses
-
In-Progress – Campaign creation has been started but not yet fully completed. The campaign can be finished at a later date or deleted.
-
Pending – The campaign has been created and is waiting for the Start Date to arrive.
-
Active – The campaign is live and voucher codes can currently be redeemed.
-
Completed – The campaign's End Date has passed. Voucher codes are no longer redeemable.
Editing a Campaign
Campaigns in In-Progress or Pending status can be edited. Once a campaign is Active, certain fields, such as the linked Promo Code, are locked and cannot be changed to protect the integrity of the campaign. If you need to make significant changes to an active campaign, you will need to end the campaign and create a new one.
Deleting a Campaign
Campaigns can be deleted if you have the Delete Vouchers permission, by click on the kabob menu for the campaign you wish to delete. Deleting a campaign is permanent and will delete any generated or uploaded vouchers from the system. The delete option is only available for in-progress or pending statuses. If a campaign is active and you would like to end it, you can edit the campaign end date to the current day.
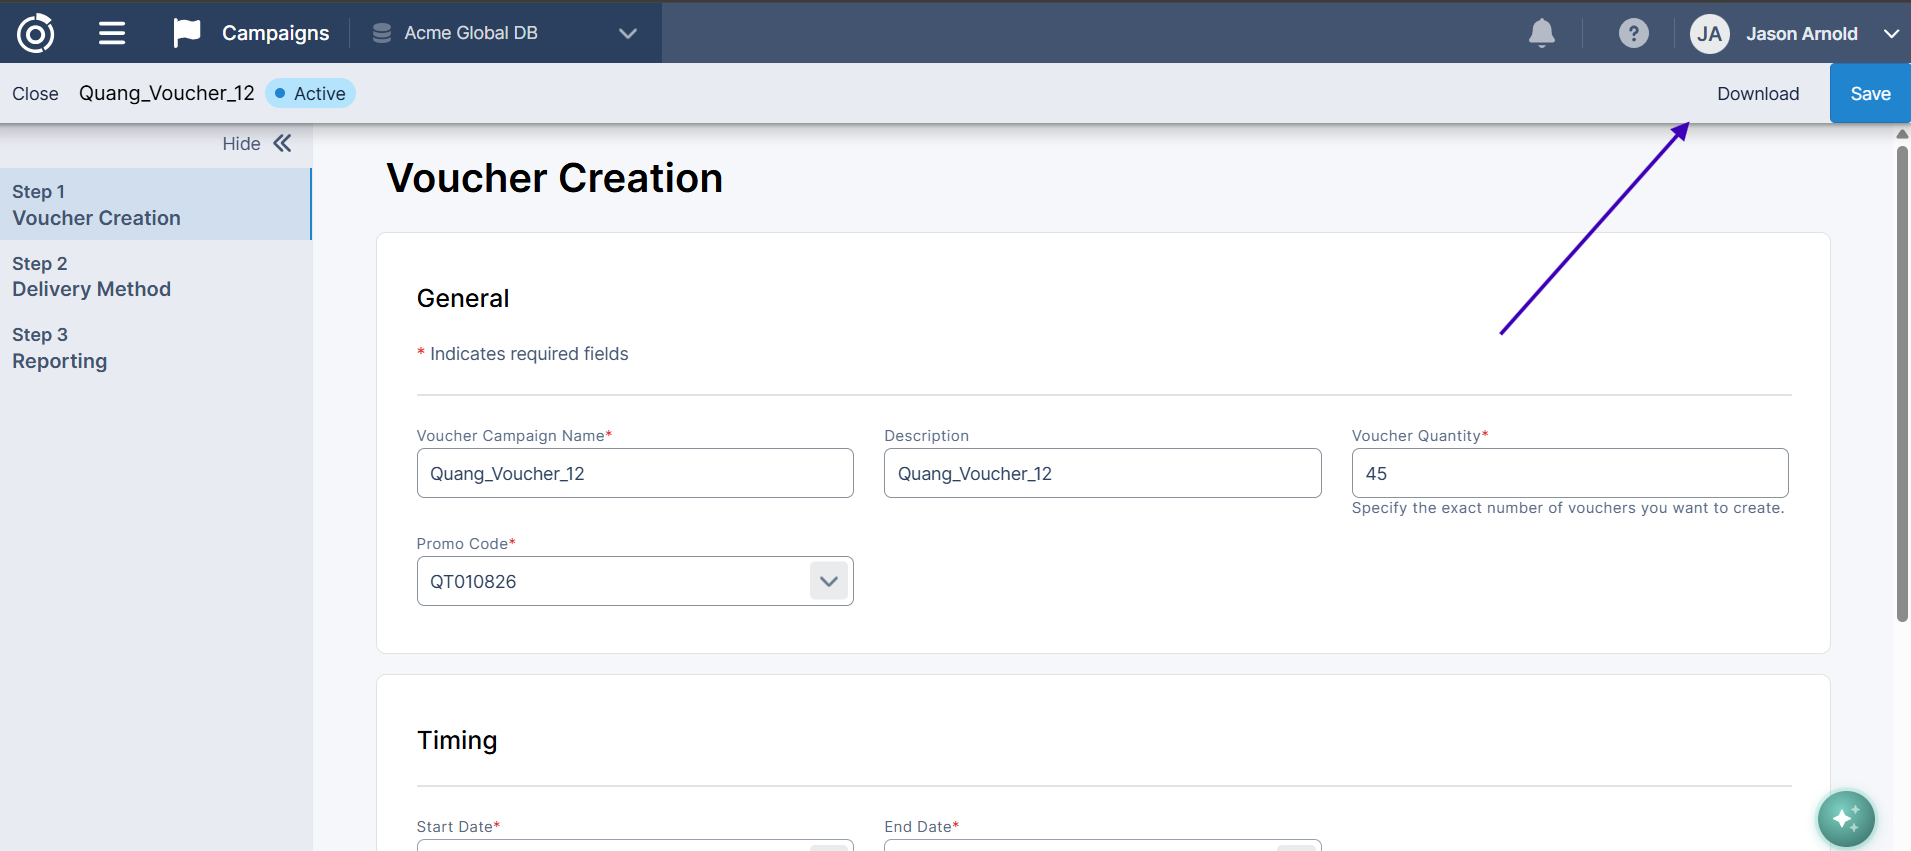
Downloading Your Voucher Codes
If you need to download your voucher codes at any point during the campaign after they have been generated and delivered, you can click “edit” on the campaign you would like to download the codes for, then on the Voucher step you will see the download option in the top right corner:
Voucher Reporting
The Voucher Campaign report provides a summary of voucher usage during your campaign. Reports are automatically delivered by email to your configured recipients at the frequency you selected during setup, and you can also download a report at any time from the campaign detail view.
Report Fields
The period-based fields in the report reflect the frequency you selected during setup. For example, if you selected Daily reporting, the report will show activity since the last report was sent rather than the previous hour. The gross fields always reflect campaign-to-date totals regardless of frequency.
|
Field |
Description |
|---|---|
|
Period Order Count |
Total vouchers redeemed since the last report was sent (period reflects your selected frequency: hourly, daily, or weekly). |
|
Period Title Count |
Total products purchased using a voucher since the last report was sent. |
|
Gross Order Count |
Total vouchers redeemed during the entire campaign to date. |
|
Gross Title Count |
Total products purchased using a voucher during the entire campaign to date. |
Report emails include a summary of the above statistics directly in the email body, as well as the report as an attachment, so you can get a quick read on campaign performance without needing to open the file.
End-of-Campaign Report
When your campaign ends, a final report is automatically generated and sent to your configured recipients. This report reflects the complete campaign totals. After the final report is sent, the voucher codes generated or uploaded for that campaign are removed from the system to prevent unnecessary database storage; your campaign history, configuration, and reporting will remain accessible. The end-of-campaign report and any previously delivered reports serve as your record of campaign performance.
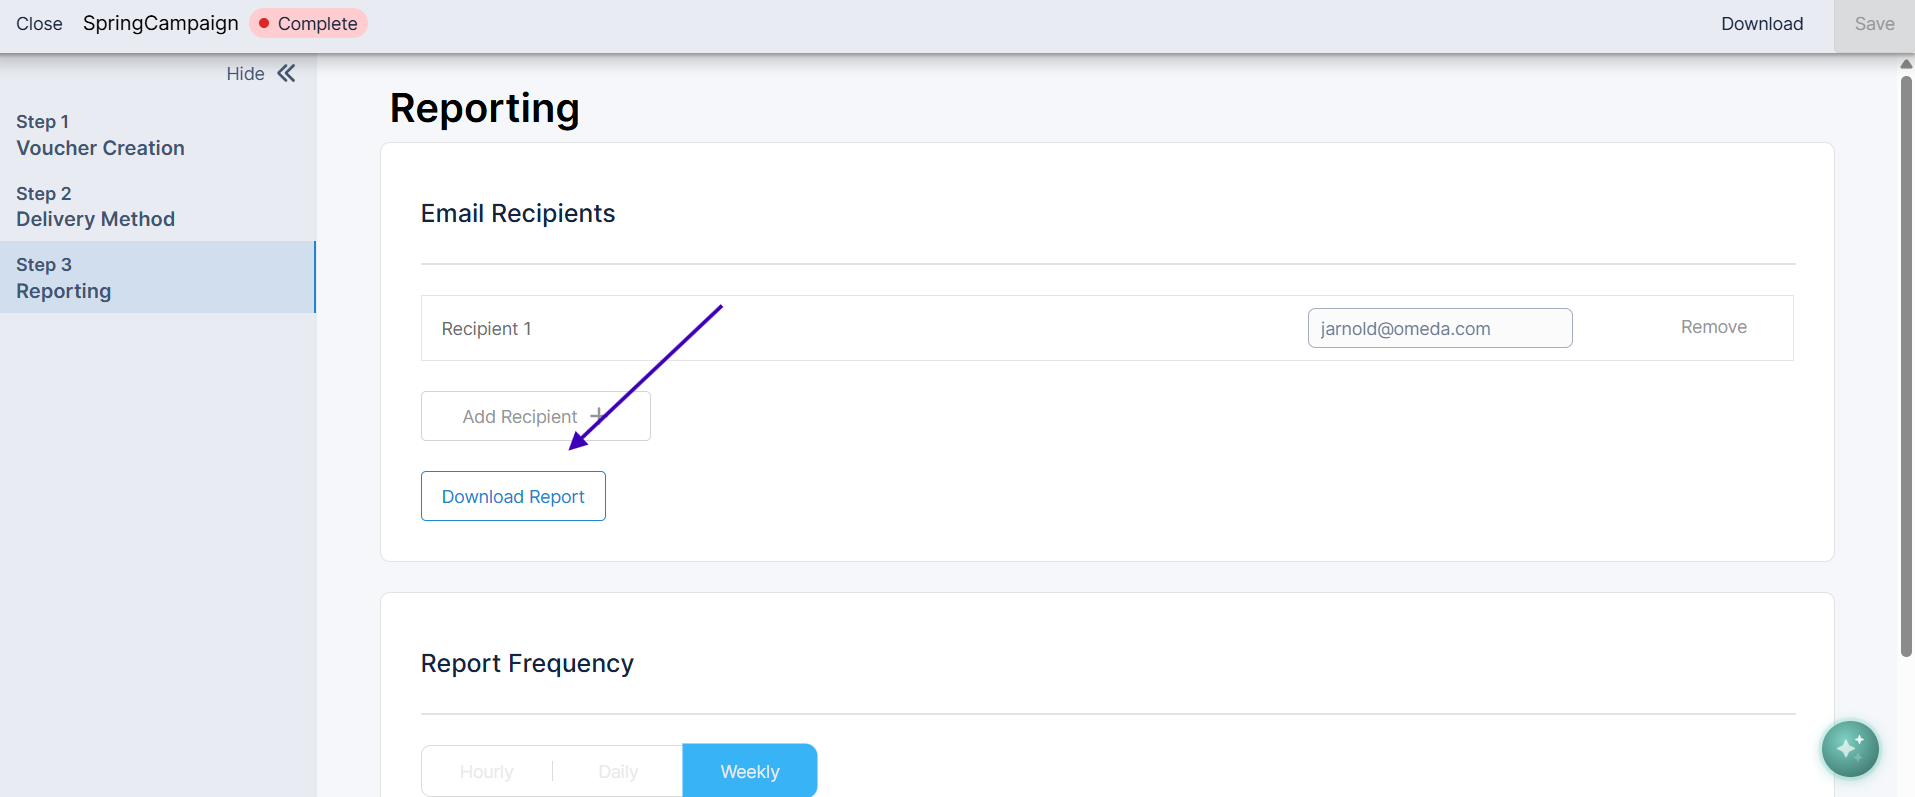
Downloading a Report
To download the current report for a completed campaign:
-
Navigate to the Voucher Campaigns dashboard.
-
Click on the completed campaign you want to view, and select the edit option.
-
Navigate to the reporting tab of that campaign
-
Click Download Report.
Voucher Redemption
Voucher Codes can be redeemed by customers through online forms. Omeda supports voucher redemption on both forms built in Form Builder and Custom Forms.
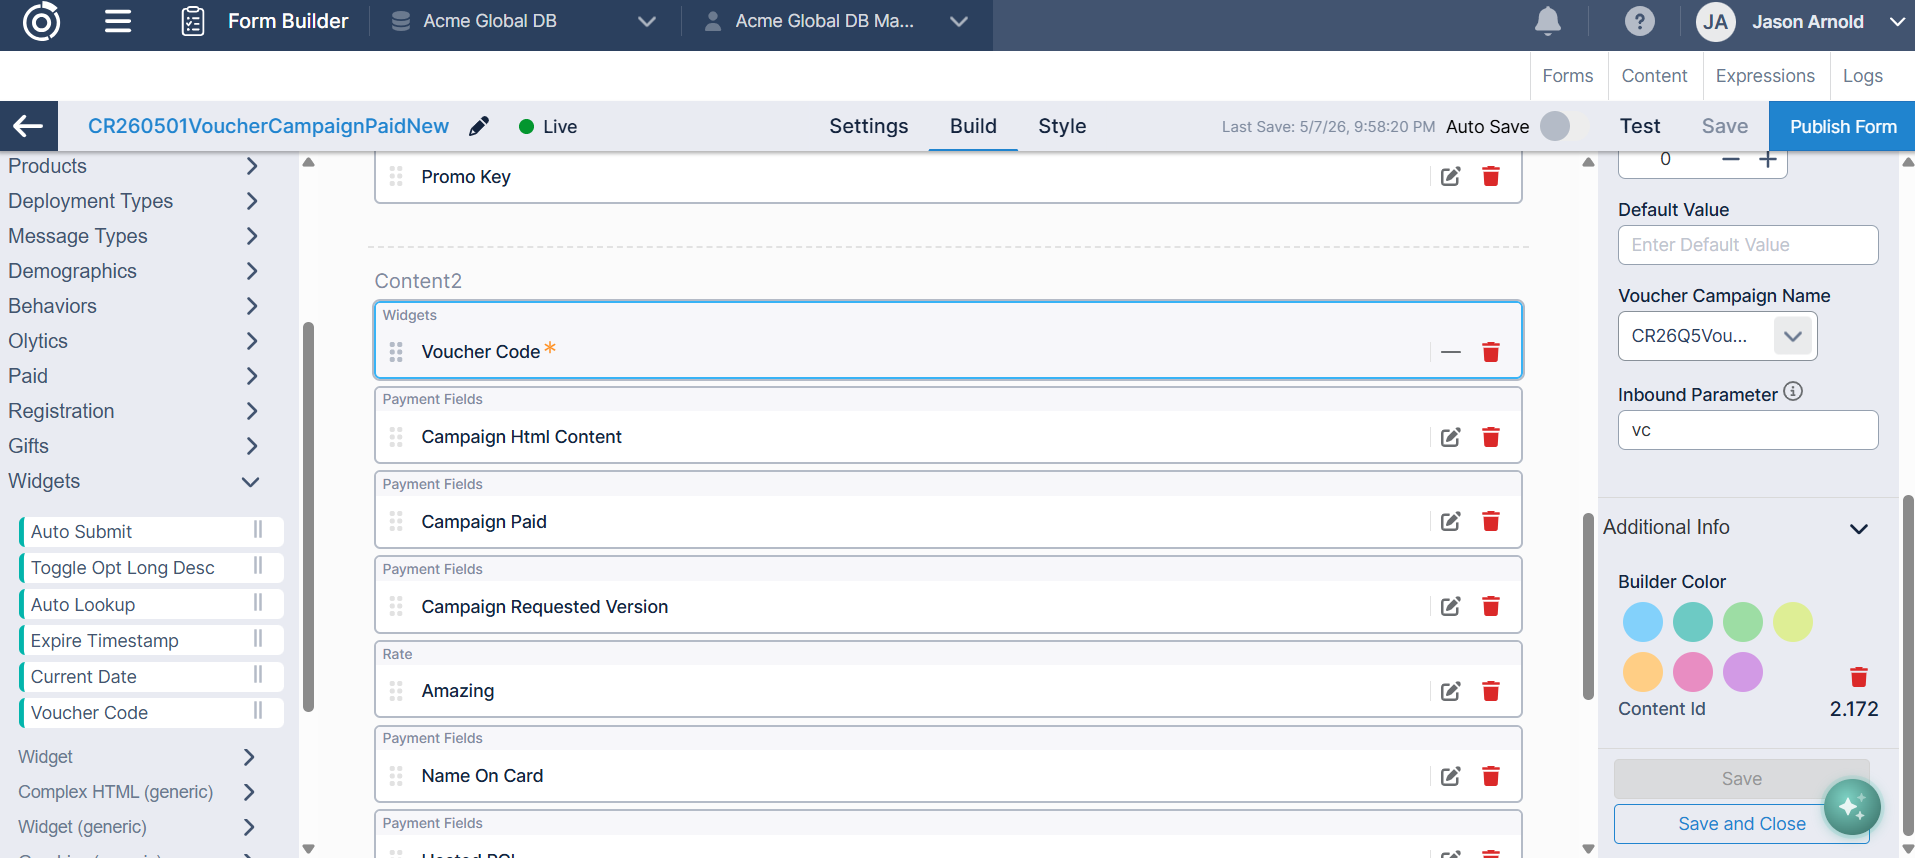
Redemption via Form Builder
To enable voucher redemption on an online form in Form Builder:
-
Open your form in Form Builder and navigate to the build view.
-
Locate the Voucher field in the Widgets pleat on the left-hand side.
-
Drag the Voucher field onto your form in the desired location.
-
Click the edit icon on the field to configure it. Select the Voucher Campaign you want to associate with this form. Only codes from the selected campaign will be redeemable through this form during the campaign's active period.
-
Publish your form.
When a customer enters their Voucher Code and submits the form, the system validates that the code exists and is unredeemed for the active campaign, applies the pricing from the linked Promo Code, and marks the Voucher Code as used upon a successful order submission.
If a code is invalid, already redeemed, or the campaign is not currently active, the customer will see an appropriate error message and will not be able to proceed with that code.
Redemption via Custom Forms
For clients using Custom Forms, Omeda provides APIs to integrate voucher validation directly into your form experience. The Voucher API allows your form to check whether a voucher code is valid and redeemable before allowing the customer to proceed, and marks the code as used upon a successful order submission.
If you need assistance setting up Custom Form voucher redemption, please reach out to your Customer Success Manager or contact Omeda Customer Support.
Frequently Asked Questions
Can a voucher code be used more than once by a customer? No. Each voucher code can only be redeemed once. Once a code has been used, it is marked as redeemed and cannot be applied again by another customer or on a subsequent transaction.
What happens to unredeemed codes when a campaign ends? When a campaign's End Date passes, unredeemed codes are no longer valid and cannot be redeemed. A final report is generated and sent to your configured recipients, and then the voucher codes for that campaign are removed from the system. Your campaign history, configuration, and all reports remain accessible.
Can I use a Voucher Campaign with any Promo Code? The Promo Code you select for a Voucher Campaign defines the pricing and product offering for all codes in that campaign. The Promo Code must exist in the Campaign Tool before you can create a Voucher Campaign.
How many codes can I generate per campaign? You can generate as many codes as your campaign requires.
Can I add more codes to an active campaign? If you need to add codes to an active campaign, please contact your Customer Success Manager or Omeda Customer Support for guidance.
Who can see Voucher Campaigns? Voucher Campaign access is permission-based. Users need at minimum the View Vouchers permission to see campaigns. Additional permissions are required to create, edit, or delete campaigns. Contact your Omeda administrator to request access.