
Available November 20. This article covers the new Audience Insights, which goes live on November 20. Until then, current dashboards work as they do today.
With build access, you can create your own apps in Audience Insights. An app is a set of pages with its own navigation, like Essential Insights. Apps take a little more setup than dashboards, but give you multiple pages and more control over layout and design. For a single page of cards, see Building a Dashboard.
Creating an app
-
In My Insights, select Apps at the top of the sidebar.
-
Select + Create in the top right.
-
Choose a theme for the app's colors and fonts:
-
App Themes: prebuilt themes, such as Essential, Clarion, Impact, and Obsidian
-
Custom Themes: themes you've created
-
Import Theme From App: use the theme from an existing app. To match Essential Insights, import its theme.
-
The new app opens in the editor. You can change the theme later.
Starting from Essential Insights or a dashboard
If Essential Insights or one of your dashboards is close to what you need, start from its pages instead of building from scratch. Essential Insights can't be duplicated directly, so you create a new app and import its pages.
-
Create a new app (see Creating an app above).
-
In the editor, open Pages and navigation from the left panel.
-
Select Import, then choose whether to import from an app or from a dashboard you've created.
-
Search for and select the app or dashboard, such as Essential Insights, then select Next.
-
Choose the import options (see below).
-
Choose which pages to import, or select Select all.
-
Select Import, then Save.
Import options
-
Duplicate Cards: makes your own copies of the cards. Always select this option. Without it, the cards in your app stay linked to Essential Insights, and Omeda's updates to Essential Insights can overwrite your changes.
-
Include Card interactions: keeps what happens when someone clicks a card, such as drilling into a table. Select this so drill-down cards keep working.
-
Include filters: keeps the filters on the imported pages.
-
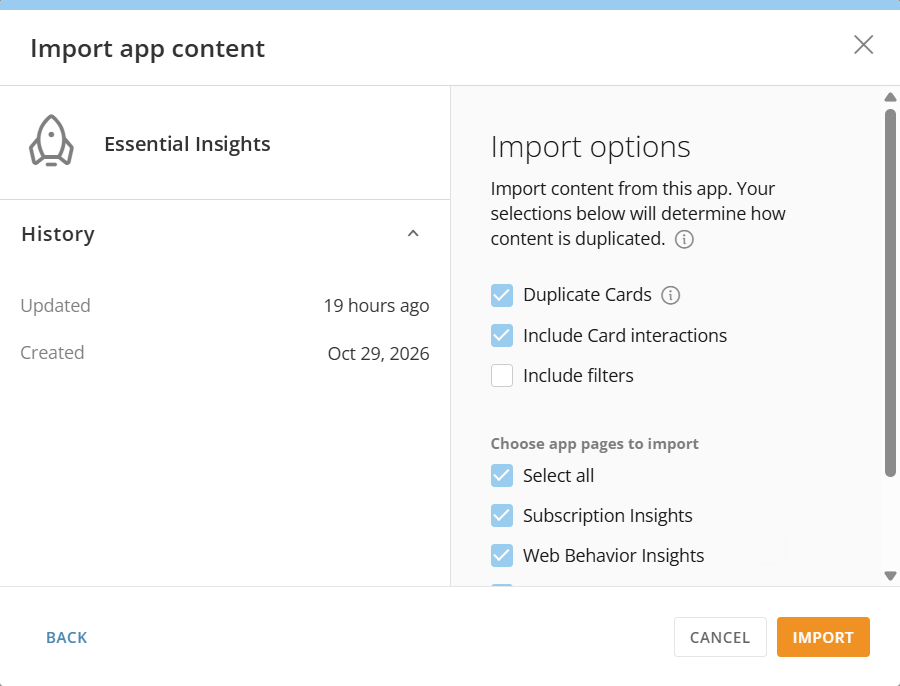
Importing app content from existing apps
Editing your app
The app editor has three areas:
-
Top bar: rename the app, switch between desktop and mobile layouts, preview at actual size, undo or redo, and Save or Cancel
-
Left panel: the top group adds content to the page; the bottom group holds app settings, such as theme, pages, and reports
-
Right panel: settings for whatever is selected on the page, such as a card
Adding content to a page
Drag items from the top group of the left panel onto the page:
-
Tables: a new table card
-
Charts: a new chart card (see Building a Card)
-
Controls: filters and other controls viewers use to change what the page shows
-
Components: other page elements, including Card (add an existing card), List, Gallery, Filter list, Banner, Details, Queue, Workflow, Image, and Custom
-
Text: a header or text
-
Layout: layouts, tabs, borders, and spacers to organize the page
Changing a card's settings
Select a card on the page to open its settings in the right panel. You can change the card here without opening Analyzer:
-
Settings: chart type, the columns it uses, date range, sorting, filters, and row limit
-
Styles: how the card looks
-
Actions: what happens when someone clicks the card
The card's menu (⋮) at the top of the right panel has more options: Save as, Choose different Card, Open Card Details, Edit in Analyzer, Remove, Move to appendix, and Delete.
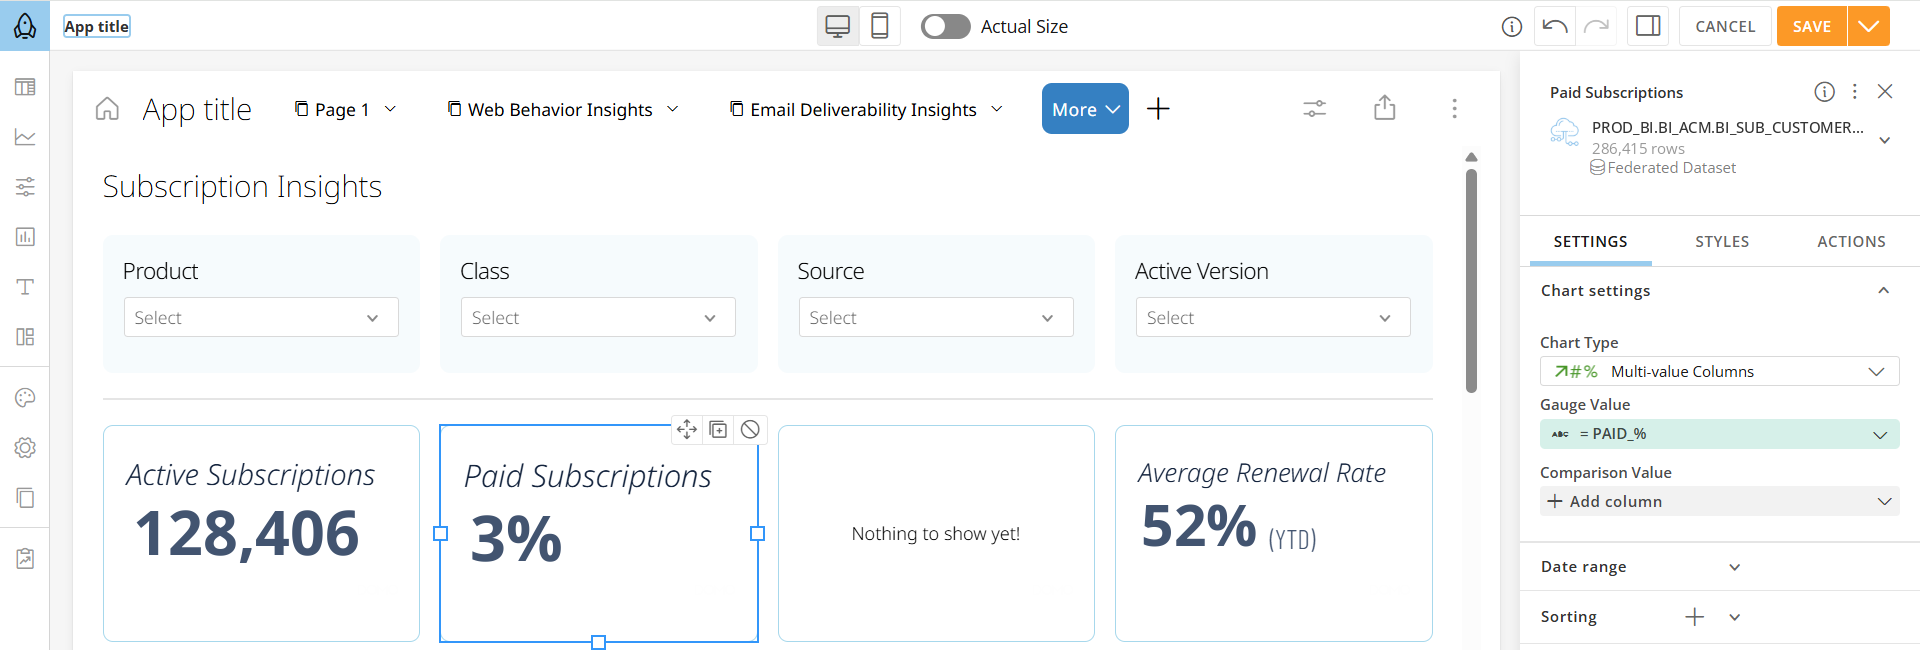
App settings
The bottom group of the left panel holds settings for the whole app:
-
App theme: the app's look, including fonts, colors, chart colors, and card, table, and navigation styles. Choose a different theme, or select Edit Styles to adjust the current one. To reuse your changes in other apps, select Save as custom. Changes to the theme's accent colors also change your chart colors.
-
App configuration (gear icon):
-
Info & Permissions: see who created the app, change the title and icon, and select Lock this content to keep others from editing it
-
Filter Options: choose whether filters persist
-
-
Pages and navigation:
-
Order: add pages with New page or Import, drag pages to change their order, and select a page's gear icon for page-level settings
-
Configuration: change where the page navigation and app controls appear
-
-
Reports: schedule an email report of the app (see Scheduling an email report below)
Saving
Select Save in the top right to save your changes, or Cancel to discard them.
Sharing an app
-
Open the app (not the editor).
-
Select the menu (⋮) in the top right, then select Share.
-
Enter users or groups, then select Share.
Scheduling an email report
To send pages of your app by email on a regular schedule, create a report. Recipients get an email with an overview of the data at that time and a link to view it in Audience Insights. To schedule a single card instead, see Using Essential Insights.
-
In the app editor, select Reports at the bottom of the left panel.
-
Select New Report.
-
Choose how to build the report:
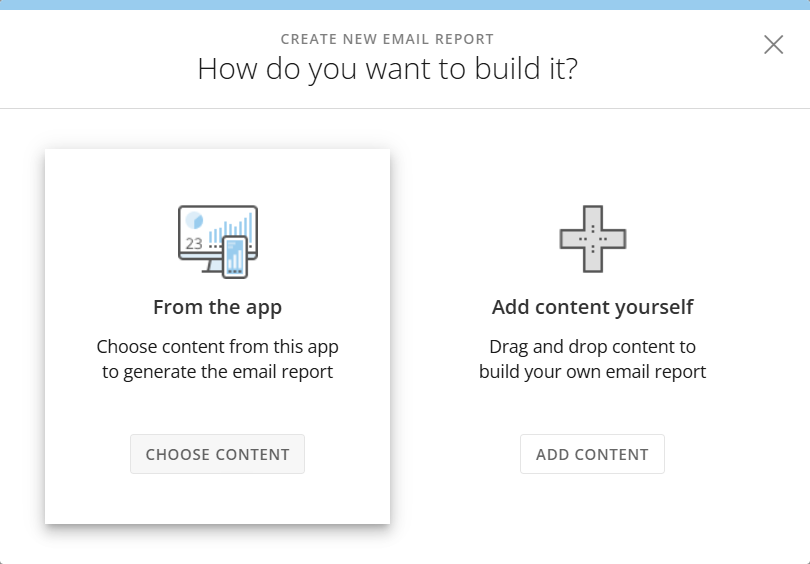
Choosing how to build a report -
From the app: select Choose Content, choose the pages to include, then select Next. The pages are combined into one report with the app's theme. Buttons, tabs, and controls aren't included.
-
Add content yourself: drag and drop content to build the report.
-
-
In Report builder, use Report configuration (gear icon) to set the report name, description, owner, and appearance.
-
Open Report views (list icon) and select a report view, or select New Report View. Each view has its own settings:
-
Filters: select Add Filter or Choose Date to filter what this view sends
-
Schedule: enter an email subject, choose how often and when to send, select Include Weekends if needed, set a start and end date, and turn on Enabled
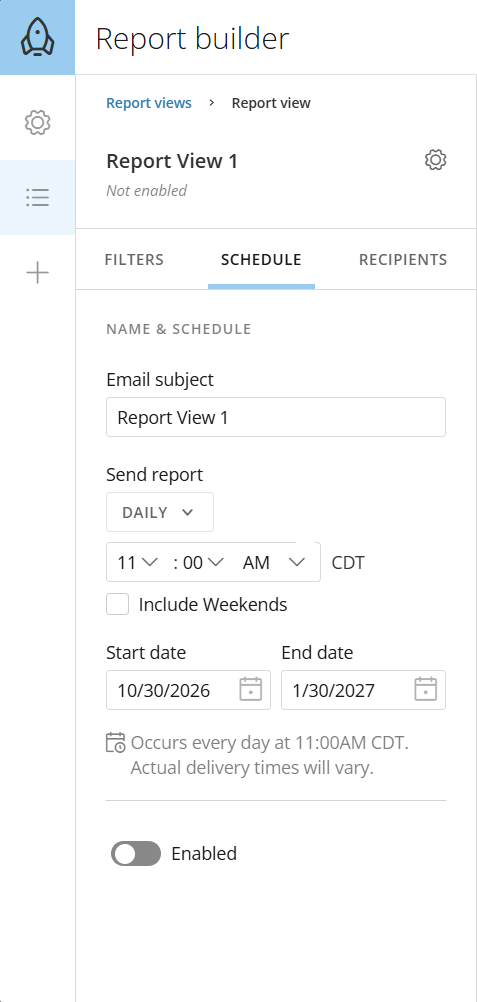
Scheduling a report -
Recipients: enter users, groups, or email addresses, then select Add
-
-
Select Save.
Use report views to send the same report to different people with different filters, such as one view per product. Layout changes in Report builder apply to every view.
To send a report right away, see past sends, or delete a view, select the view's menu (⋮), then Save and Send Now, View History, or Delete.
Additional Resources
-
Building a Card
Create a new card and build it in Analyzer. -
Using My Insights
Find your apps, dashboards, and shared and favorited content. -
Audience Insights Data Sources
Review the datasets and fields available in Audience Insights.
Table of Contents