
Available November 20. This article covers the new Audience Insights, which goes live on November 20. Until then, current dashboards work as they do today.
Essential Insights is Omeda's prebuilt Audience Insights app. Its pages cover email engagement, email deliverability, subscriptions, web behavior, and AI content tagging. This article covers what you can do on those pages with view access. For building your own content, see Building a Dashboard, Building a Card, and Building Your Own App.
Navigating pages
Open the Essential Insights tab in the top right corner of Audience Insights. The app's pages are listed along the left side of the app. If they don't all fit, the remaining pages are under More.
-
Email Engagement Insights
-
Email Deliverability Insights
-
Subscription Insights
-
Web Behavior Insights
-
AI Tagging Insights
Filtering a page
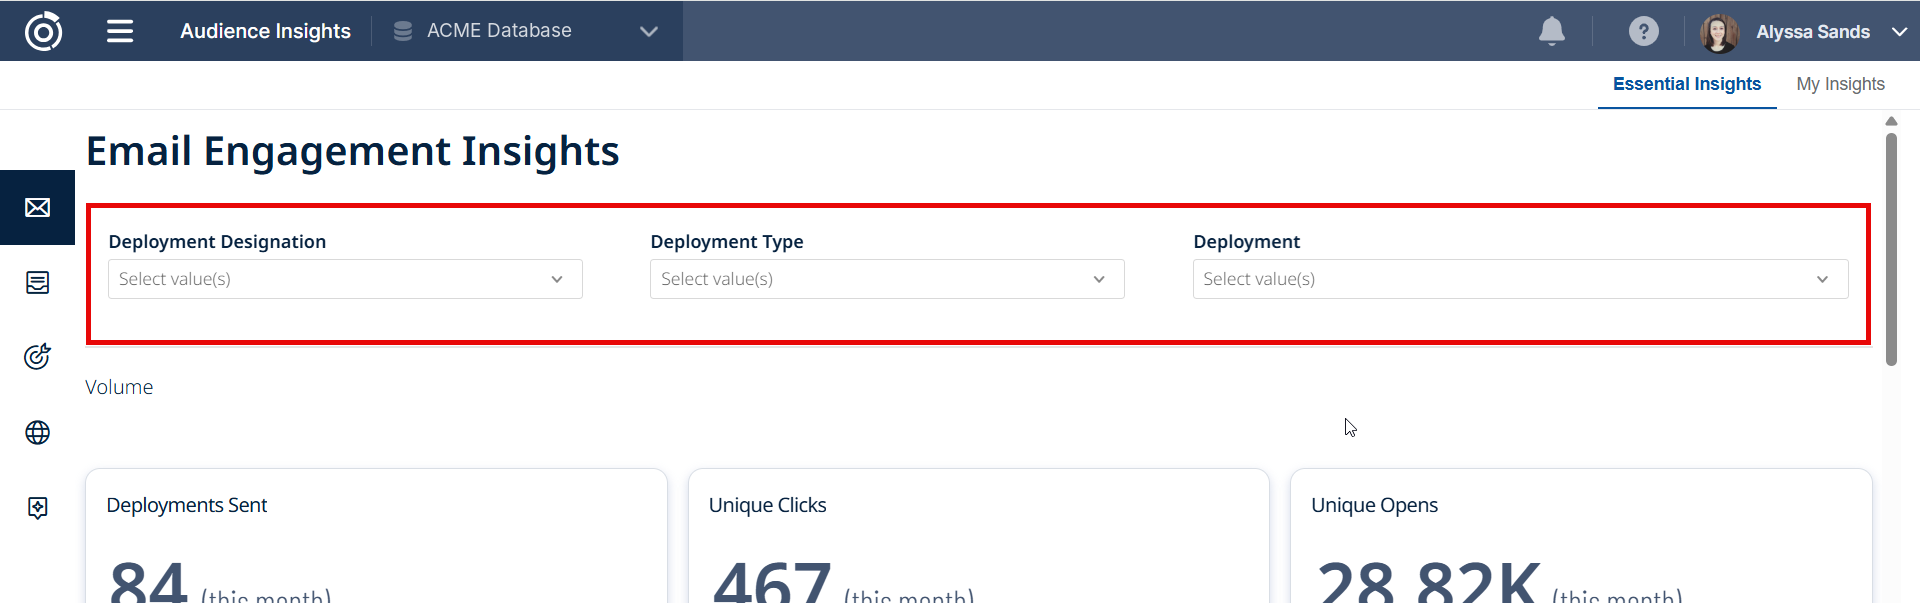
Filters at the top of each page, such as Class, Source, and Active Version on Subscription Insights, apply to every card on that page. Select one or more values from a filter's dropdown to narrow the data.
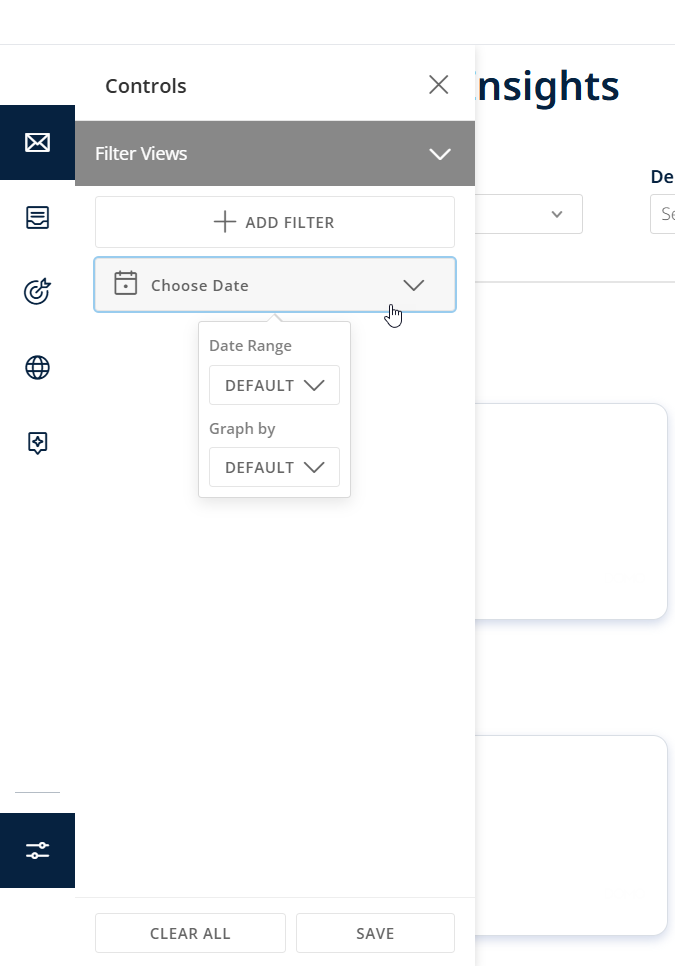
Date range filters, or filters you choose, can be applied to the page using the control icon on the bottom left of the app navigation
Filtering from a card
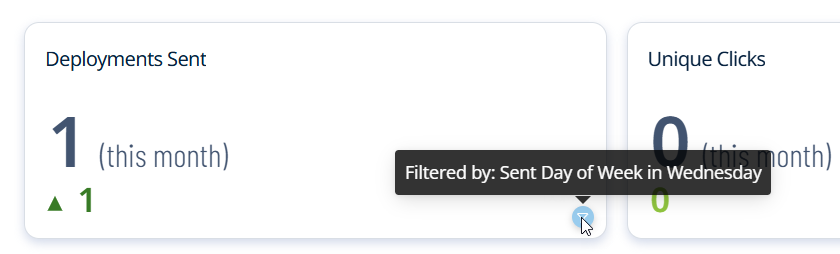
Some cards also work as filters. If a card's description says to click it to filter the other cards on this page, selecting a bar, point, or day in that card filters every other card on the page to that value. For example, selecting Wednesday on Performance by Send Day updates the rest of the page to show only deployments sent on Wednesday.
To clear a card filter, click the same value again, or open Controls and select Clear All. A filter icon in the bottom right corner of a card shows that the card is currently filtered. Hover over the icon to see which filter is applied.
Other cards drill down instead: clicking them opens more detail inside the card without changing the rest of the page. The card's description tells you which one it does. See Drilling into details.
Saving your own view
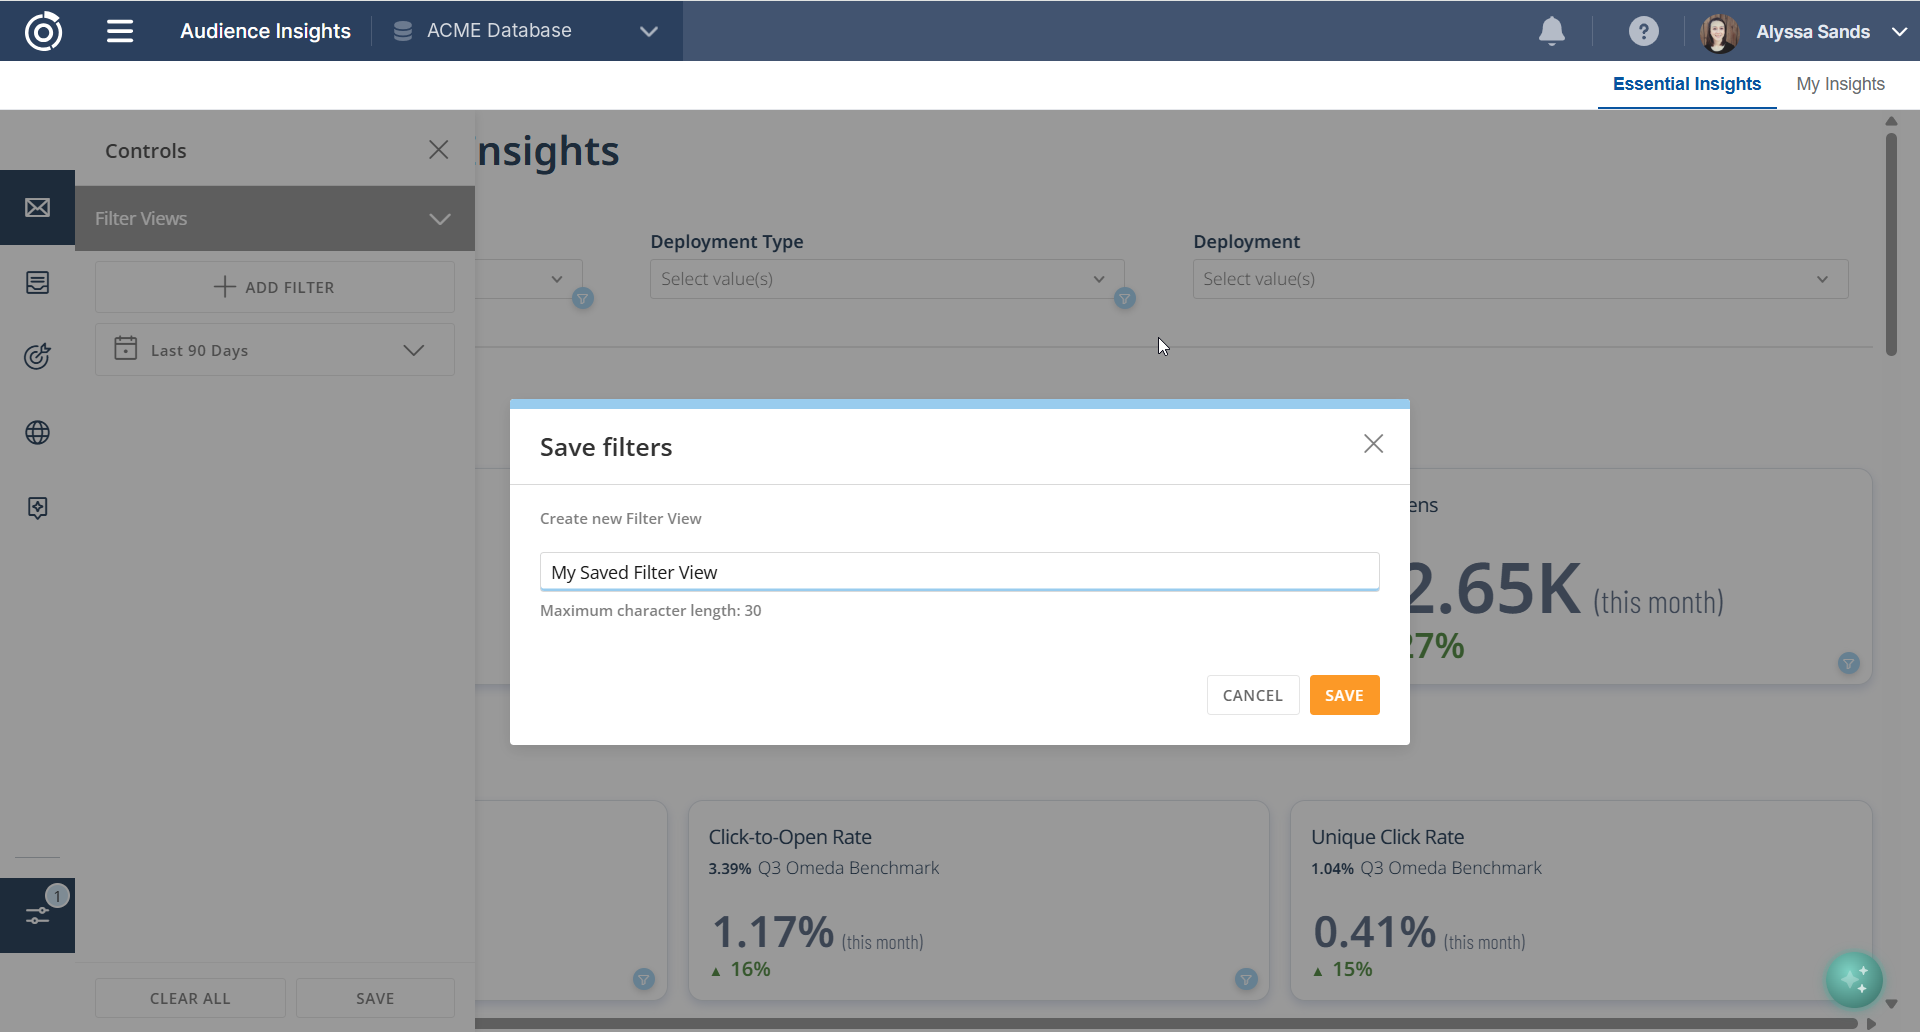
You can save a filtered version of a page to come back to later.
-
Select the control icon on the bottom left of the app navigation to open Controls.
-
Select Add Filter to add one or more filters, and set the date range.
-
Select Save at the bottom of the Controls panel.
-
In the Save filters window, enter a name for your Filter View (up to 30 characters), then select Save.
Your saved views are listed under Filter Views at the top of the Controls panel. To remove all filters from the page, select Clear All.
Saved views belong to you; other users don't see them. You can copy views you've created. Omeda doesn't provide prebuilt saved views.
Viewing card details
You can look at a card two ways: expand it on the page for a quick, full-size view, or open its Card Details page for more options.
Expanding a card
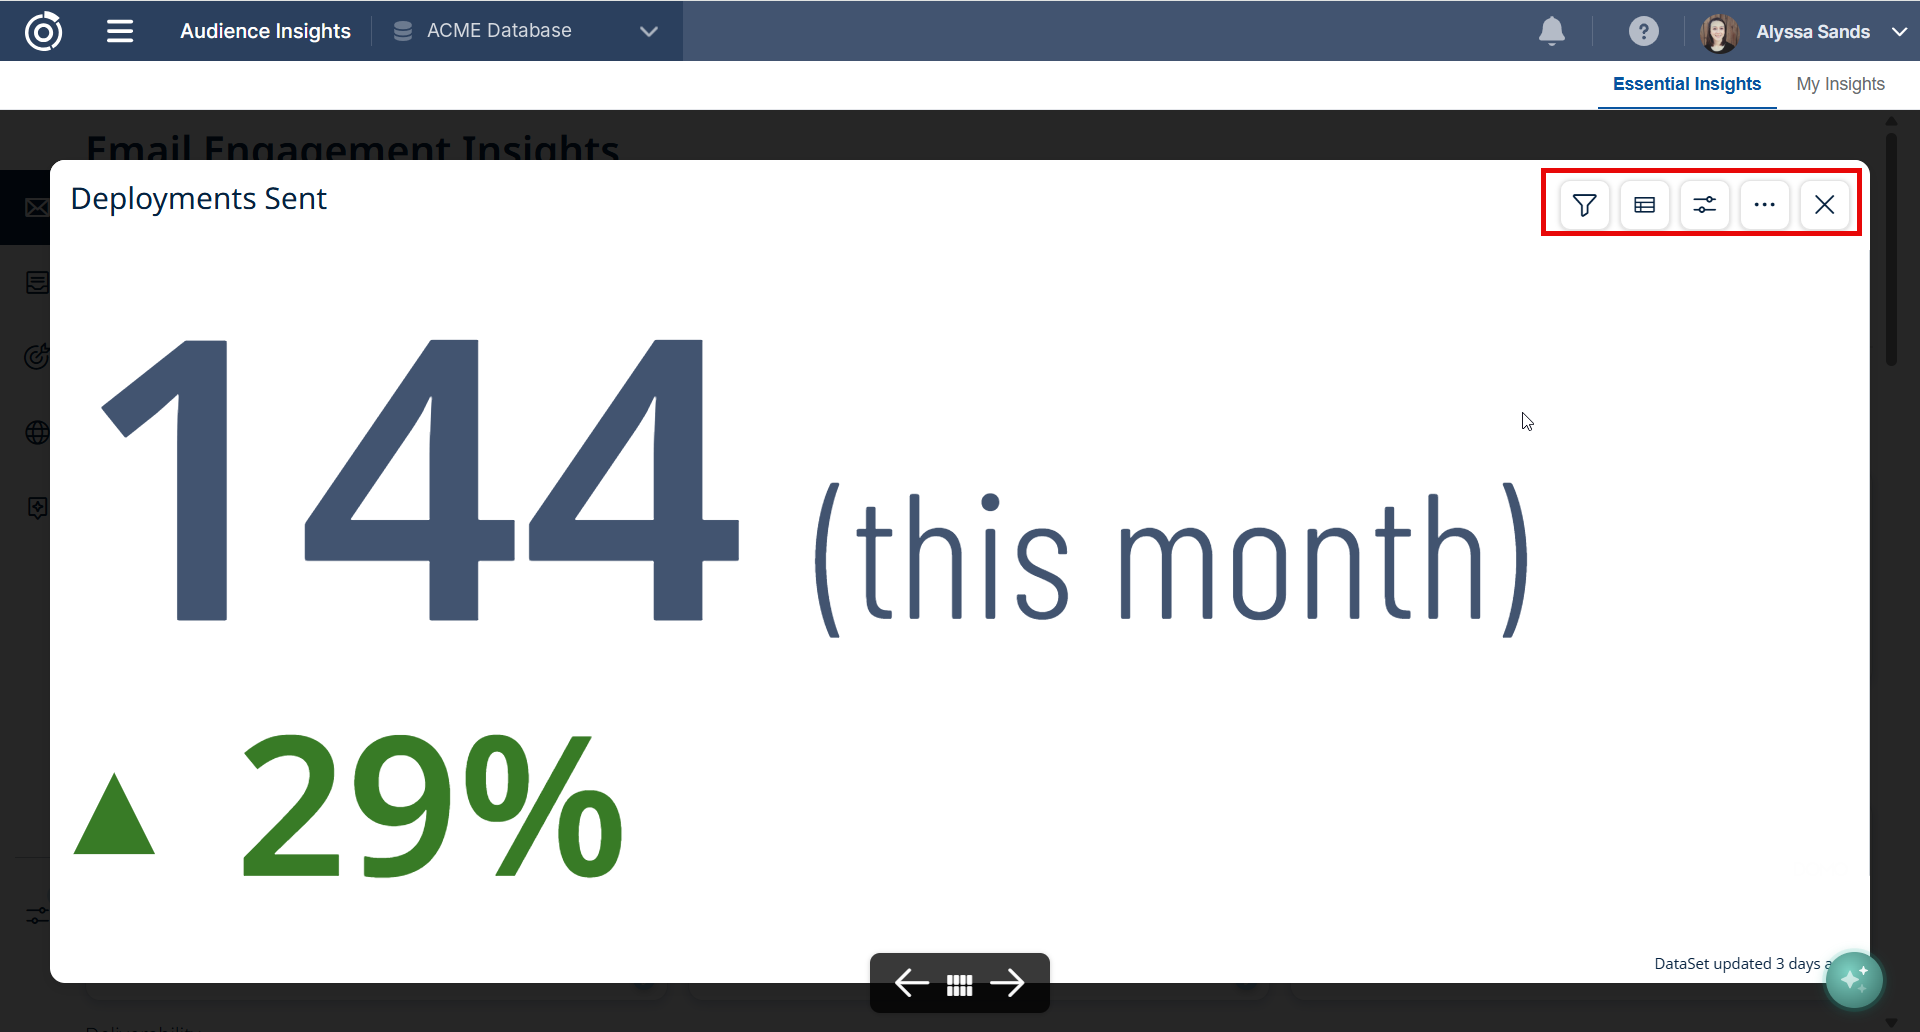
Open a card to see it at full size. The expanded card's toolbar has:
-
Filters: filter this card only
-
Table: switch to the table view of the card's data
-
Show Controls: adjust the card's controls, or read about the card under About
-
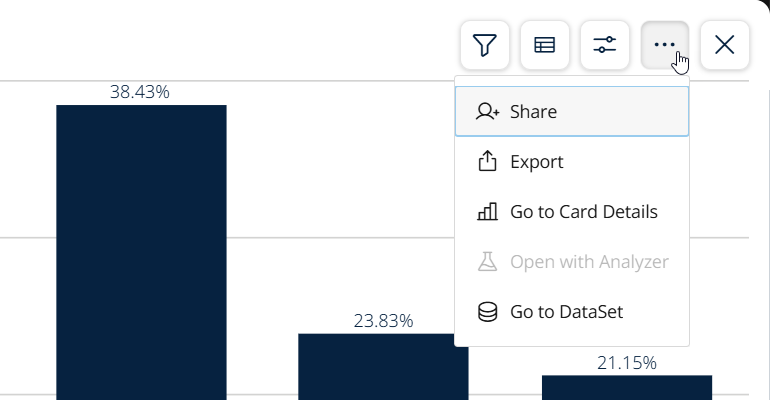
Card Options (...): Share (with build access), Export, Go to Card Details, and Go to DataSet
The bottom right corner shows when the card's dataset was last updated. Use the arrows at the bottom to move to the previous or next card on the page.
Sharing a card
Sharing requires build access.
-
Expand the card, select Card Options (...), then select Share.
-
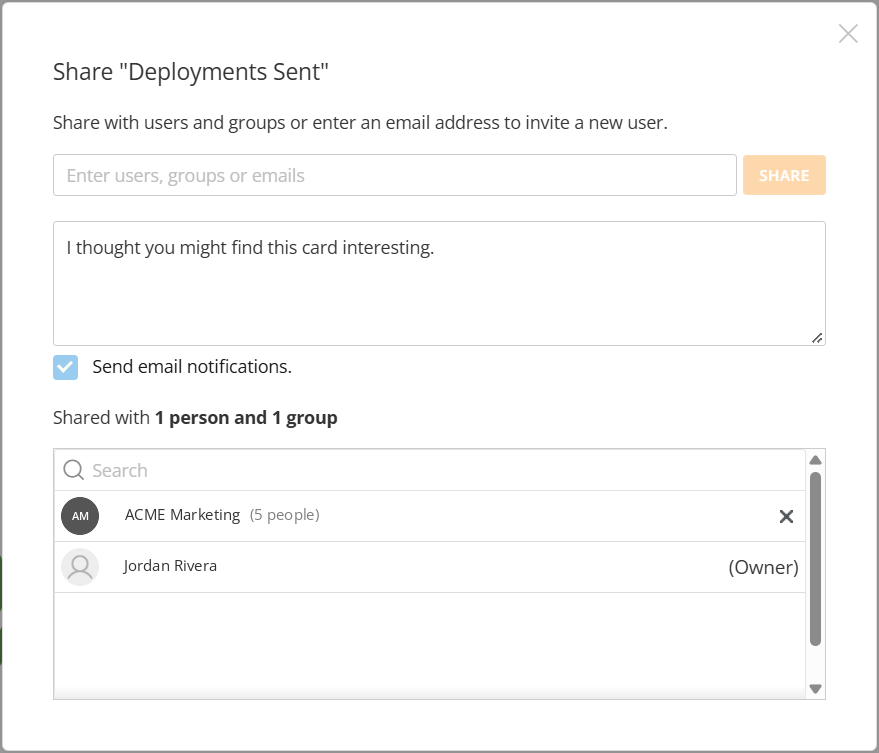
Enter users, groups, or email addresses.
-
Optional: edit the message and choose whether to Send email notifications.
-
Select Share.
The bottom of the Share window lists everyone the card is already shared with.
Card Details page
To open it, expand the card, select Card Options (...), then select Go to Card Details. Card Details is a separate page from the expanded card, with a date range selector next to the card title and these tools:
-
Filters: filter this card only
-
Annotate: with build access, add a note to a data point on the chart. Notes are visible to everyone who views the card.
-
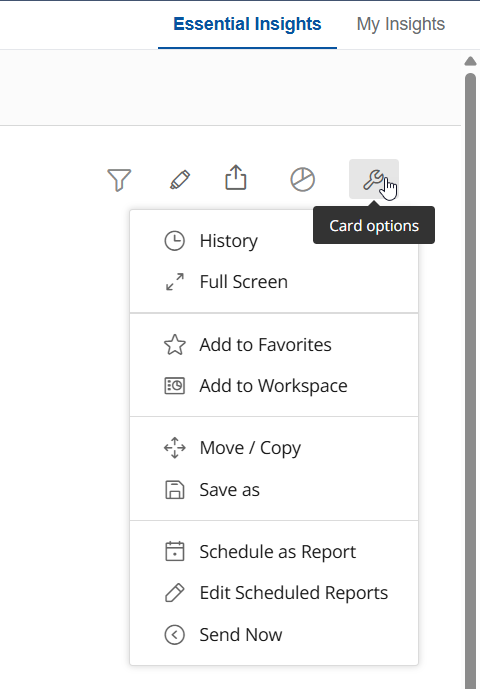
Share: Share (with build access), Save as, and Send / Export
-
Chart picker: view the data as a different chart type
-
Card options (wrench): includes Add to Favorites, Full Screen, History, and the scheduling options Schedule as Report, Edit Scheduled Reports, and Send Now
Seeing the data behind a card
There are two ways to get past a card's summary: view all the rows behind the card, or drill into a single value for more detail.
Viewing and exporting underlying data
Switch to the card's table view to see the data behind the chart. You can export this data as a CSV or Excel file.
Drilling into details
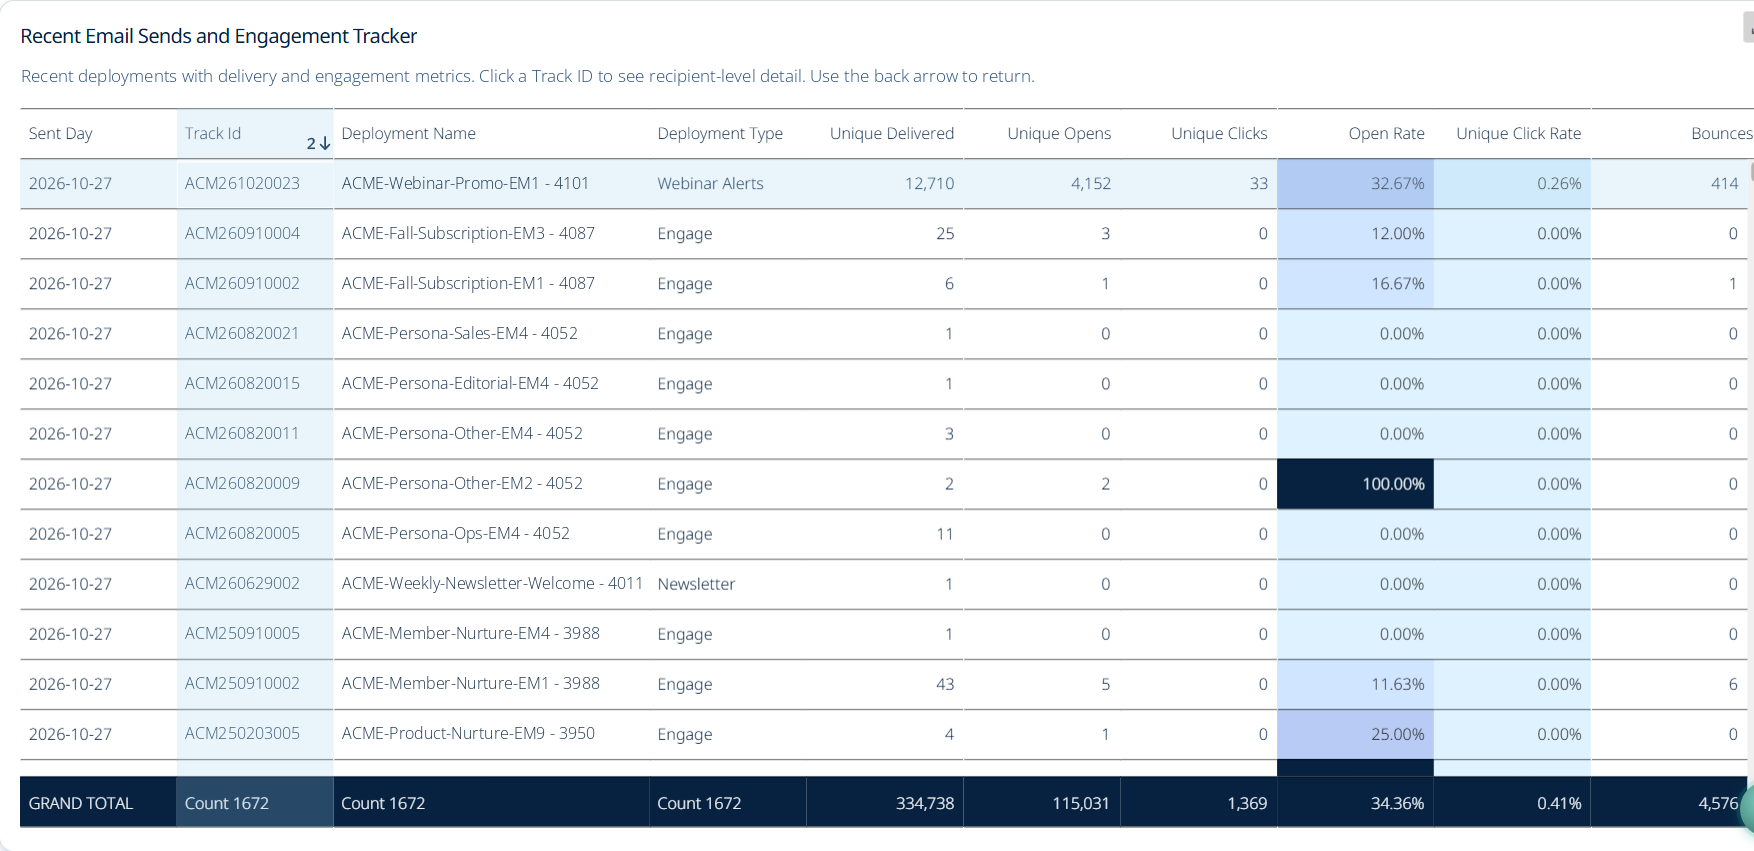
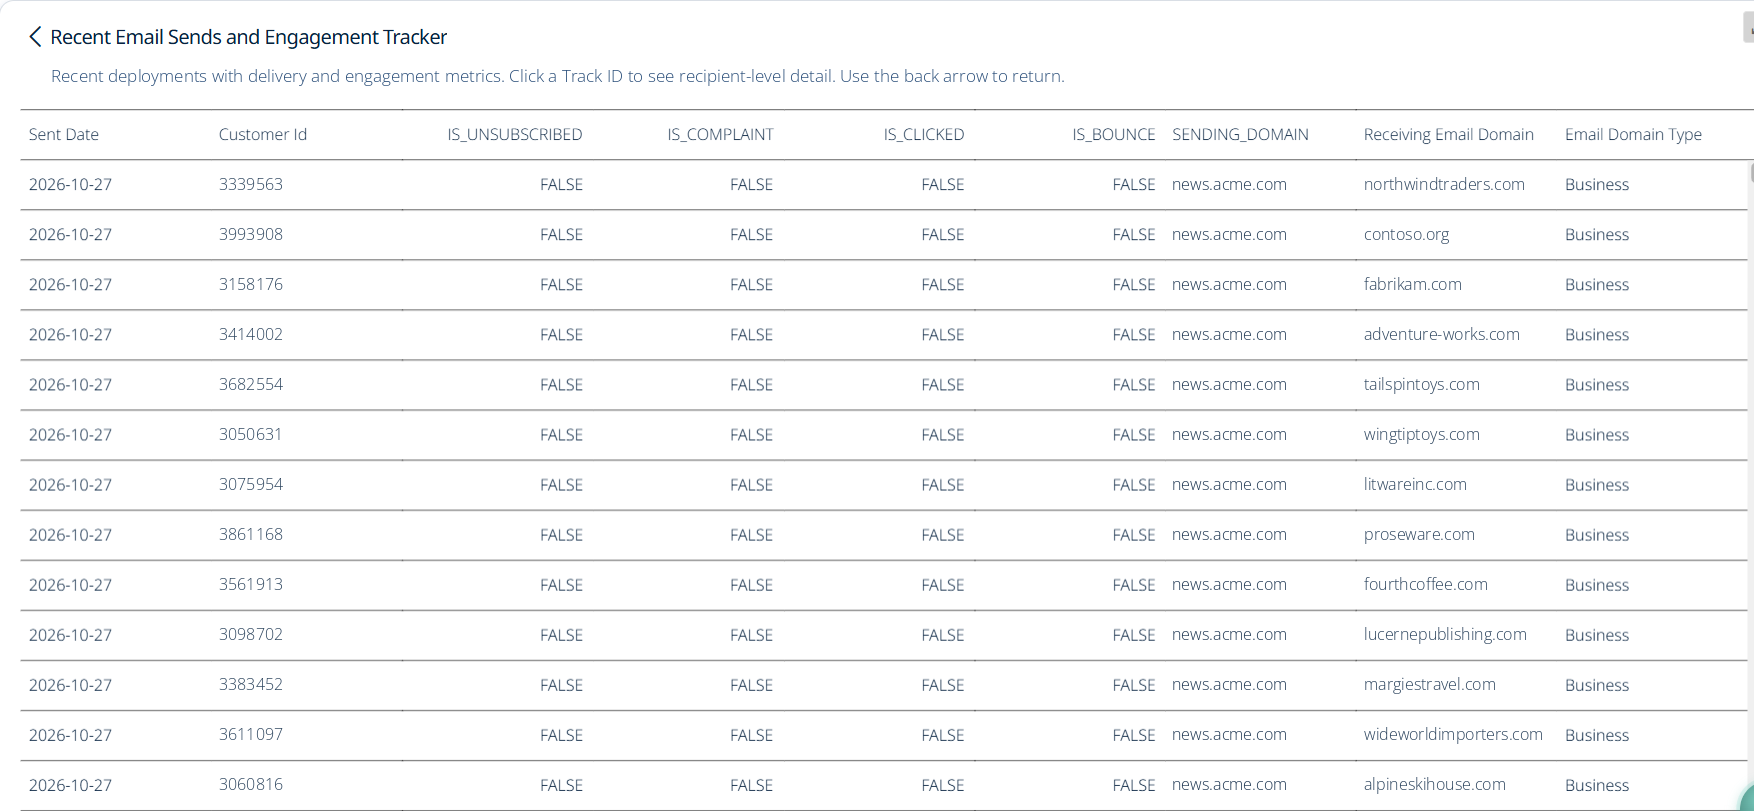
Some cards let you drill into a single value. For example, on Email Engagement Insights, selecting the Track ID in the deployment table opens the recipient-level detail for that deployment.
Drilling down changes only that card; the rest of the page stays the same. A card's description tells you when it drills down.
Exporting a card
-
Expand the card, select Card Options (...) in the top right, then select Export.
-
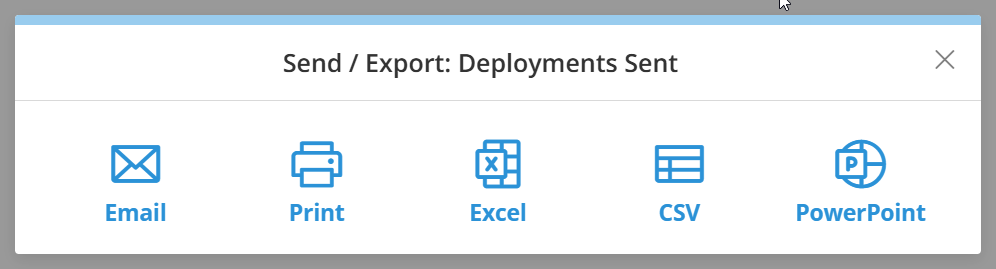
Choose a format:
-
Email: add users, groups, or email addresses, optionally include a spreadsheet of the data as an attachment (5MB limit), then select Send
-
Print: preview the card, choose whether to include the Last Data Update and Card Owner, then select Print
-
Excel, CSV, or PowerPoint: the file downloads right away
-
Each card is exported on its own. To export a full app page, you need build access; see Building Your Own App.
Scheduling a card report
You can have a card emailed on a schedule. You don't need edit access to schedule a card.
-
Open the card's Card Details page (expand the card, then select Card Options (...) and Go to Card Details).
-
Select the Card options icon (wrench), then select Schedule as Report.
-
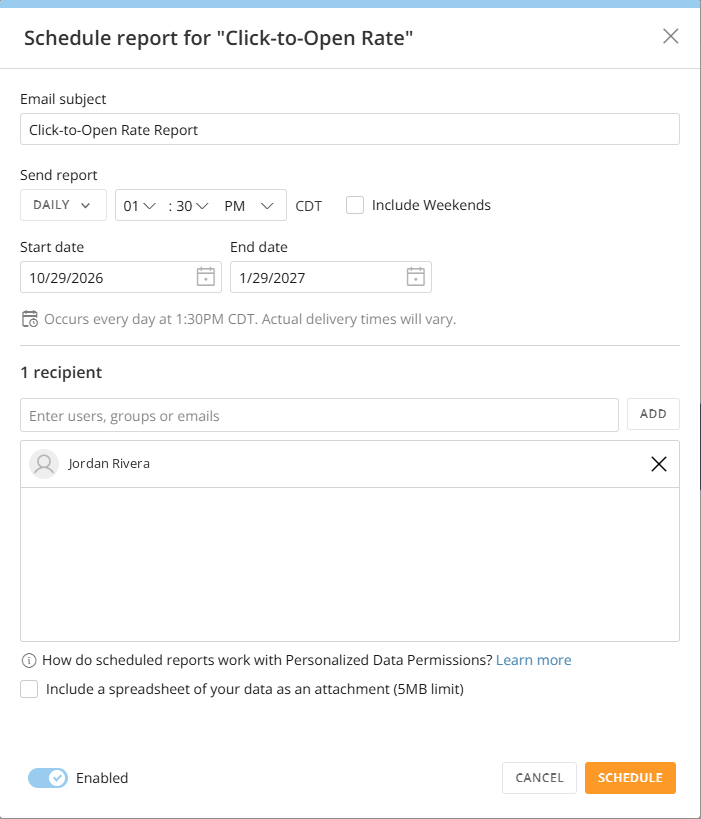
Enter an Email subject.
-
Under Send report, choose the frequency and time. Select Include Weekends if you want weekend sends.
-
Set a Start date and End date.
-
Add recipients. You can enter users, groups, or email addresses.
-
Optional: select Include a spreadsheet of your data as an attachment. Attachments are limited to 5MB.
-
Make sure Enabled is on, then select Schedule.
To change or pause a scheduled report, select Edit Scheduled Reports from the same menu and turn Enabled off. To send the report immediately, select Send Now.
Additional Resources
-
Audience Insights Overview
Learn the difference between cards, dashboards, and apps, and what each access level can do. -
Using My Insights
Organize your Overview dashboard and find content shared with you. -
Building Your Own App
Start a new app from Essential Insights and customize it. -
Audience Insights Data Sources
Review the datasets and fields behind each page.
Table of Contents