
Marketing Automation Platform
Journeys is Omeda's marketing automation platform, rebuilt from the ground up to improve the flexibility and capabilities for audience and marketing teams. It gives you everything you need to launch outcome-driven, scalable, and highly targeted journeys, backed by seamless element linking, autosave and recovery, always-on form-triggered journeys, and a sleek, intuitive new design — the speed and reliability you expect from a modern platform.
Journeys connects directly to Omeda's Audience Management platform, so you can activate and engage audiences using your own data, and set and track goals for every journey right from the canvas.
Omeda Journeys shares the same sending infrastructure that has supported your Email Builder deployments for years, so your sending IPs, domains, and reporting stay consistent. Email Builder remains the right tool for one-to-one efforts with lighter automation and splits, while Journey Builder is where you'll build bigger, ongoing journeys to reach your audience in ways that weren't possible before. So let’s get started!
Use Cases
Journeys supports a variety of use cases, including, but not limited to, the following:
-
Welcome Series – Target new members of your audience with a gradual introduction to other products and services.
-
Reengagement Campaign – Target audience members who have stopped responding to email or other channels like social, display, or on-site targeting.
-
Renewal/Requalification for Paid Expires – Coordinate and automate your efforts across multiple channels.
-
Cross-Promotions – Automatically deploy additional campaigns when audience members fall into the right combination of products, demographics, and behaviors.
-
Lead Generation for Advertisers – Enhance your advertiser's lead funnel with automated efforts targeted to their audience.
Journeys are only limited by your creativity and the marketing materials you have on hand. We encourage you to build your own and send your favorites to ClientSuccess@omeda.com.
The Basics
Journeys can be found under the "Activate" section of the Omeda menu and is available at no additional cost to Omeda customers. To use some elements, you may need additional access — for example, the Email element requires an Omeda Email Builder subscription, and the Personalization and Metering elements require Omeda CDP.
Journeys was built with expanded storage and improved state management, so you have increased flexibility to build intricate, complex journeys.
After opening Journeys, you'll first land on the Journey Search screen.
The Journeys Search Screen
The Search screen will be where you go to create new Journeys and templates, as well as find existing Journeys to review and edit.
The image and walk through below will describe where to click within the screen to do those tasks.
-
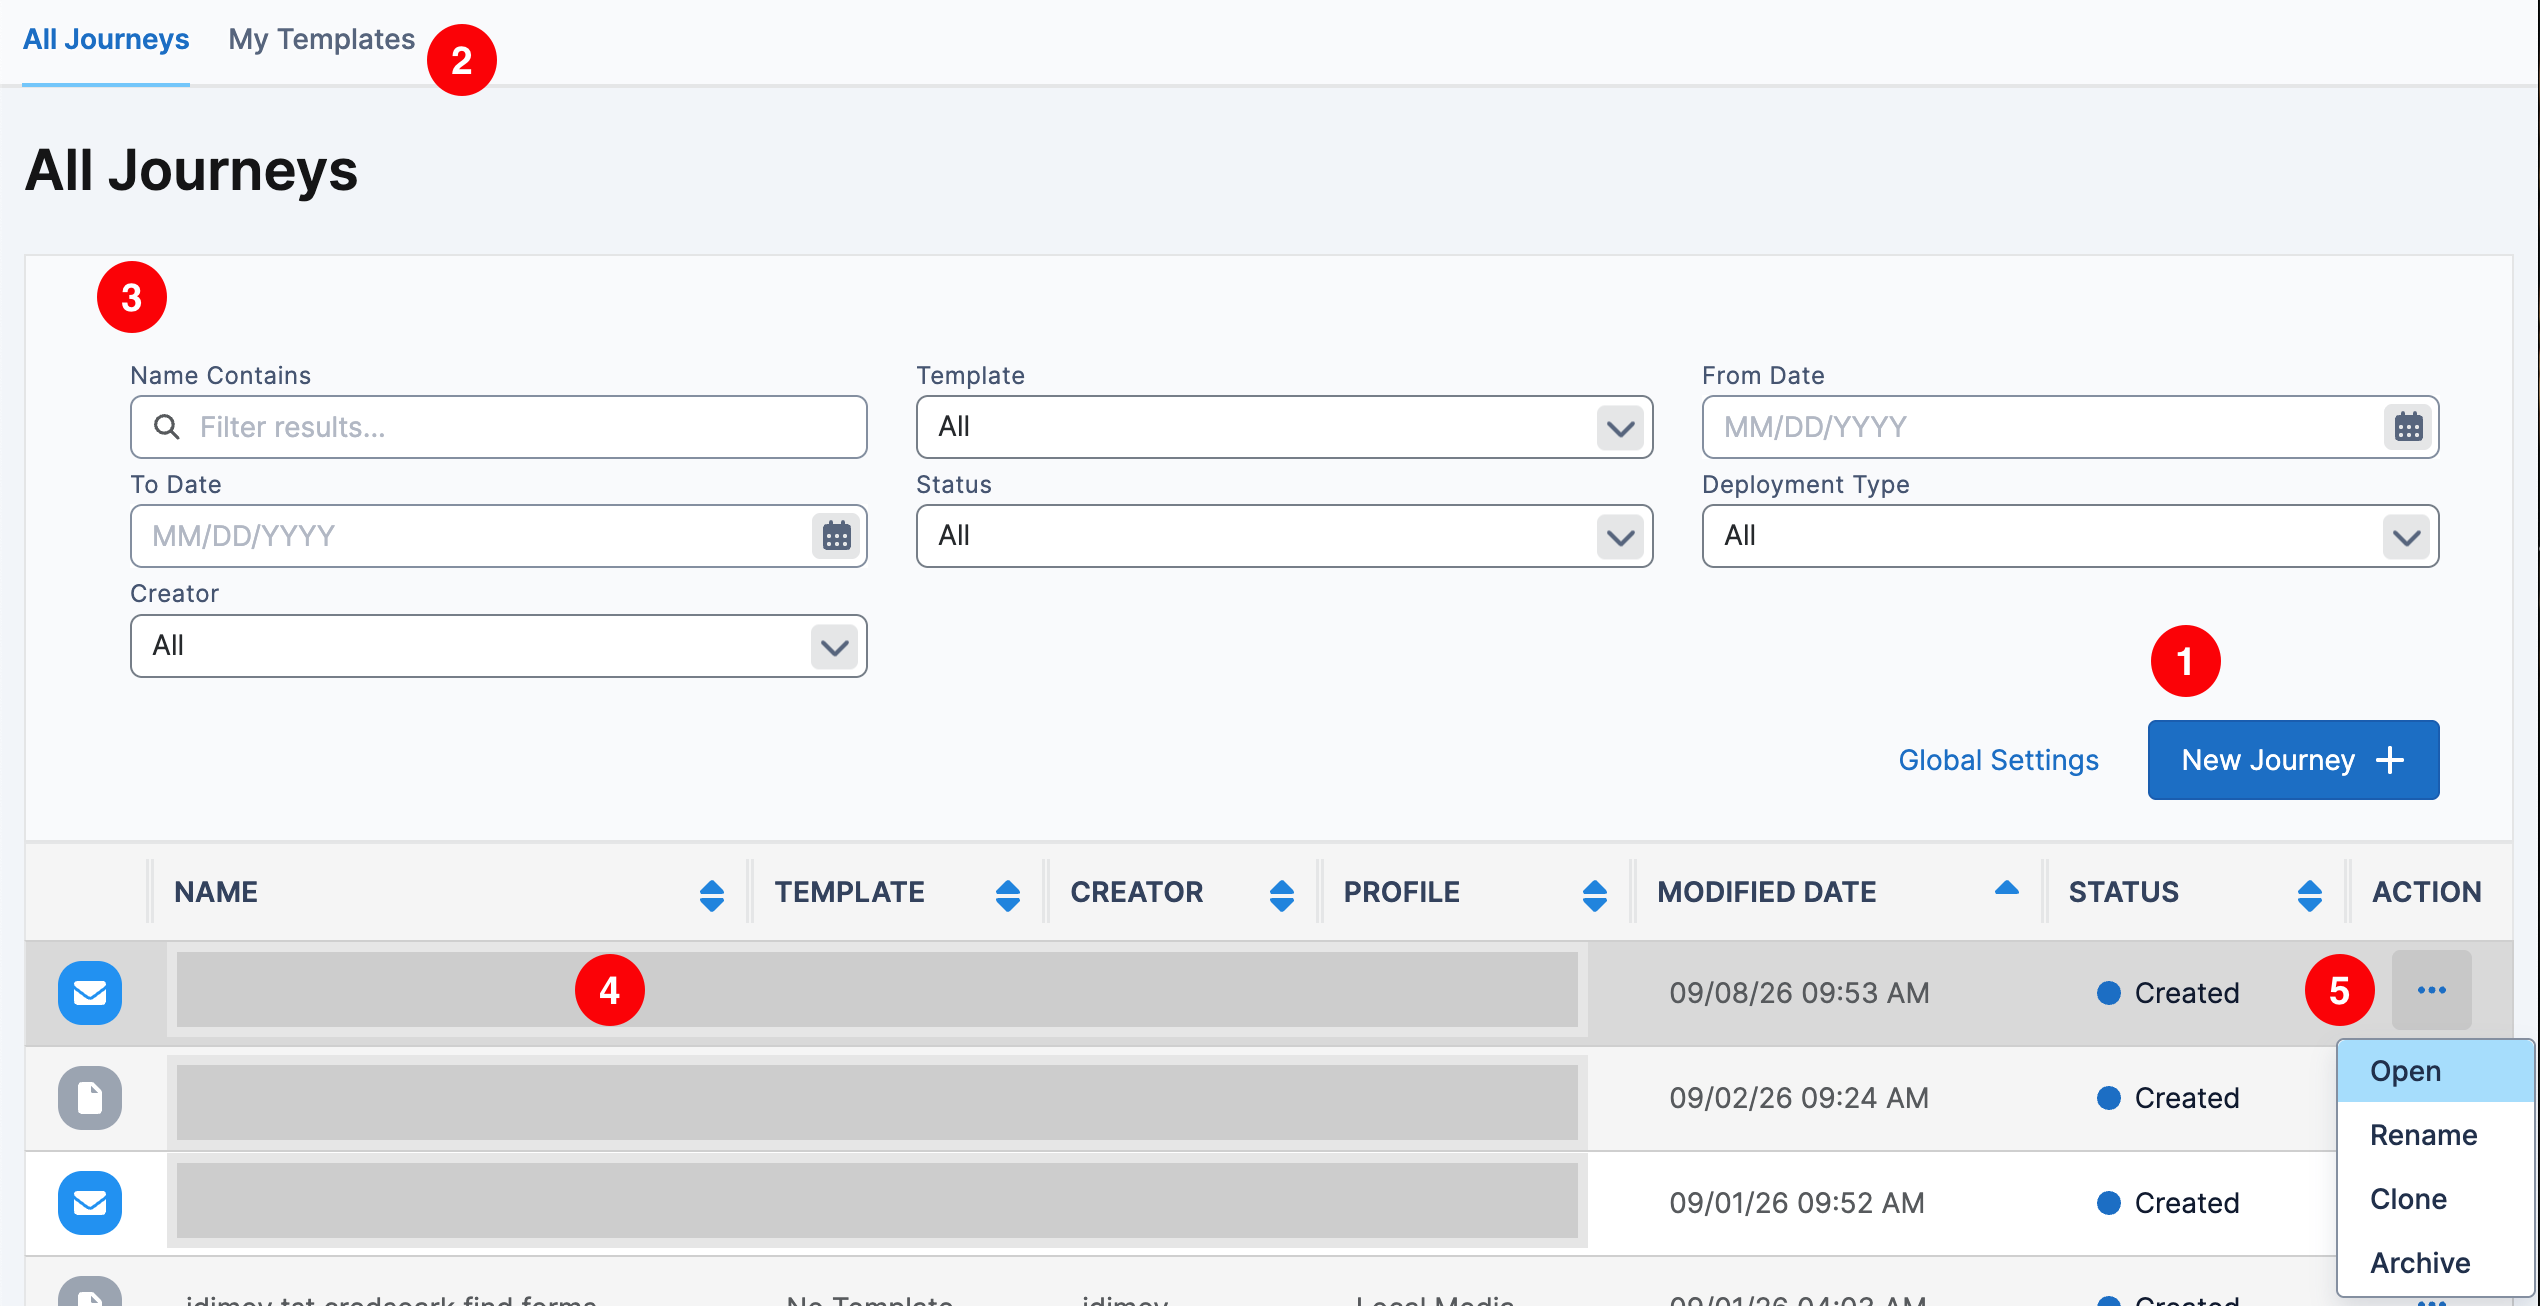
The blue button on the bar at the top of the screen labeled New Journey + can be clicked to create a new journey.
-
Select My Saved Templates to view and open one of the saved templates for your organization.
-
In the white bar, you can search for existing Journeys by Template, the modification Date Range, Journey Status, and, within the Filter field, the Journey name or creator. Just click the Search button when you’ve provided your search criteria and the Journeys that meet your criteria will be displayed below.
-
In the table below, each journey that meets your search criteria, or, if no search criteria is provided, all non-archived Journeys will be displayed. Click the Journey name to open the journey.
-
On the right hand side there is an Action column. Here you can Rename an existing Journey, Duplicate the journey, Archive a journey, or Open a journey. When a journey is duplicated, the new journey will contain the elements, and connections of the previous journey. For several elements, the element settings will also be duplicated from the previous Journey except for within the Audience, Schedule, Personalization, Metering, and Marketplace elements.
Creating a Journey
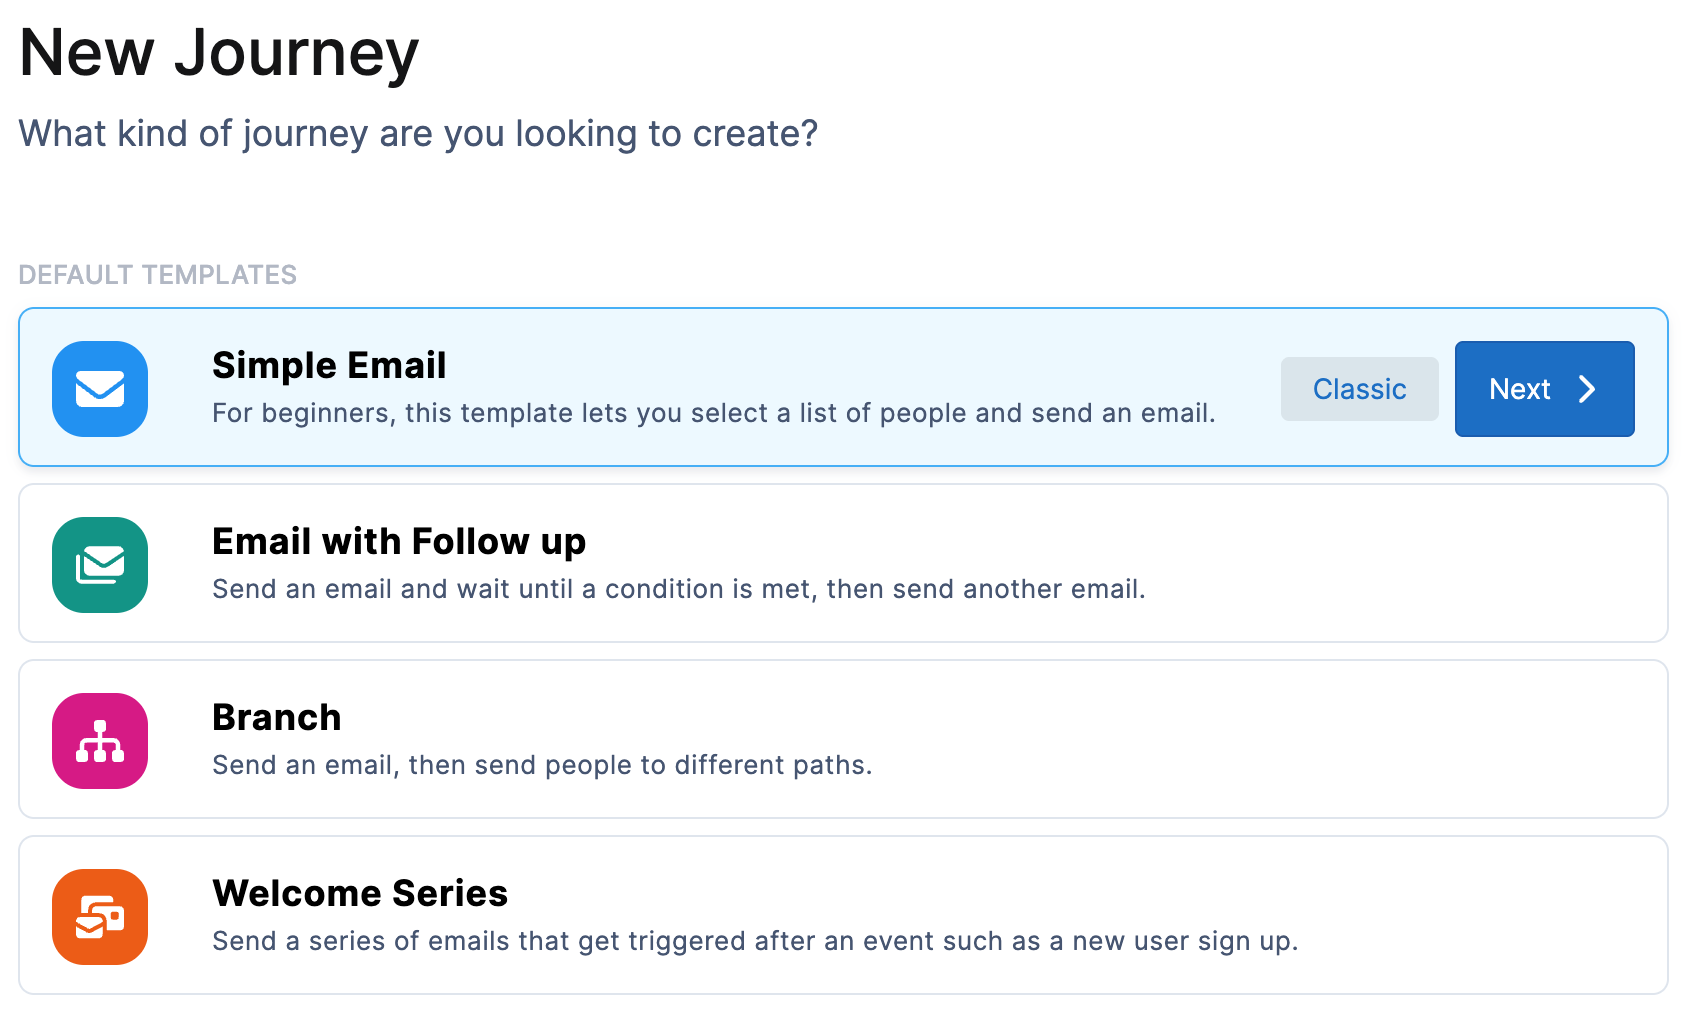
To create a new journey, click on + Create New or My Saved Templates.
If you’ve selected + Create New, a menu will open where you can choose a starter template or start form a blank canvas.
If you’ve selected a saved template, your template will open to the journey canvas immediately.
For your convenience, the classic journey builder will remain accessible. Click on the “Classic” button when hovered over any template to load that journey in the old experience.
The Journey Canvas
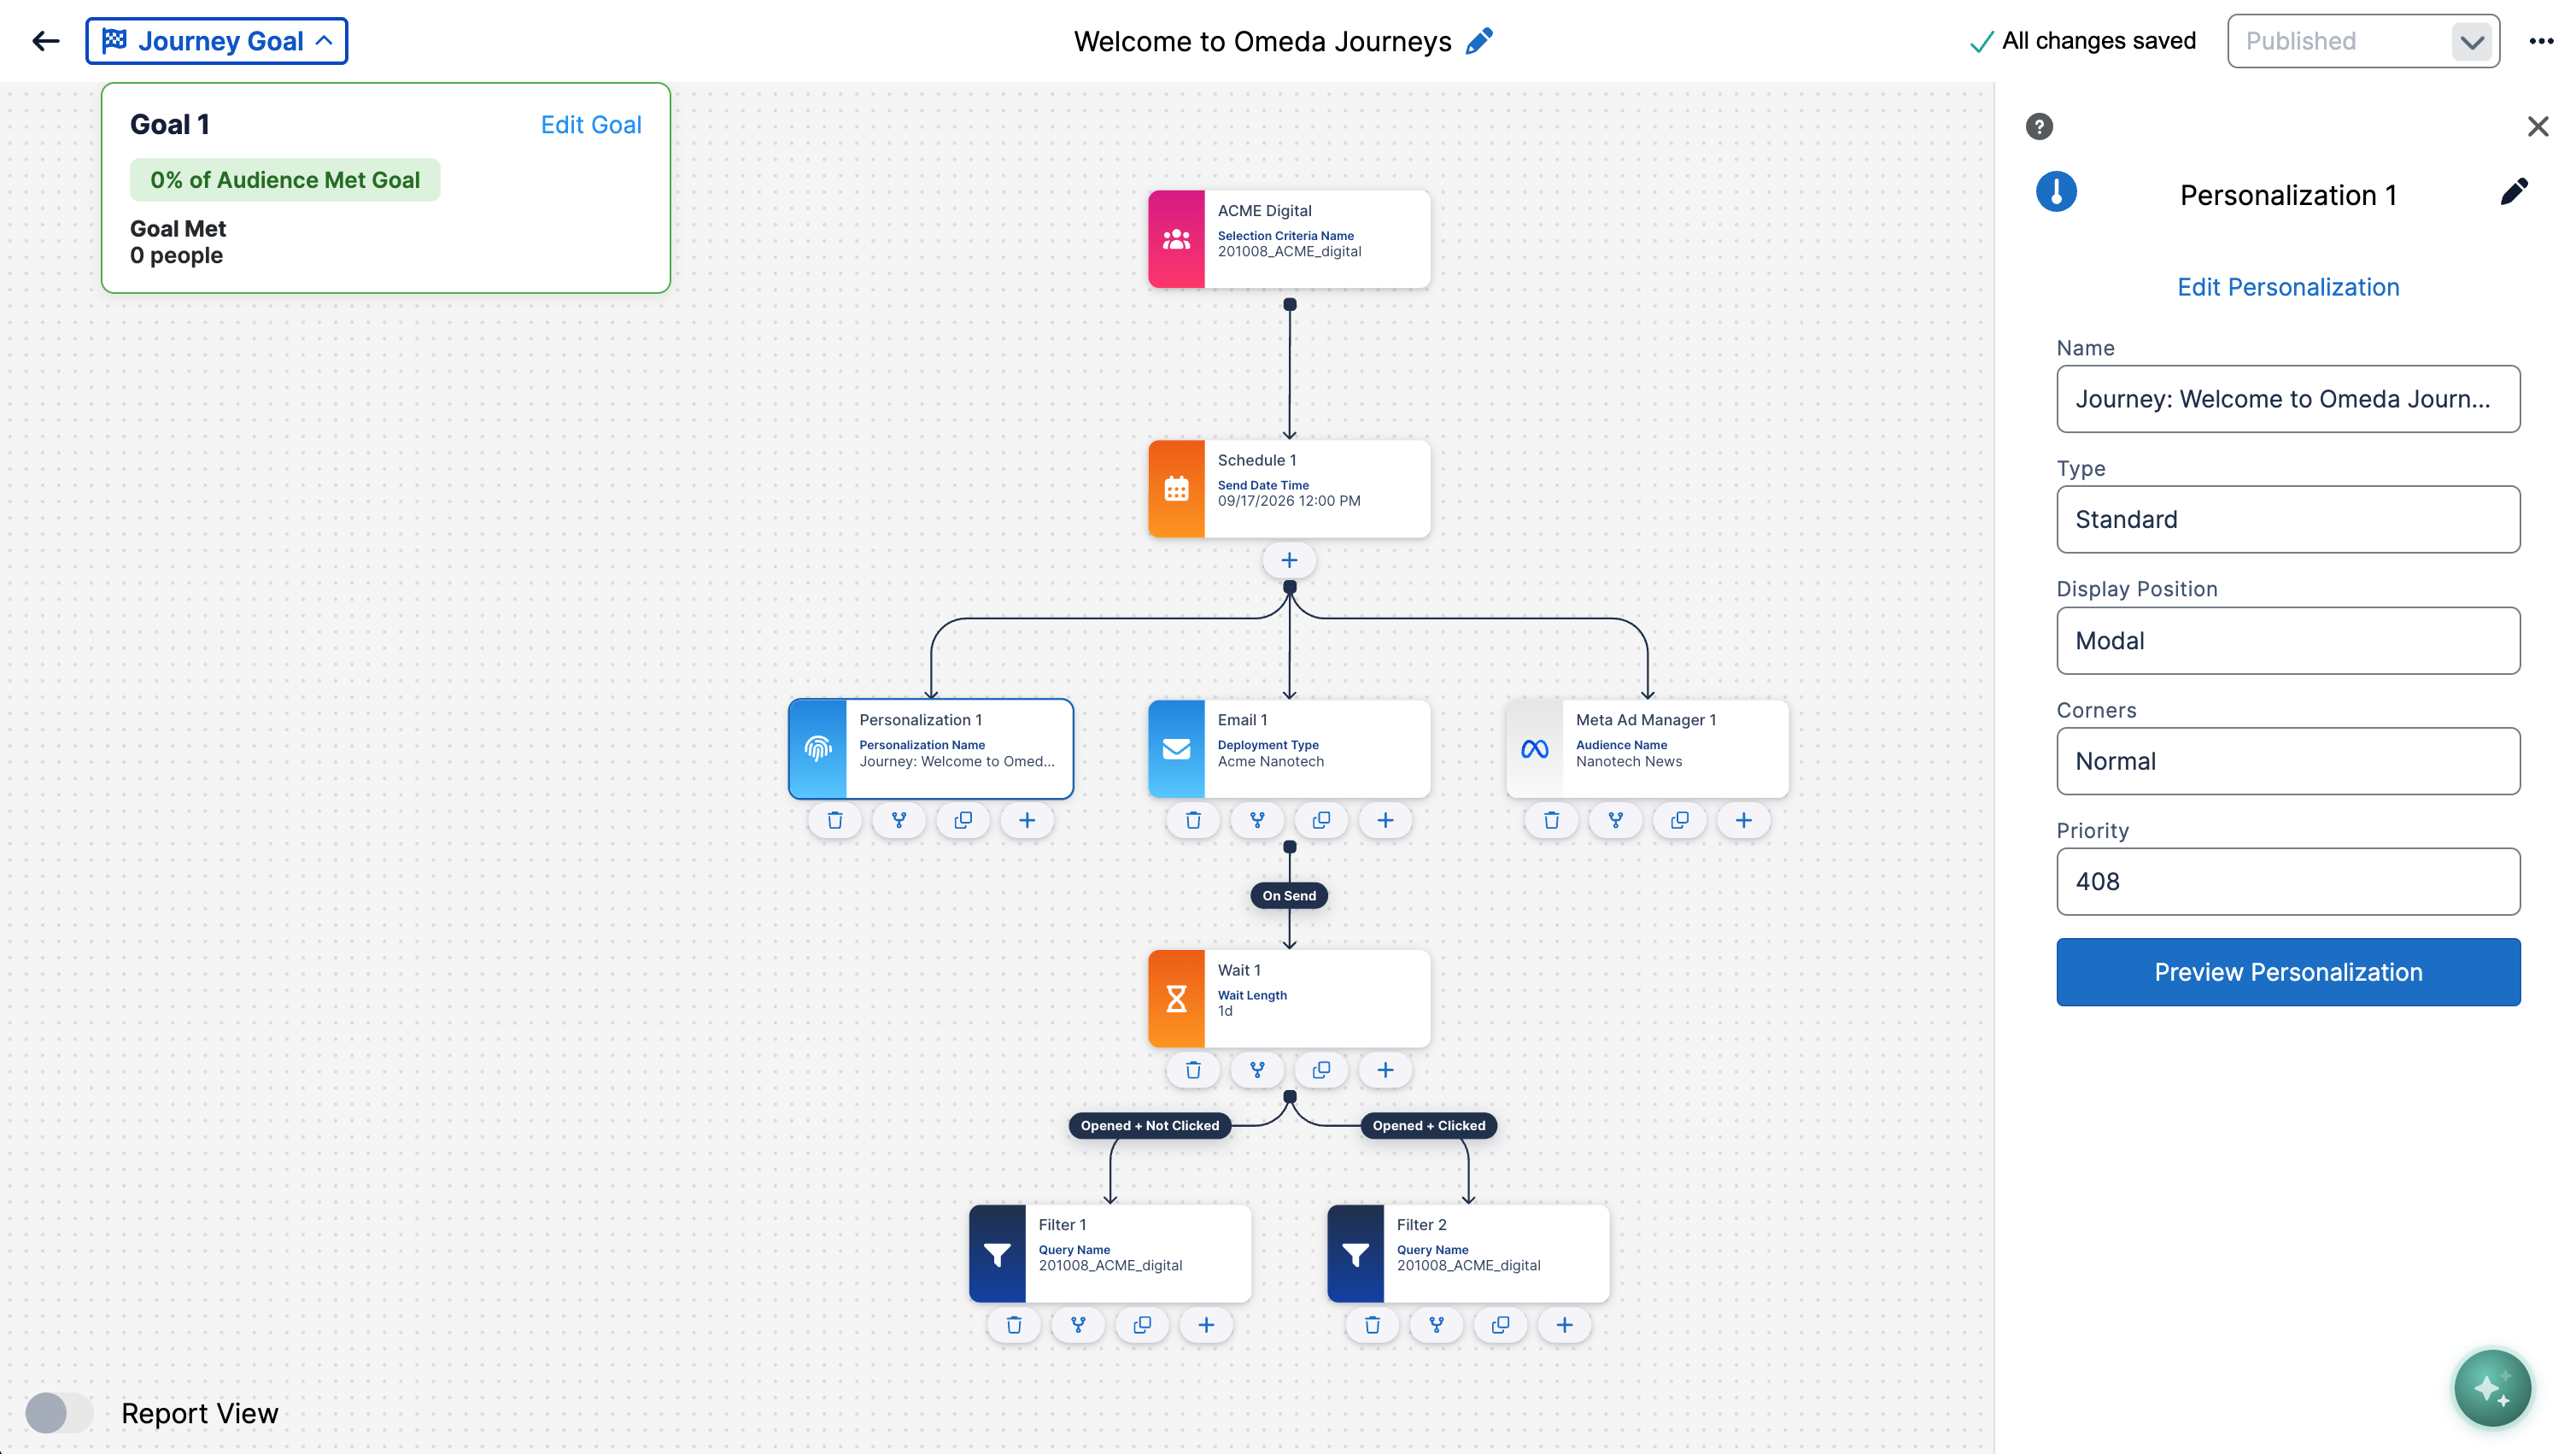
When you create a new journey or open an existing one, you'll land on the journey canvas — the modern, refreshed workspace where you add elements and connections, provide specifications for each element, and review reporting metrics once a journey is complete.
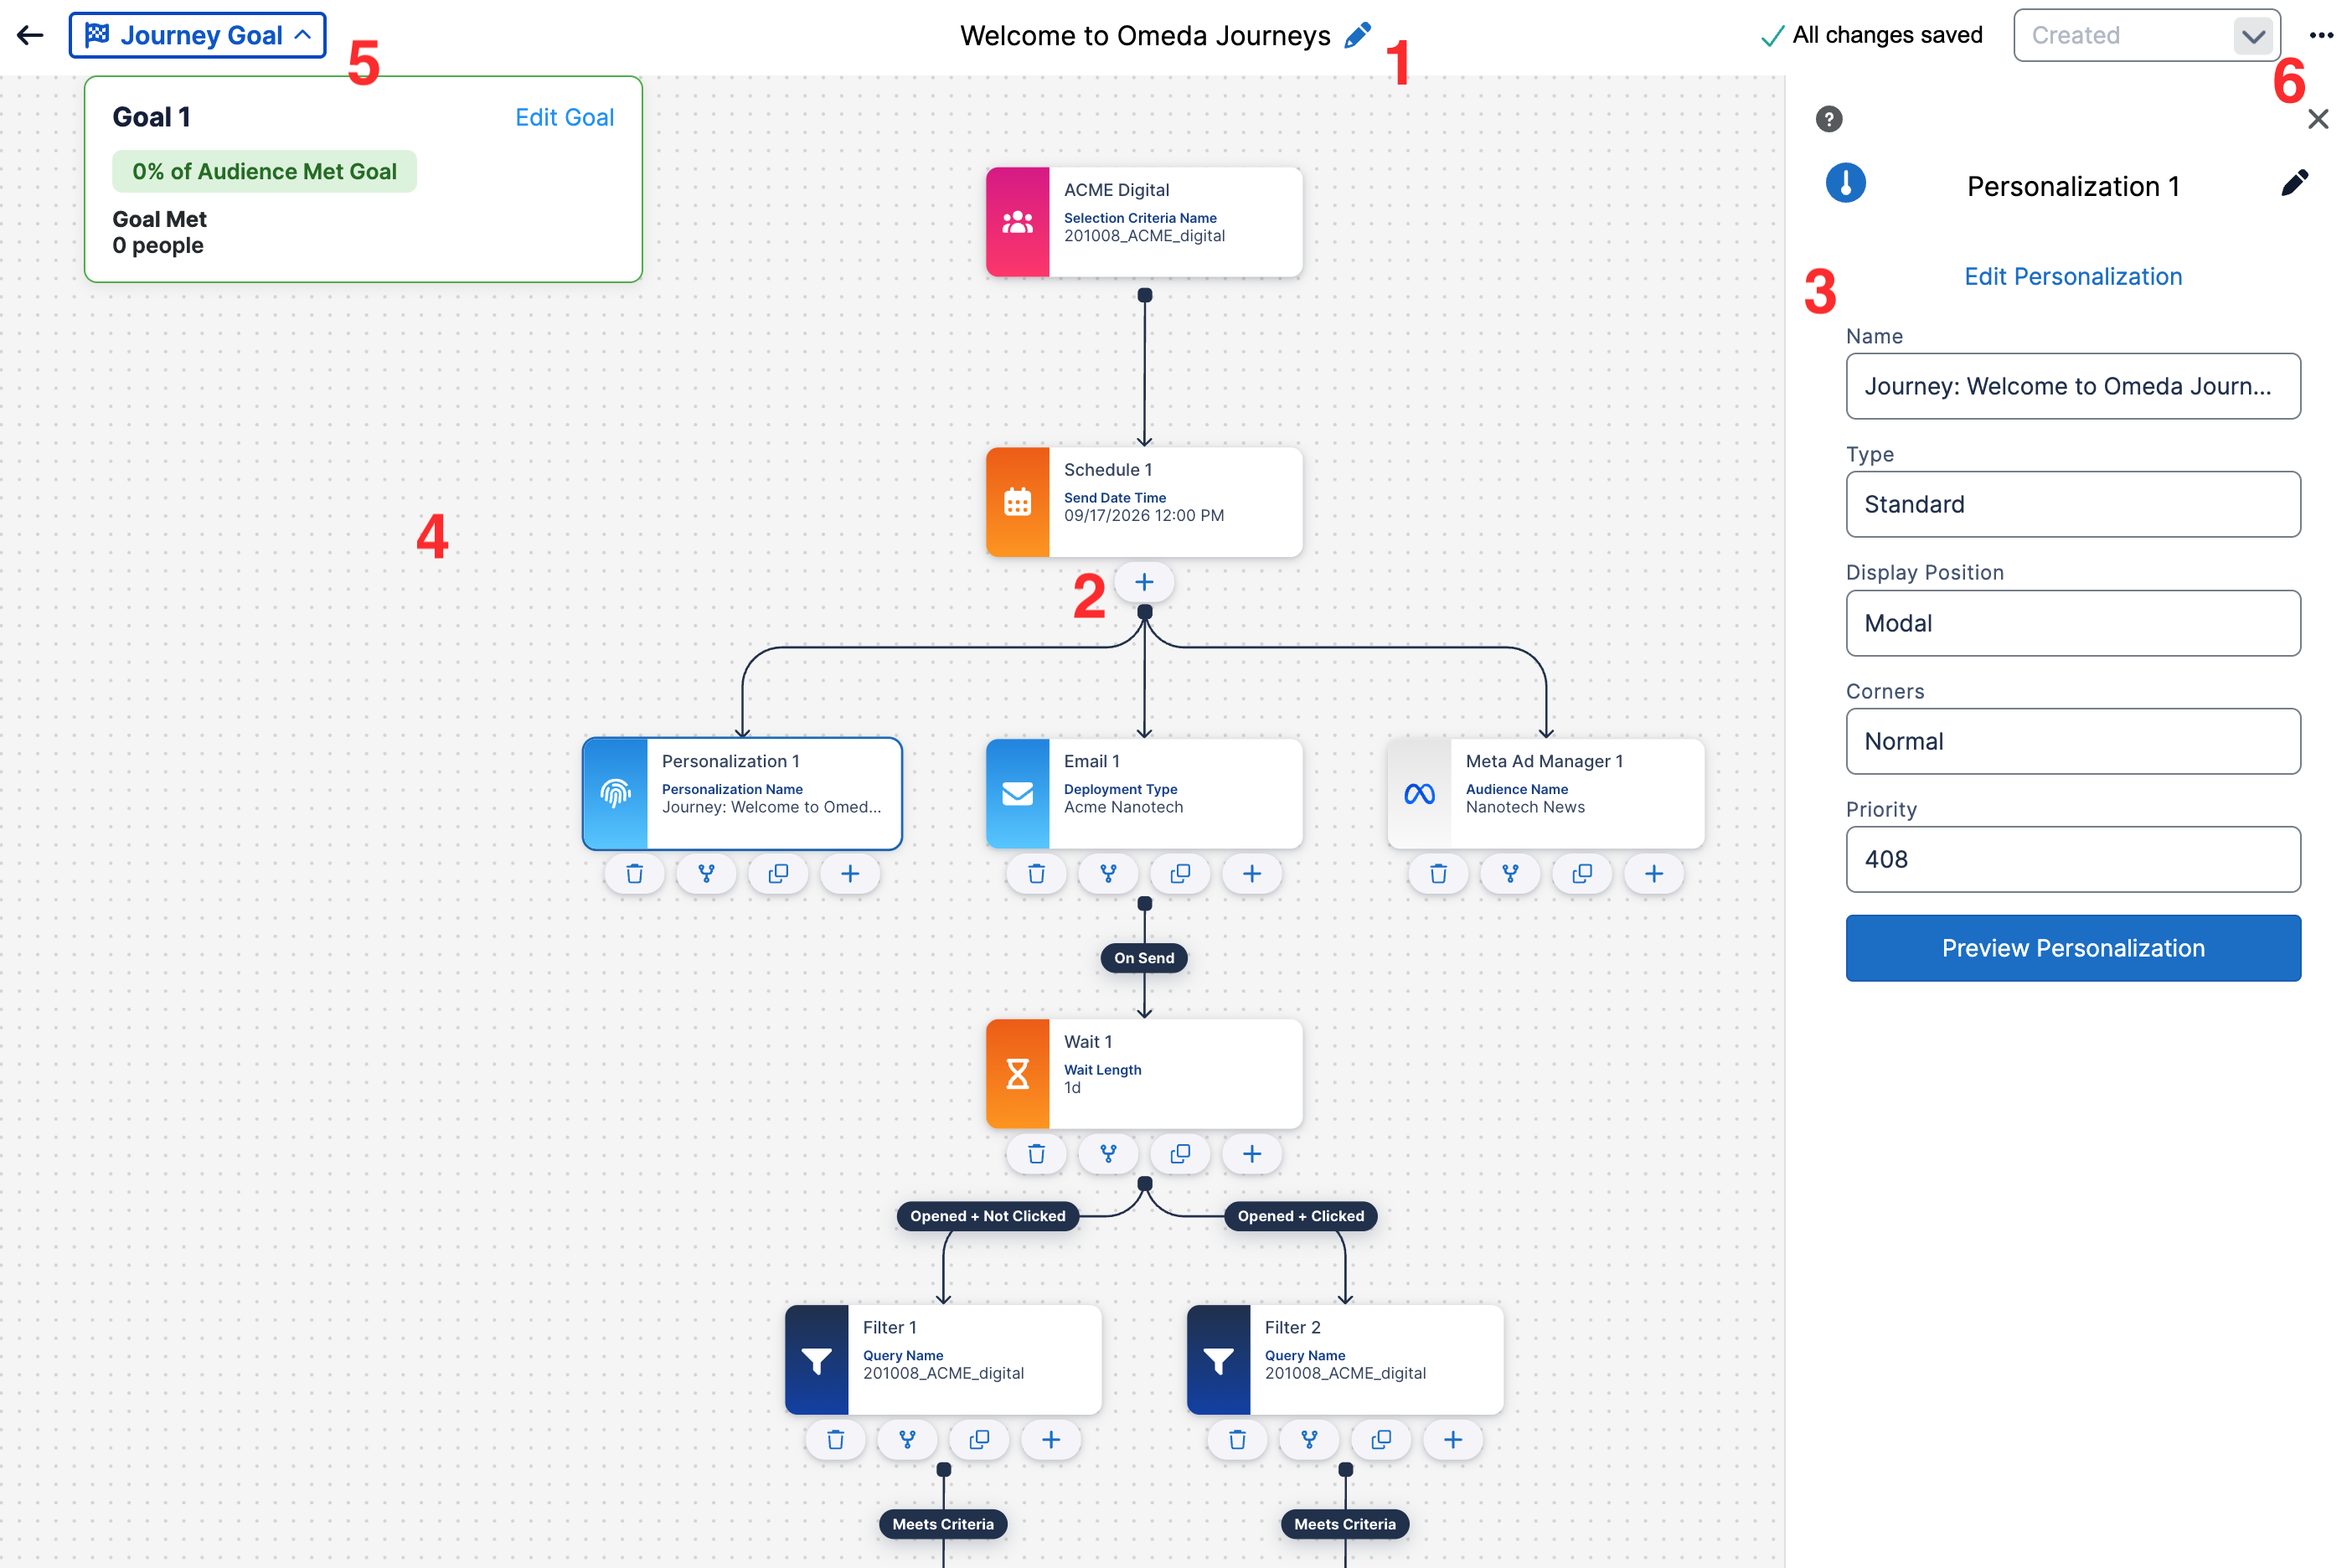
The image and walk through below will describe where to click within the screen to do those tasks.
-
At the top center of the screen, the journey name appears. Click it to rename the journey or add a description.
-
Clicking on the + button below an element opens the element library, showing you which compatible elements can be added and connected from the source element.
-
On the right, the Inspector Panel displays the settings for the selected element. Click an element to provide required specifications.
-
At the center of the screen is the journey canvas, review the element flow, add new elements, duplicate, delete, connect, and configure each one. If information is still needed for an element, you'll see an orange alert status icon on the element. Once all required fields are submitted, the status icon will clear and you will see a quick summary of the element and it's name.
-
At the top left, you will see the “Journey Goal” drop down. Clicking on that gives you the option to set a journey goal using custom criteria to help you manage the purpose of the journey. Learn more about the Goals here.
-
At the top right of screen, you will see an ‘…‘ icon. This can be clicked to export your Journey to PDF, edit the template that you are using, or View Analytics for a Journey that is In Progress or Done. To change the Status, you can click the drop down to the left, to select an available status.
Journeys autosave your changes in real time as you work, and if your browser tab crashes, basic recovery lets you pick up where you left off — no more manually re-saving or losing progress.
The Elements
Source Elements
-
Audience – This element is required for any Journey and is how you specify who should be included in your Omeda Journey.
Channel Elements
These elements include the marketing elements that you’d like your audience to visit within the Journey.
-
Email – This element is where you will provide the details for an Email deployment that is included in your Omeda Journey.

-
SMS - This element is where you will provide the details for an SMS deployment that is included in your Omeda Journey.
-
Personalization – This element is where you will provide the specifications to target your Journey audience with a Personalization popup on your Olytics sites.
-
Metering – This element is where you will provide the specifications to Meter your Journey audience on an Olytics site.
Timing Elements
These elements allow you to specify when events in your Journey should take place. For more information on these elements, see the article here.
-
Schedule – This element is where you will specify when your Journey will begin and end.
-
Wait – This element is where you will specify the amount of time that should elapse before your audience should advance to the next element in your Journey.
-
Stop – This element is how you will specify when an audience member should stop advancing within a branch of your Journey.
Pathing Elements
-
Split – This element will allow you to split your audience into equal sections down one or more branches in your Journey.
-
A/B Test – This element will allow you to test the success of two or more Channel or Marketplace elements based on the most Opens, Clicks or the most audience members who met a criteria.
Modifiers
-
Filter – This element allows users to set up criteria that the Journey passengers can either meet or not meet to continue within the Journey.

-
Fatigue Filter – This element enables users to advance only audience members who are not “fatigued” by too many email sends per the setting in the element.
-
Form Submit – This element can be used to differentiate between audience members who have submitted a form and those who have not, and create subsequent branches.
-
Interaction Submit – This element can be used to differentiate between audience members who have submitted a form and those who have not, and create subsequent branches.
-
Export – This element allows users to export a list of audience members at any point in the Journey (following the Wait element).
-
Pathfinder – The Pathfinder element can be used to make the audience members that have reached the pathfinder available to query in Audience Builder.

Marketplace Elements
-
Meta Ad Manager – This element allows you to send your audience directly into Facebook Ads Manager (or Business Manager) to target directly with ads on Facebook and/or Instagram using custom audiences.
-
Meta Event Manager – This element works with the Facebook Pixel and syncs known/unknown audiences from your Journey to Facebook for targeted advertisement.
-
CRM Audience (AdRoll) – This element allows you to target your known audience across additional extension networks through your own AdRoll account.
-
Event Based Audience (AdRoll) – This element works with your Olytics sites and AdRoll Pixel to sync both known and anonymous Journeyrs that visit your site to AdRoll.
-
Google Ads Manager – This element allows you to target your audience with display ads through Google Ad Manager (previously DFP).

Journey Goal
-
Goal – This element allows you to set a Goal for your Journey to track your success and suppress audience members who have met the Goal from receiving additional marketing efforts.
Version History & Restoring Previous Versions
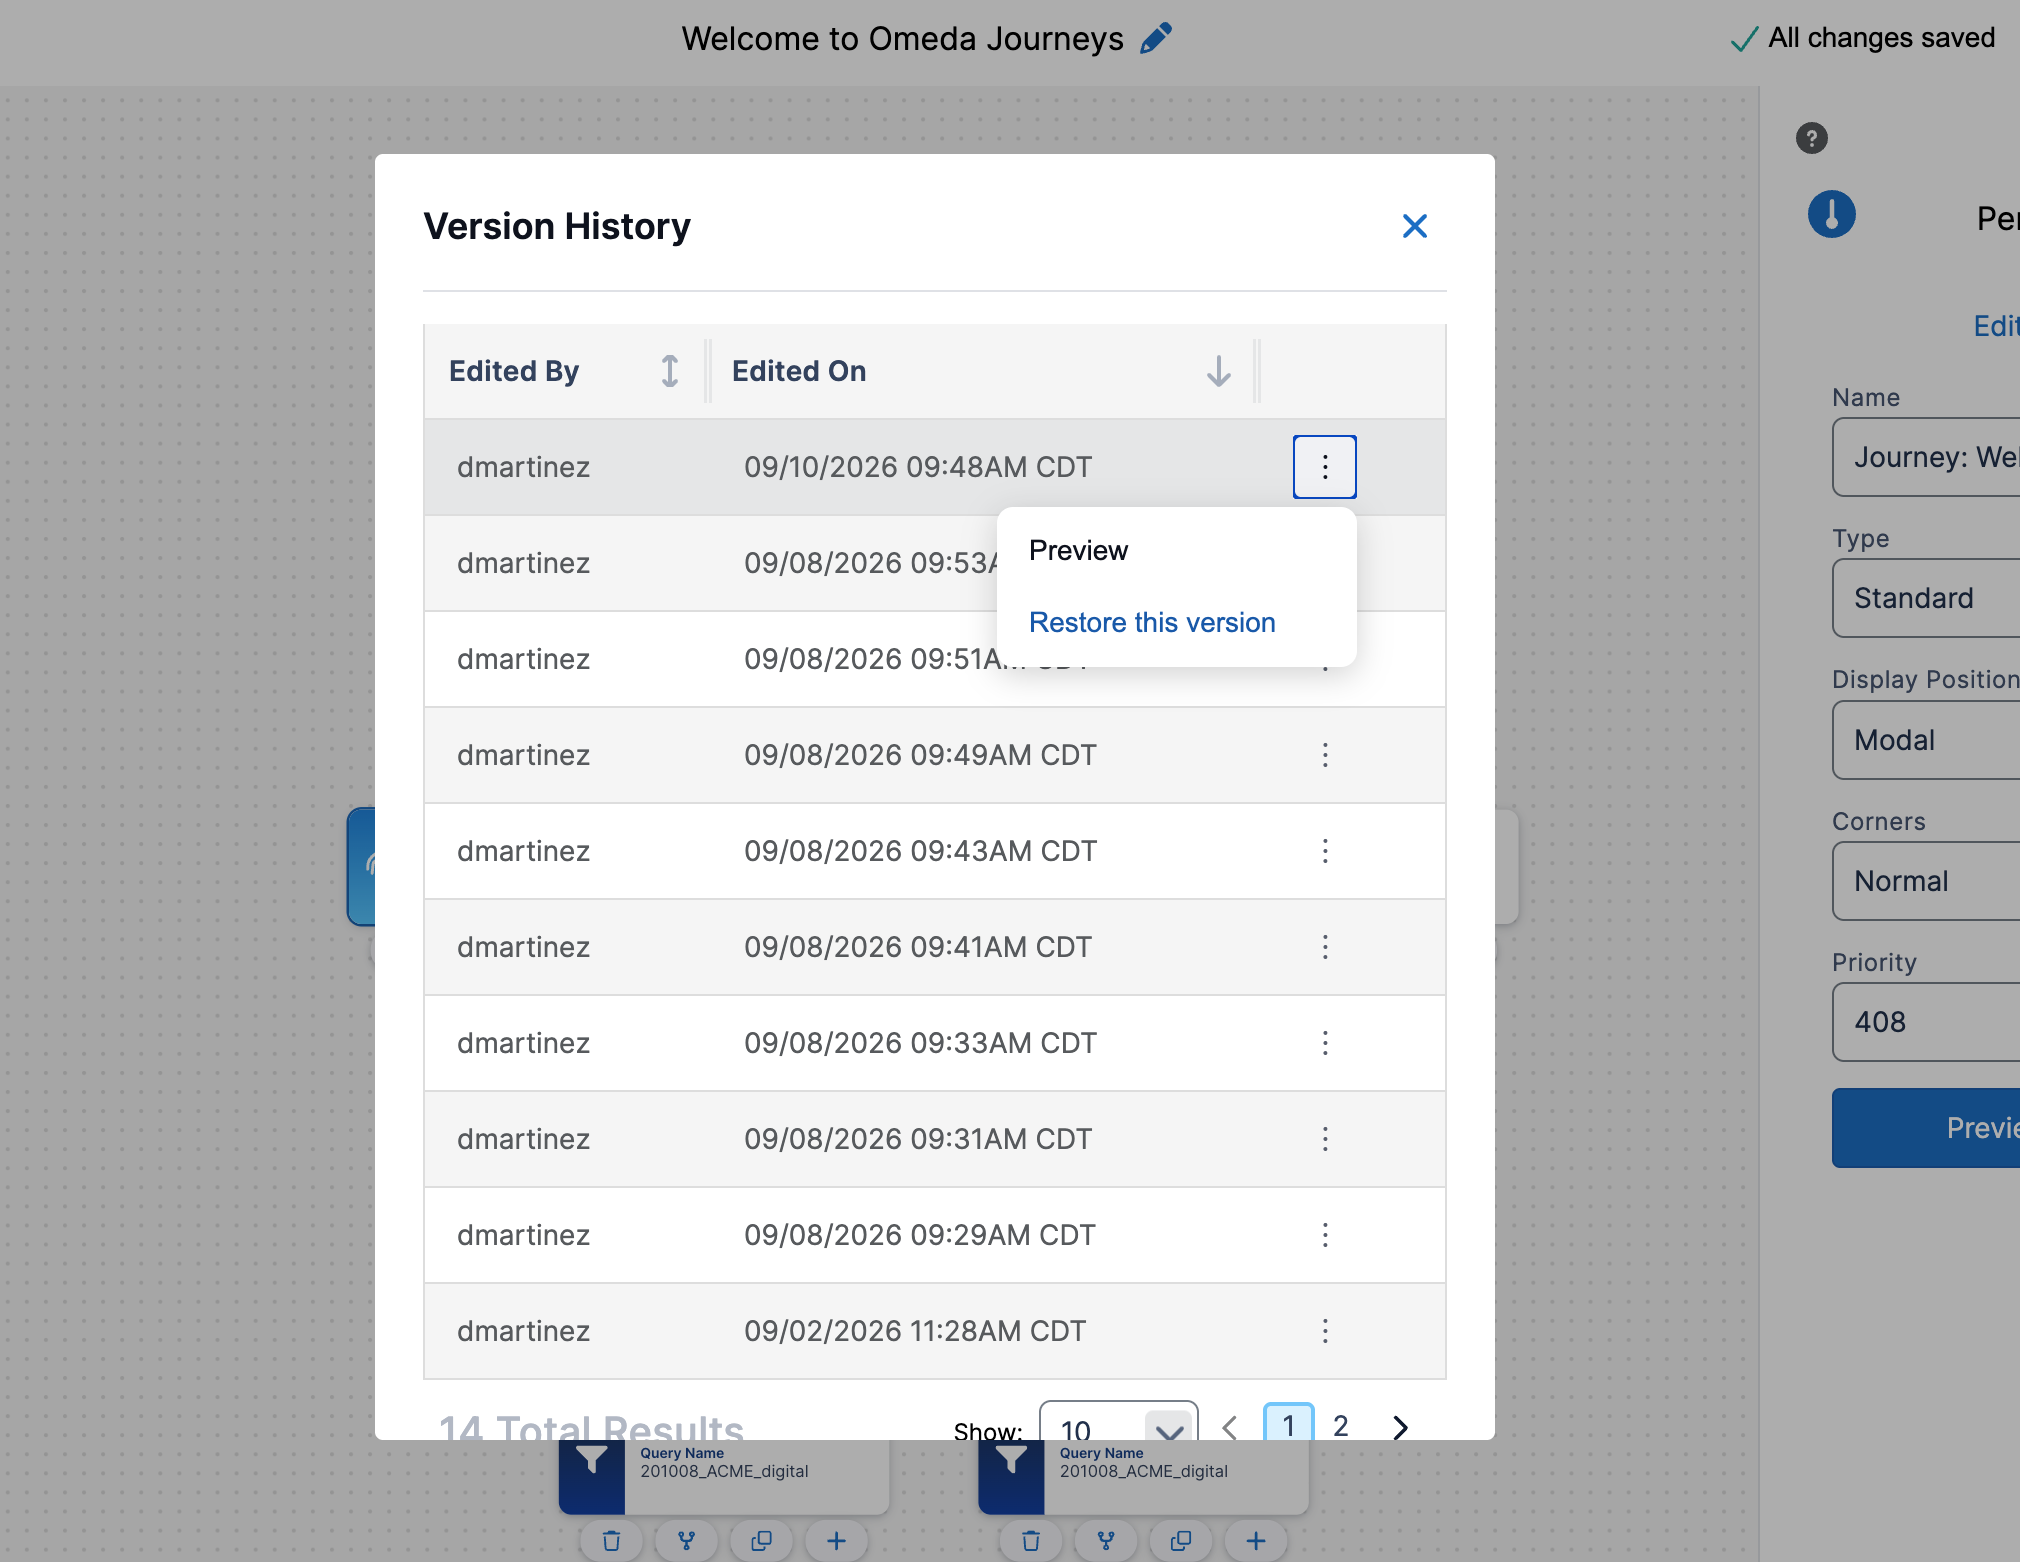
With built in autosaving, Omeda Journeys now gives you the ability to restore a Journey to a previous state using Version History. Clicking on the “All changes saved” indicator on the top right, or clicking on the “⋯” menu and selecting “Version History” will display the Version History modal. Similar to modification history, you will see time stamps of changes as well as the user who made the changes. Versions are stored at 2 minute intervals if changes on the canvas are detected. From here, you can click on any snapshot “⋯” menu to Preview, or Restore immediately.
The preview modal will then render the canvas as it was saved for that snapshot to make it easier to see what changes were made prior to restoring.
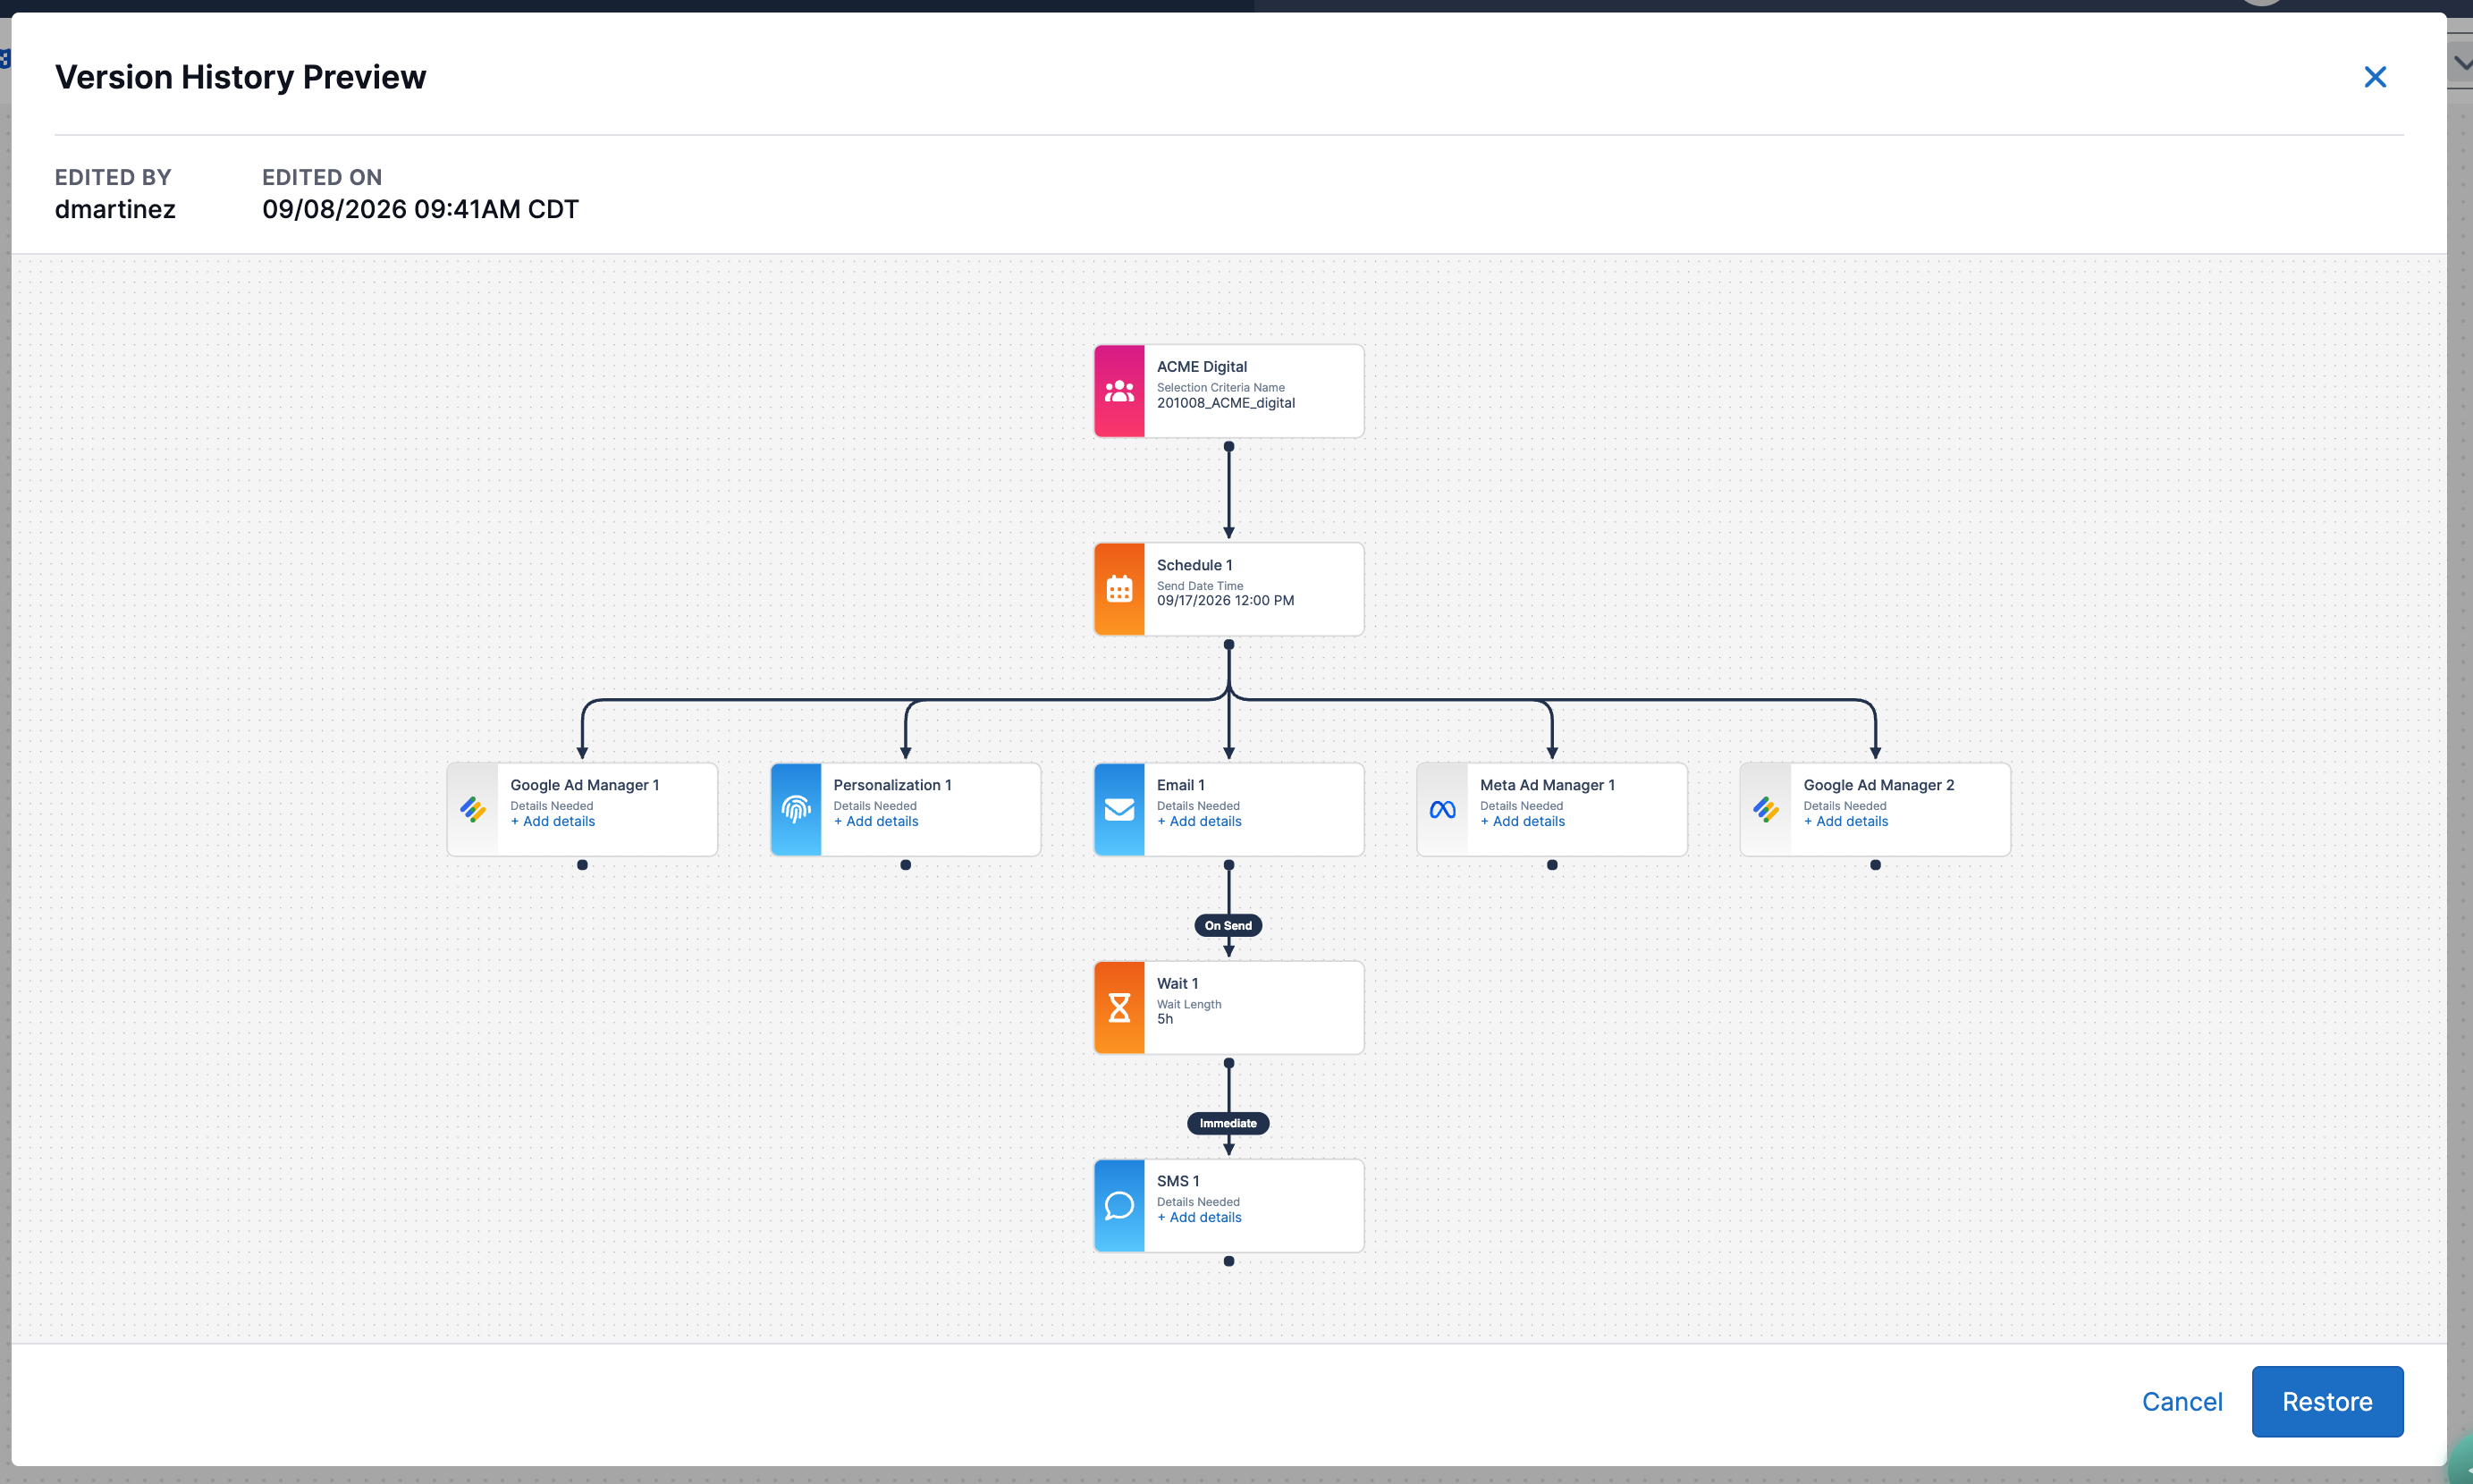
This added flexibility allows you to undo changes quickly without having to manually add & delete elements individually.
Journey versions restores canvas details such as the elements on the canvas, element names, and some details such as wait times, schedule times, & conditions. Content within elements such as Email, SMS, Meters, & Personalizations retain the most recent data regardless of the restore point.
Saving and Scheduling Journeys
Omeda Journeys autosaves your work in real time by default, so there's no autosave setting to configure and nothing to remember to save.
Saving your journey for the first time changes its status from “New” to “Created.” Once each element's required fields are complete, you can move the status to Published.
Once your journey is Published, you can continue editing it and test any Email elements by clicking the element and selecting Send Test; a test deployment will go to your testers. For more information on testing the Email element, see the article here.
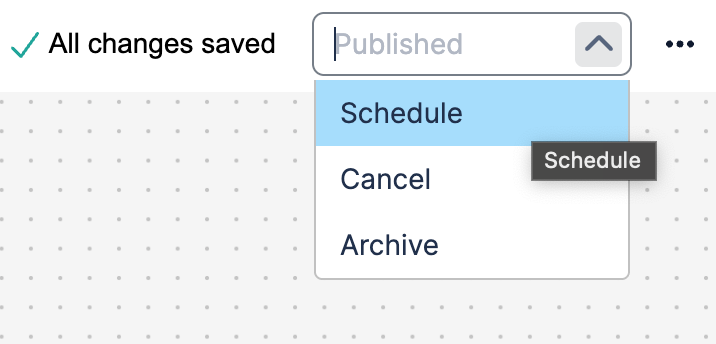
When you're ready to schedule, select the dropdown next to the journey's status and choose Schedule. You'll see a confirmation that your request has been queued and receive an email once the journey is successfully scheduled — be sure to confirm the date and time. Your journey will then move to In Progress at the scheduled time. If you need to make changes, open the journey, select the status dropdown, and choose Unschedule.
Upgrading Classic Journeys
Journeys in a Published status created in the classic canvas will be available to upgrade to the new experience.
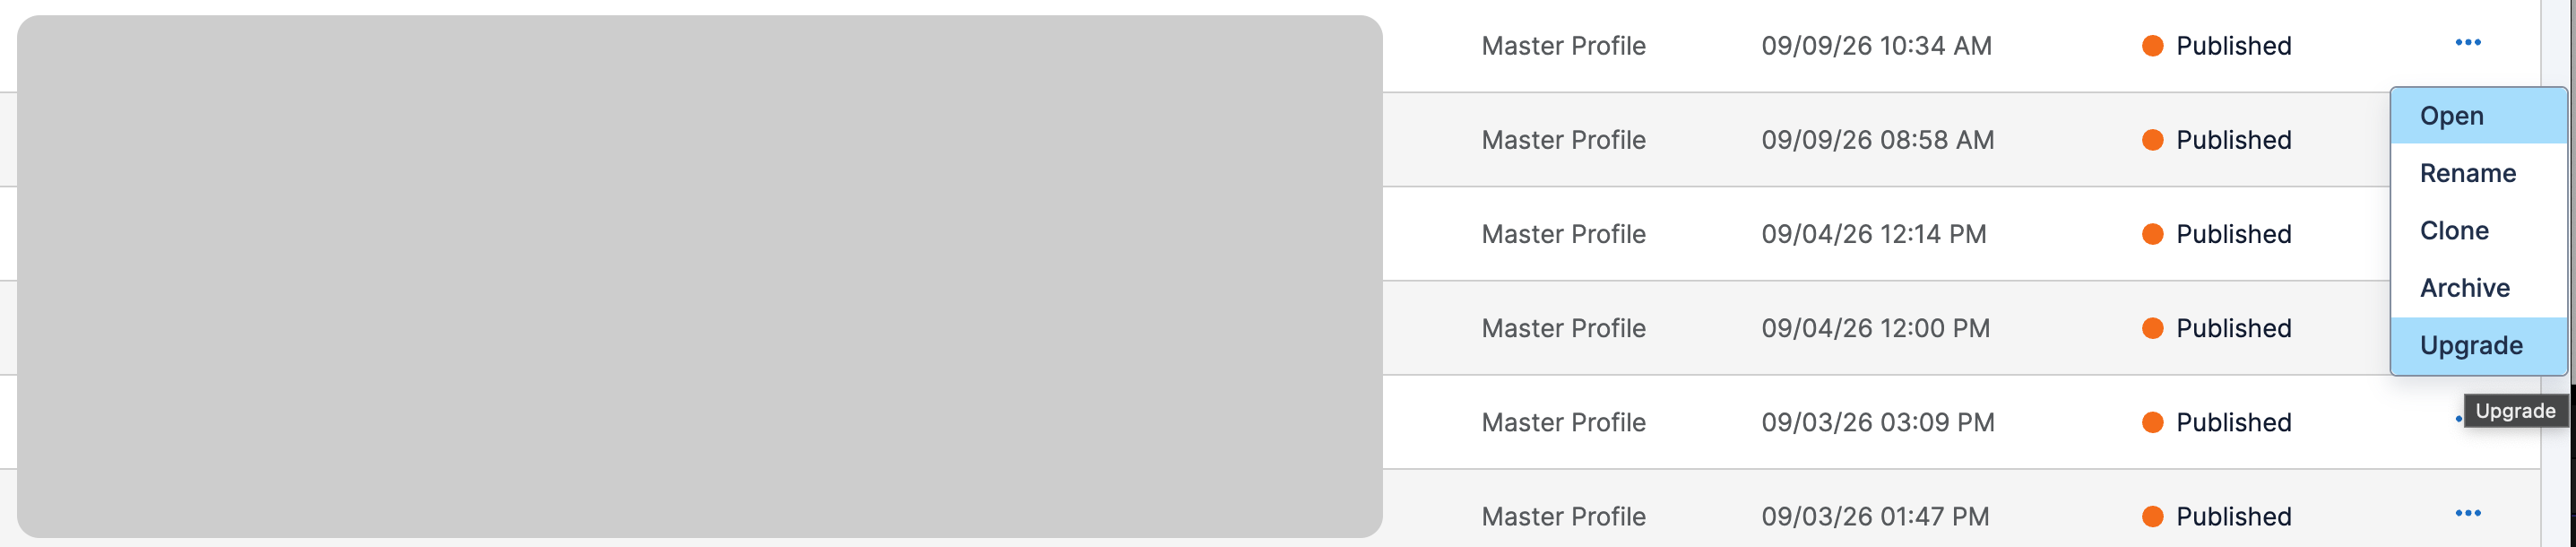
In the Actions ellipses menu on the Journeys dashboard, click on the “Upgrade” option to convert a classic Journey to the new Journey experience.
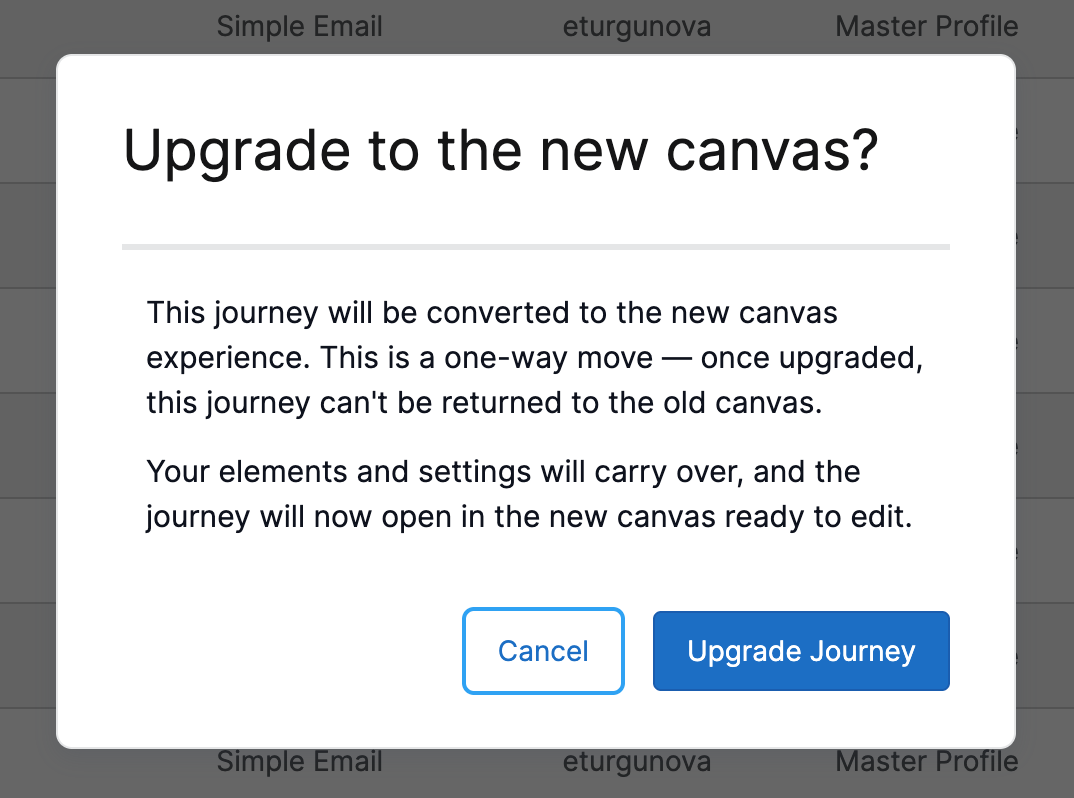
This is a one way move, and Journeys upgraded will not be able to be reverted back to the classic canvas.
Additional Resources
-
Watch the overview video.
-
Review our Journeys Frequently Asked Questions.
-
Learn how to access reports for Journeys.
-
Learn how to make changes to an In Progress Journey.
-
Learn how to query your Journey data.
-
Learn how to create custom Journey templates.
-
Learn more about the Email Designer.
-
Leverage these templates to create Email content with the Designer.
-
Learn how to use our Merging Paths functionality to simplify your Journeys.
-
Learn how to create and use Merge Variables within your emails.
Table of Contents